Creating a SalesForce Source
For creating a SalesForce source, see Creating a Source. Ensure that the Source Type selected is SalesForce.
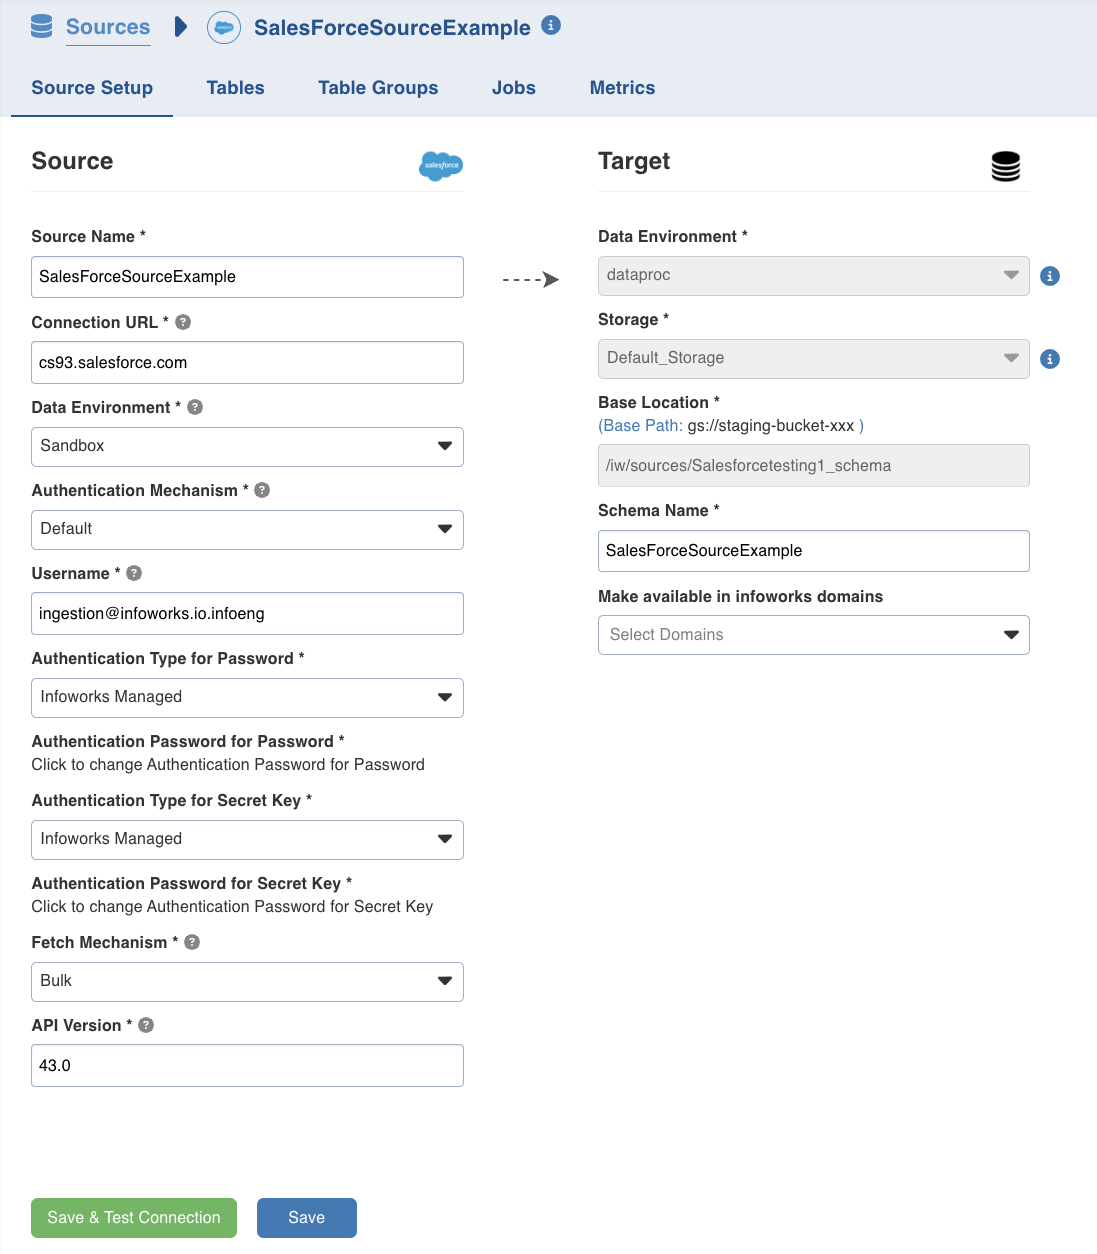
Setting a SalesForce Source
For setting a SalesForce source, see Setting Up a Source.
SalesForce Configurations
Field | Description |
|---|---|
Environment | The Salesforce environment Production or Sandbox. |
Connection URL | The connection URL through which Infoworks connects to the Salesforce instance. |
Username | Salesforce login user name. |
Authentication Type for Password | Select the authentication type from the dropdown. For example, Infoworks Managed or External Secret Store. If you select Infoworks Managed, then provide Authentication Password for Password. If you select External Secret Store, then select the Secret which contains the password. |
Authentication Type for Secret Key | Salesforce connected application secret key. If you select Infoworks Managed from the Authentication Type for Secret Key dropdown, then provide Authentication Password for Secret Key. If you select External Secret Store, select the secret from the Secret for Secret Key dropdown. |
Fetch Mechanism | The fetch mechanisms include Bulk, REST and Both. For details, see SalesForce Fetch Mechanism. |
API Version | Salesforce API version. |
You may choose to click the Save and Test Connection button to save the settings and ensure that Infoworks is able to connect to the source system.
Click Next to proceed to the next step.
SalesForce Fetch Mechanism
Infoworks supports the following methods to crawl data from Salesforce:
Ingestion via Salesforce REST API
Ingestion via Salesforce Bulk API
REST API
Infoworks supports data ingestion via Salesforce REST API. The Salesforce REST API provides data in a paginated manner, where one API response provides the URL of the next API call. Ingestion via REST API is slower compared to bulk API but also provides features like Salesforce Custom Fields and Column Addition. This is the recommended method to crawl data via Infoworks.
Bulk API
Ingestion via Bulk API is faster and must be used in cases where data volumes are high. SalesForce Bulk API provides options to dump data into CSV for faster ingestion. Bulk API also allows data crawled to be parallelised using option like PK chunking. However, Ingestion via bulk API does NOT support the Custom fields and Column Addition features.
Select Tables
You can browse the entire source by clicking on browse source button to select the tables to be onboarded as per requirement, from a list of all the tables on that source.
Alternatively, you can use the filter tables to browse option to only fetch the table you want by specifying the table name filter. You can add more tables later on if required.
Once you see the fetched tables list, follow the below mentioned steps to add the required tables to the source :
Click on the Preview button to preview the schema and sample data for any table in the tables list.
Select the source tables you want to add to the source to onboard the data and click on Add selected tables button at the bottom.
Specify the respective Target fields that depend on the data environment the source is using.
Edit the auto filled fields if required.
Click Next to start the metadata crawl.
Configuring a SalesForce Table
For configuring SalesForce tables, see Configuring a Table.
Ingesting SalesForce Data
For ingesting SalesForce source data, see Onboarding Data.
Ingest Configurations
Field | Description |
|---|---|
Ingest Type | The type of synchronization for the table. The options include full refresh and incremental. |
Update Strategy | This field is displayed for only incremental ingestion. The options include append, merge and insert overwrite. |
Natural Keys | The combination of keys to uniquely identify the row. This field is mandatory in incremental ingestion tables. It helps in identifying and merging incremental data with the already existing data on target. |
Watermark Column | Select single/multiple watermark columns to identify the incremental records. The selected watermark column(s) should be of the same datatype. |
Storage Format | The format in which the tables much be stored. The options include: Read Optimized (Delta), Write Optimized (Avro), and Delimited text files. |
Target Table Name | Name of the target table. |
Partition Column | The column used to partition the data in target. |
Fetch Mechanism | The fetch mechanisms include Bulk and REST . |
Enable PK Chunking | The option to enable PK chunking for the table. If enabled, SalesForce splits data based on the primary key and data will be fetched in parallel. |
Generate History View | The option specifies whether to preserve data in the history table. After each CDC, the data will be appended to the history table. |
Adding a column to the table
After metadata crawl is complete, you have the flexibility to add a target column to the table.
Target Column refers to adding a target column if you need any special columns in the target table apart from what is present in that source.
You can select the datatype you want to give for the specific column
You can select either of the following transformation modes: Simple and Advanced
Simple Mode
In this mode, you must add a transformation function that has to be applied for that column. Target Column with no transformation function applied will have null values in the target.
Advanced Mode
In this mode, you can provide the Spark expression in this field. For more information, refer to Adding Transform Derivation.
NOTE When table is in ready state (already ingested), schema editing is disabled.
Error Tables
During data crawl, the data that cannot be crawled will be stored in an error table, <tablename>_error.
Known Issue
By default, the Sample Data section displays the datatype as String for every column.