Prerequisites
You must install TPT on the master node of the interactive cluster, along with the cloud specific access module using the TPT installer. For more information on TPT installation steps, refer to Teradata Tools and Utilities Installation.
Ensure that you manually download the Teradata JDBC driver from the Teradata portal.
Extract the compressed file (.zip or .tar) and copy the drivers namely, tdgssconfig.jar, terajdbc4.jar from the extracted file.
Create lib/dist-jobs directory under the $IW_HOME/lib/ingestion/connectors/teradata folder, so that the directory structure becomes $IW_ HOME/lib/ingestion/connectors/teradata/lib/dist-jobs, and place the downloaded drivers inside it.
To upload driver jars for Kubernetes-based Installation:
Step 1: Create a structured directory in your local or VM bastion.
mkdir -p lib/ingestion/connectors/<connector_name>/<path>/<jars>
NOTE Replace the connector_name with the respective connectors, path and keep the jars in the source directory.
Step 2: Get the list of the pods and select the ingestion pod.
kubectl get pods -n <namespace>
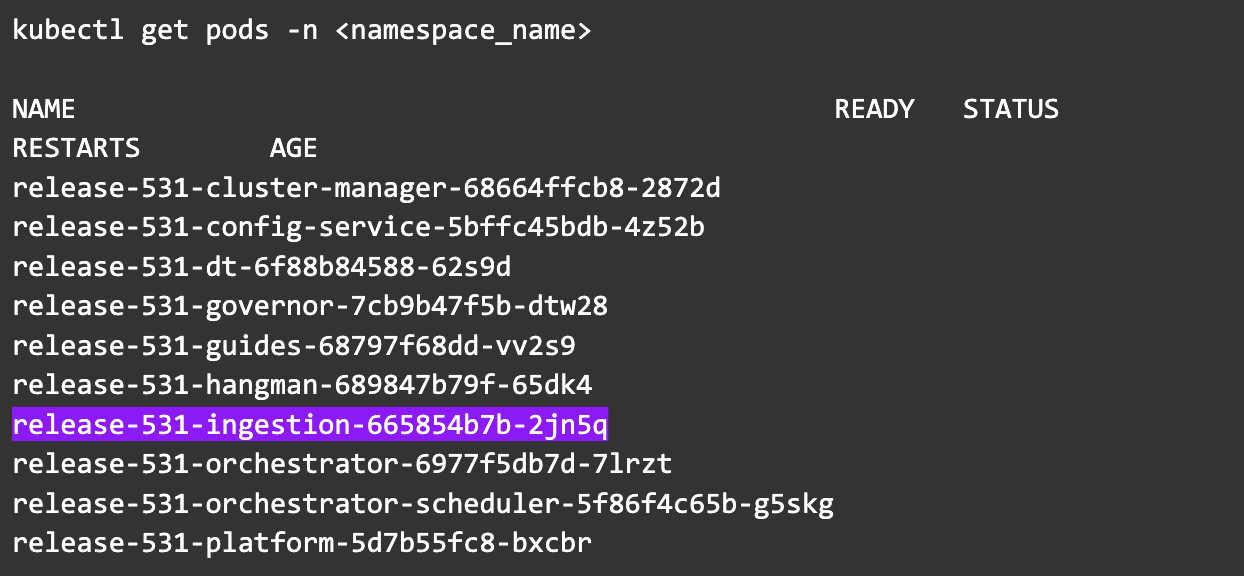
Step 3: Copy the jars to the ingestion pod.
kubectl cp lib
release-531-ingestion-665854b7b-2jn5q:/opt/infoworks/uploads/ -c ingestion -n <namespace_name>
Step 4: Delete the ingestion pod.
kubectl delete pods release-531-ingestion-665854b7b-2jn5q -n <namespace_name>
Step 5: Wait for the pod's state to change to the running state your changes are in.
Configuring a Teradata Source
For onboarding data from a Teradata source, see Onboarding a RDBMS Source. Ensure that the Source Type selected is Teradata.
Teradata Configurations
Field | Description |
|---|---|
Fetch Data Using | The mechanism through which Infoworks fetches data from the database. |
Connection URL | The connection URL through which Infoworks connects to the database. The URL must be in the following format: |
Username | The username for the connection to the database. |
Authentication Type for Password | Select the authentication type from the dropdown. For example, Infoworks Managed or External Secret Store. If you select Infoworks Managed, then provide Authentication Password for Password. If you select External Secret Store, then select the Secret which contains the password. NOTE Only the secrets accessible to the user will be available in the drop-down list. |
Source Schema | The schema in the database to be crawled. The schema value is case sensitive. |
Enable Ingestion via Teradata Parallel Transporter (TPT) | Check the box to enable ingestion via TPT. For more details, see Onboarding Data from Teradata TPT. This option cannot be disabled, if any of the tables is configured for TPT(or TPT without IW Processing ). In order to disable this option, you will need to change the "Ingest Using" field setting to JDBC. |
Custom Tags | This dropdown provides the list of tags which you can choose. It can be used to identify/segregate the source based on the selected tags. |
Once the settings are saved, you can test the connection.
Configuring a Teradata Table
With the source metadata in the catalog, you can now configure the table for CDC and incremental synchronization.
Click the Configuration link, for the desired table
Provide the ingestion configuration details.
Field | Description |
|---|---|
Query | The custom query based on which the table has been created. NOTE This field is only visible if the table is ingested using Add Query as Table. |
Ingest Type | The type of synchronization for the table. The options include full refresh and incremental. |
Natural Keys | The combination of keys to uniquely identify the row. This field is mandatory in incremental ingestion tables. It helps in identifying and merging incremental data with the already existing data on target. NOTE At least one of the columns in the natural key must have a non-null value for Infoworks merge to work. |
Incremental Mode | The option to indicate if the incremental data must be appended or merged to the base table. This field is displayed only for incremental ingestion. The options include append, merge and insert overwrite. |
Watermark Column | Select single/multiple watermark columns to identify the incremental records. The selected watermark column(s) should be of the same datatype. |
Enable Watermark Offset | For Timestamp and Date watermark columns, this option enables an additional offset (decrement) to the starting point for ingested data. Records created or modified within the offset time period are included in the next incremental ingestion job. NOTE Timestamp watermark column has three options: Days, Hours and Minutes, and the Date watermark column has Days option. In both the cases, the options will be decremented from the starting point. |
Use JDBC for This Table | The option to ingest data from Teradata via JDBC driver, if the table cannot be crawled by TPT, for any reason. This option is available for Teradata TPT ingestion. |
Ingest subset of data | The option to configure filter conditions to ingest a subset of data. This option is available for all the RDBMS and Generic JDBC sources. For more details, see Filter Query for RDBMS Sources |
Sorting Columns | Select columns on which the target table will be sorted. NOTE This feature is only available for Snowflake environments. |
Target Configuration
Configure the following fields:
Field | Description |
|---|---|
Target Table Name | The name of the target table. |
Database Name | The name of the target database. |
Catalog Name | The name of the target catalog. NOTE This field will be available only to the Unity Catalog enabled data environments. |
Staging Catalog Name | The staging catalog name for temp tables. |
Staging Schema Name | The staging schema name for temp tables. NOTE Applicable only for Unity Catalog enabled environments on Azure Databricks |
Schema Name | The schema name of the target table. |
Merged Table Name | The name of the merged table. This table is created only in case of Merge mode. This table has the de-duplicated data. |
Table Name | The name of the target table maintained in Infoworks UI. |
Storage Format | The format in which the tables must be stored. The options include Read Optimized (Parquet), Read Optimized (ORC), Write Optimized (Avro), Universal Format (UniForm) and Delimited text files. NOTE Selecting the storage format is not supported in Snowflake environments. NOTE UniForm is available only to the Unity Catalog enabled data environments. |
Partition Column | The column used to partition the data in target. Selecting the Create Derived Column option allows you to derive a column and then use that as the partition column. This option is enabled only if the partition column datatype is date or timestamp. Provide the Derived Column Function and Derived Column Name. Data will be partitioned based on this derived column. |
Optimization Configuration
Configure the following fields:
Field | Description |
|---|---|
Split By Column | The column used to crawl the table in parallel with multiple connections to database. Split-by column can be an existing column in the data. Any column for which minimum and maximum values can be computed, can be a split-by key. Select the Create Derived Split Column option and provide the Derived Split Column Function to derive a column from the Split By column. This option is enabled only if the Split By column datatype is date or timestamp. The data will be split based on the derived value. |
Derived Split Column Function | Select the Create Derived Split Column option and provide the Derived Split Column Function to derive from the Split By column. This option is enabled only if the Split By column data type is integer or timestamp. The data will be split based on the derived value. mod: For every float, integer, or long value, the mod function is performed on the number of connections that are available on the database and based on the mod value the corresponding database is updated. The mod function is first applied to the column and after getting the output the split gets applied and the data is evenly distributed. The mod function is applied on each row level and all the connections run parallelly until the end of the job. hashamp_hashbucket_hashrow: This function divides the data to the maximum number of amps available in the Teradata. You can apply this function on the columns such as natural key, primary key, and so on. The data is first distributed among the amps and Teradata computes much faster while applying this function. Using hashamp, you can save the time of computing the mod. Limitation: The hashamp value is restricted to only five amps even though there are several connections running on Teradata. |
Generate History View | Select this option to preserve data in the History table. After each CDC, the data will be appended to the history table. |
Advanced Configurations
Following are the steps to set advanced configuration for a table:
Click the Data Catalog menu and click Ingest for the required source.
NOTE For already ingested table, click View Source, click the Tables tab, click Configure for the required table and click the Advanced Configuration tab.
Click the Configure Tables tab, click the Advanced Configuration tab and click Add Configuration.
Enter key, value, and description. You can also select the configuration from the list displayed.
Sync Data to Target
Using this option, you can configure the Target connections and sync data as described in the section Synchronizing Data to External Target
The following are the steps to sync data to target.
From the Data Sources menu, select one of the tables and click View Source/Ingest button.
Select the source table to be synchronized to Target.
Click the Sync Data to Target button.
Enter the mandatory fields as listed in the table below:
Field | Description |
|---|---|
Job Name | The name of the ingestion job. |
Max Parallel Tables | The maximum number of tables that can be crawled at a given instance. |
Compute Cluster | The template based on which the cluster will spin up for each table.The compute clusters created by admin and are accessible by the user are listed in the drop down. |
Overwrite Worker Count | The option to override the maximum and minimum number of worker node values as configured in the compute template |
Number of Worker Nodes | The number of worker nodes that will spin up in the cluster. |
Save as a Table Group | The option to save the list of tables as a table group. |
Click Onboarding a RDBMS Source to navigate back to complete the onboarding process.