Configuring Infoworks with Azure Databricks
Prerequisites
Ensure that the following prerequisites are set before configuring Infoworks:
- A Databricks token must be generated. For more details, see Generate a Token.
- You must have a valid user access token with privileges to create clusters.
- The Databricks workspace must be created using VNet injection, to use an existing Databricks workspace.
- User should ensure the init-scripts workspace folder to have can manage permissions.
Procedure
To configure and connect to the required Azure Databricks instance, navigate to Admin > Manage Data Environments, and then click Add button under the Azure Databricks option.
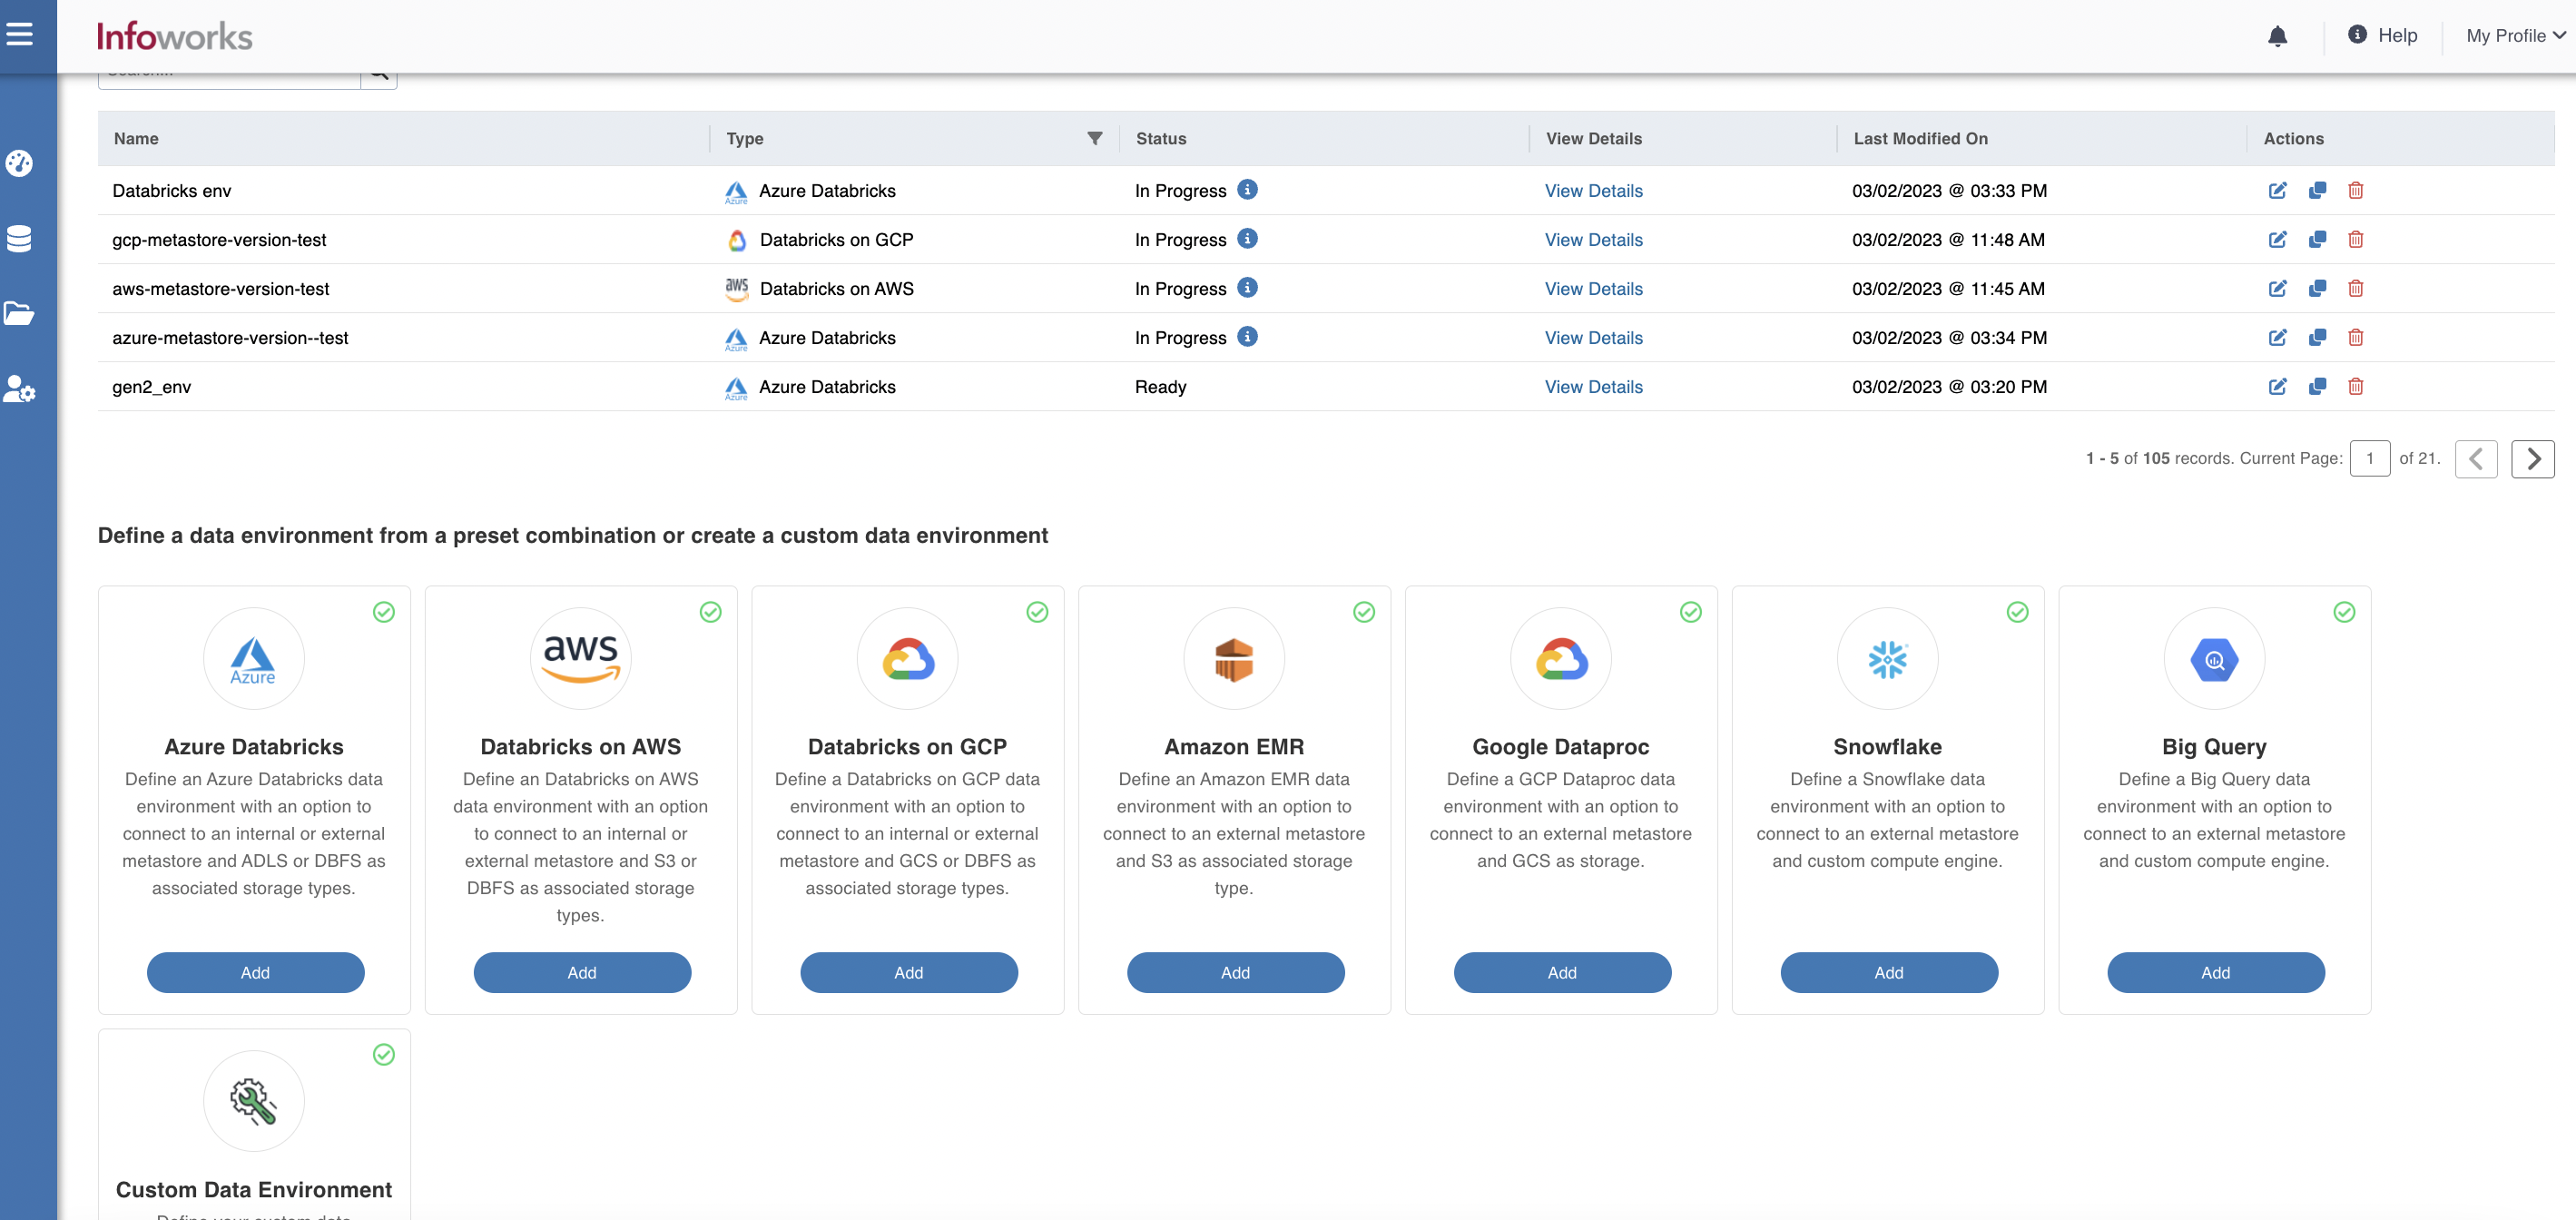
The following window appears.
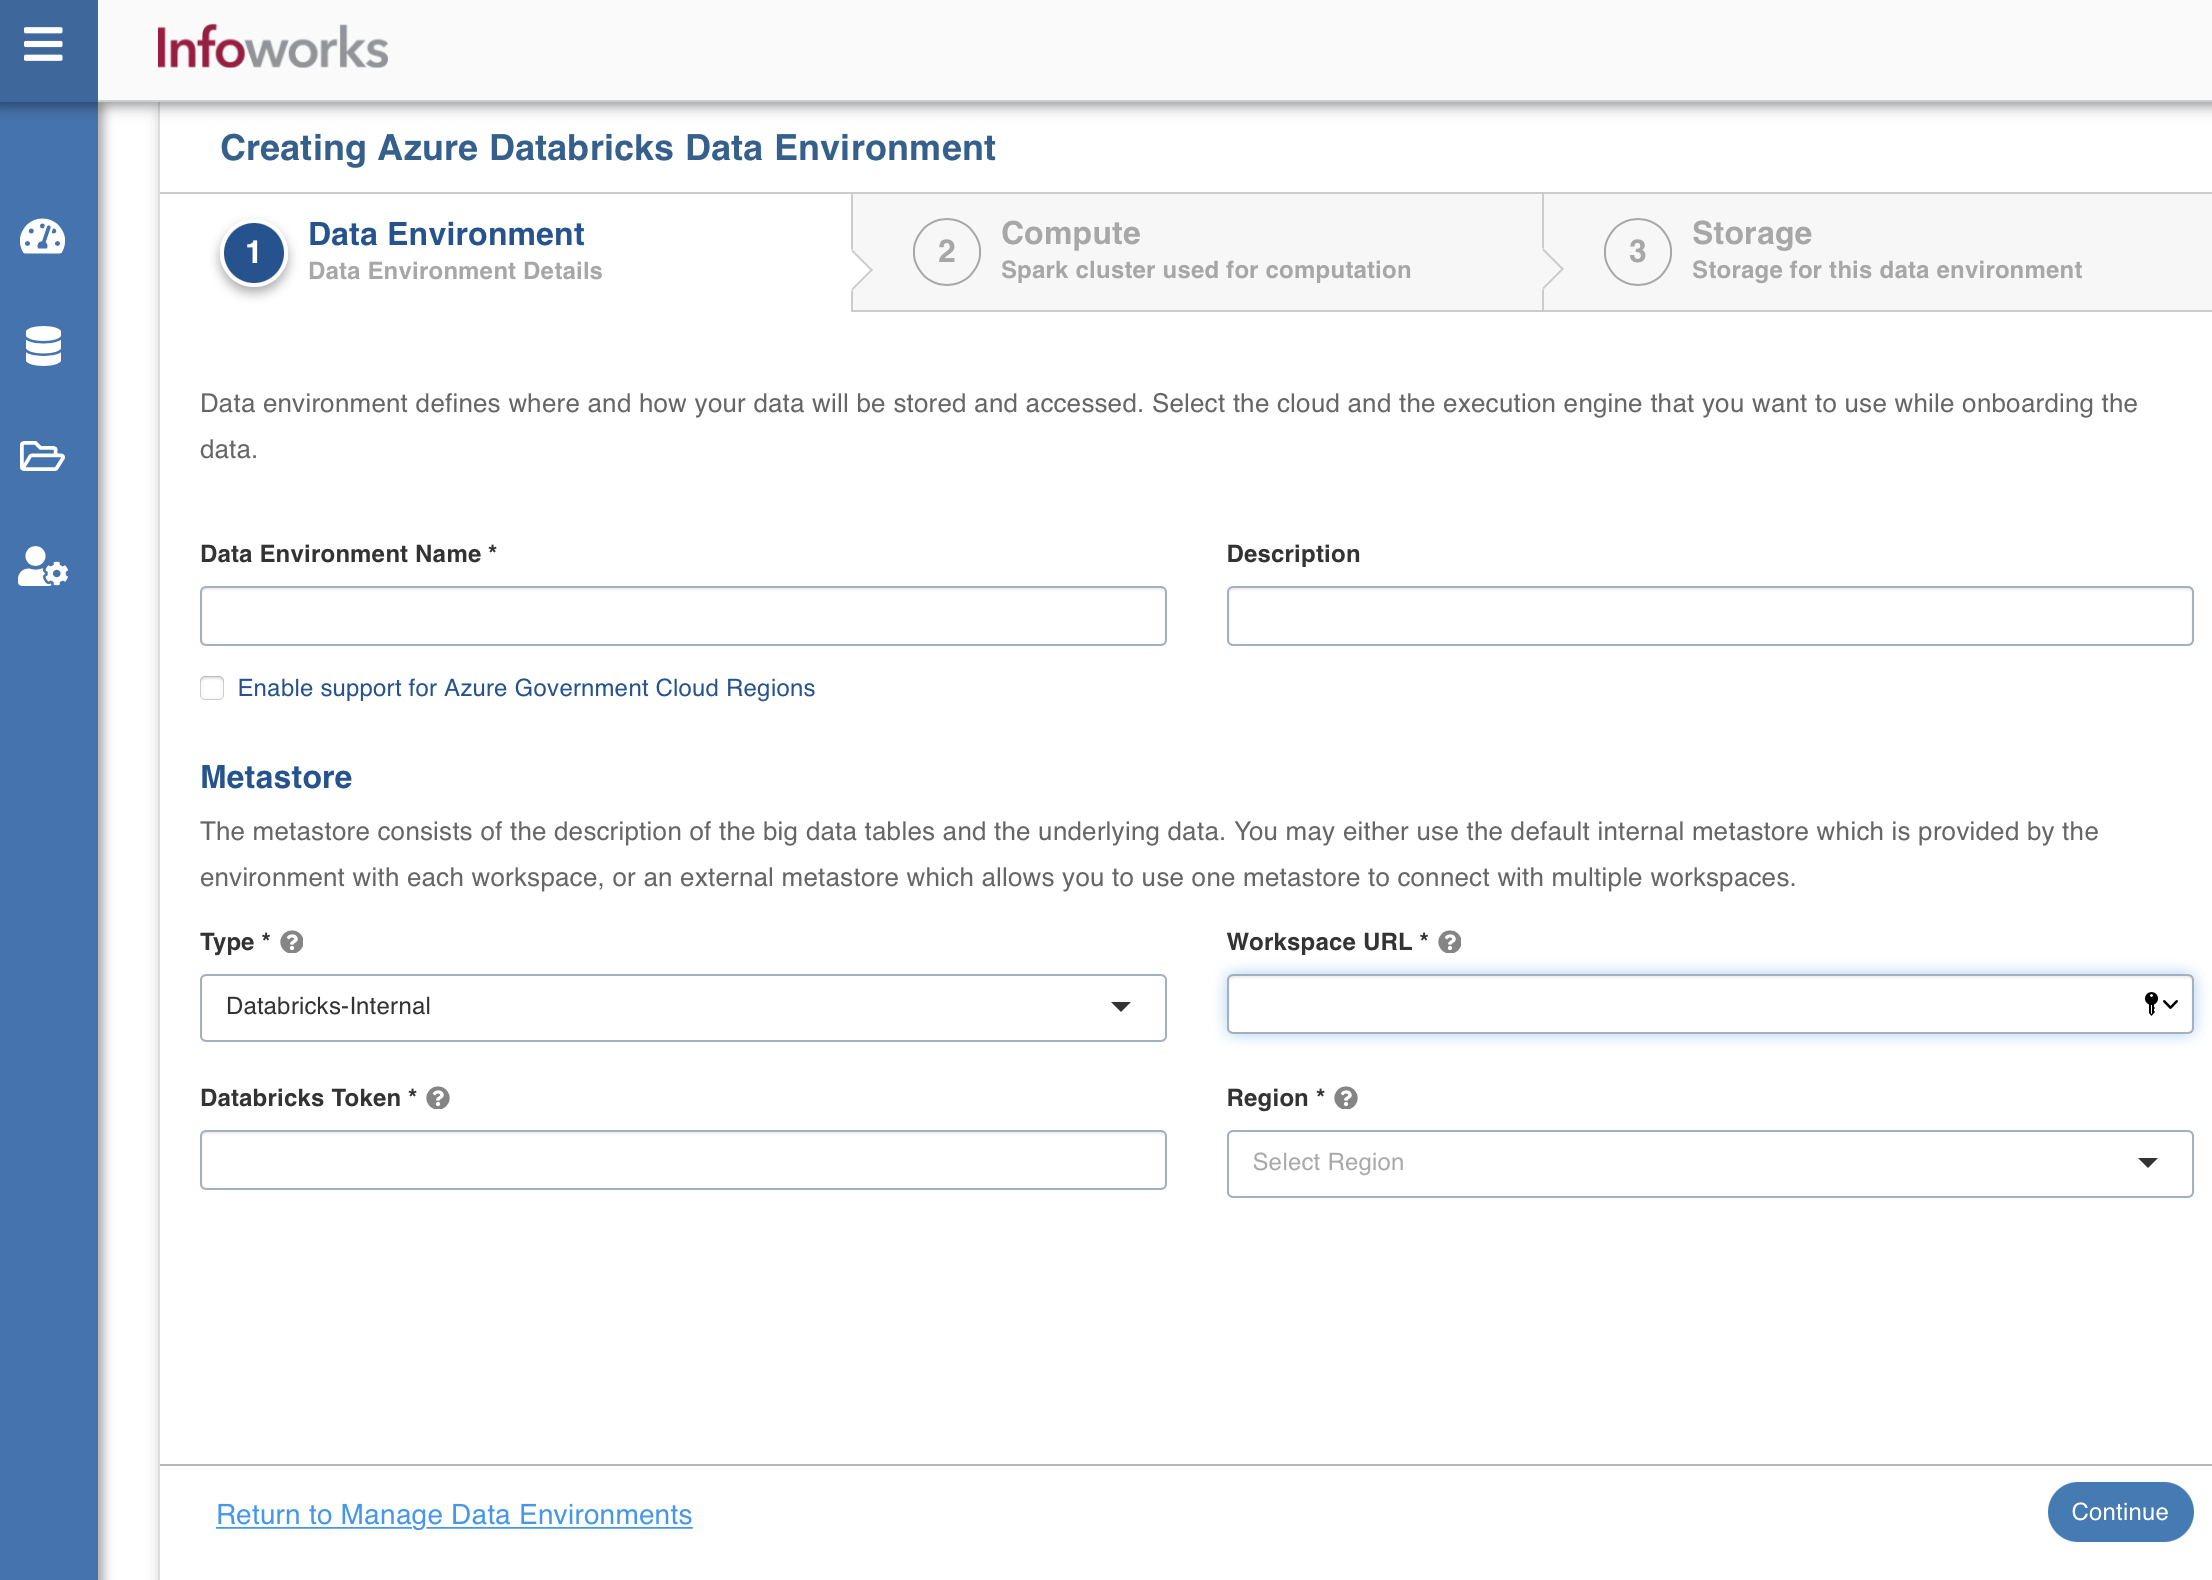
There are three tabs to be configured as follows:
Data Environment
To configure the environment details, enter values in the following fields. This defines the environmental parameters, to allow Infoworks to be configured to the required Azure Databricks instance:
| Field | Description | Details |
|---|---|---|
| Environment Name | Environment defines where and how your data will be stored and accessed. Environment name must help the user to identify the environment being configured. | User-defined. Provide a meaningful name for the environment being configured. |
| Description | Description for the environment being configured. | User-defined. Provide required description for the environment being configured. |
| Enable Support for Azure Government Cloud Regions | Select this check box to configure the environment in Azure Government Cloud regions. | You can select this check box while configuring the environment details for the first time. This option is not editable for the environment that is already configured. |
| Section: Metastore | Metastore consists of the description of the big data tables and the underlying data. The user may either use the default internal metastore which is provided by Databricks with each workspace, or an external metastore which allows you to use one metastore to connect with multiple workspaces. | Provide the required values for the following four fields listed in the rows below, corresponding to the metastore being configured.
|
| Type | Type of the metastore.<br>The valid values are Databricks-Internal and Databricks-External. <br>Default value is Databricks Internal. | Select the required value for the metastore type, from the available valid values. |
| Workspace URL | URL of the workspace that Infoworks must be attached to. | Provide the required workspace URL. For example: https://adb-xxxxx474xx93xxxxxx.x.azuredatabricks.net |
| Authentication Type for Databricks Token | This field indicates the type of Databricks token Input. For example: Infoworks-Managed, Service Authentication, or External Secret Store. | Infoworks-Managed: This field indicates that Infoworks stores the token in its database. Service Authentication: This field indicates that Service Principal or Managed Identity will be used to authenticate to Databricks without a user token. External Secret Store: This field indicates that Databricks token will be retrieved from External Secret Store/Keyvault as per the requirement. |
| Authentication Password for Databricks Token | Access token of the user who uses Infoworks. The user must have permission to create clusters. | Provide the required Databricks token. |
| Service Authentication for Databricks Token | Select the Service Authentication which can be used to provision Databricks computes. | |
| Secrets for Databricks Token | Select the secret which contains databricks token as a value in external secret store. | |
| Region | Geographical location where you can host your resources. | Provide the required region. For example: East US. If the check box for "Enable Support for Azure Government Cloud Regions" is selected, then the following US regions are visible in the Region drop-down list. US GOV Virginia, US GOV Iowa, US GOV Arizona, US GOV Texas, US DOD East, and US DOD Central. |
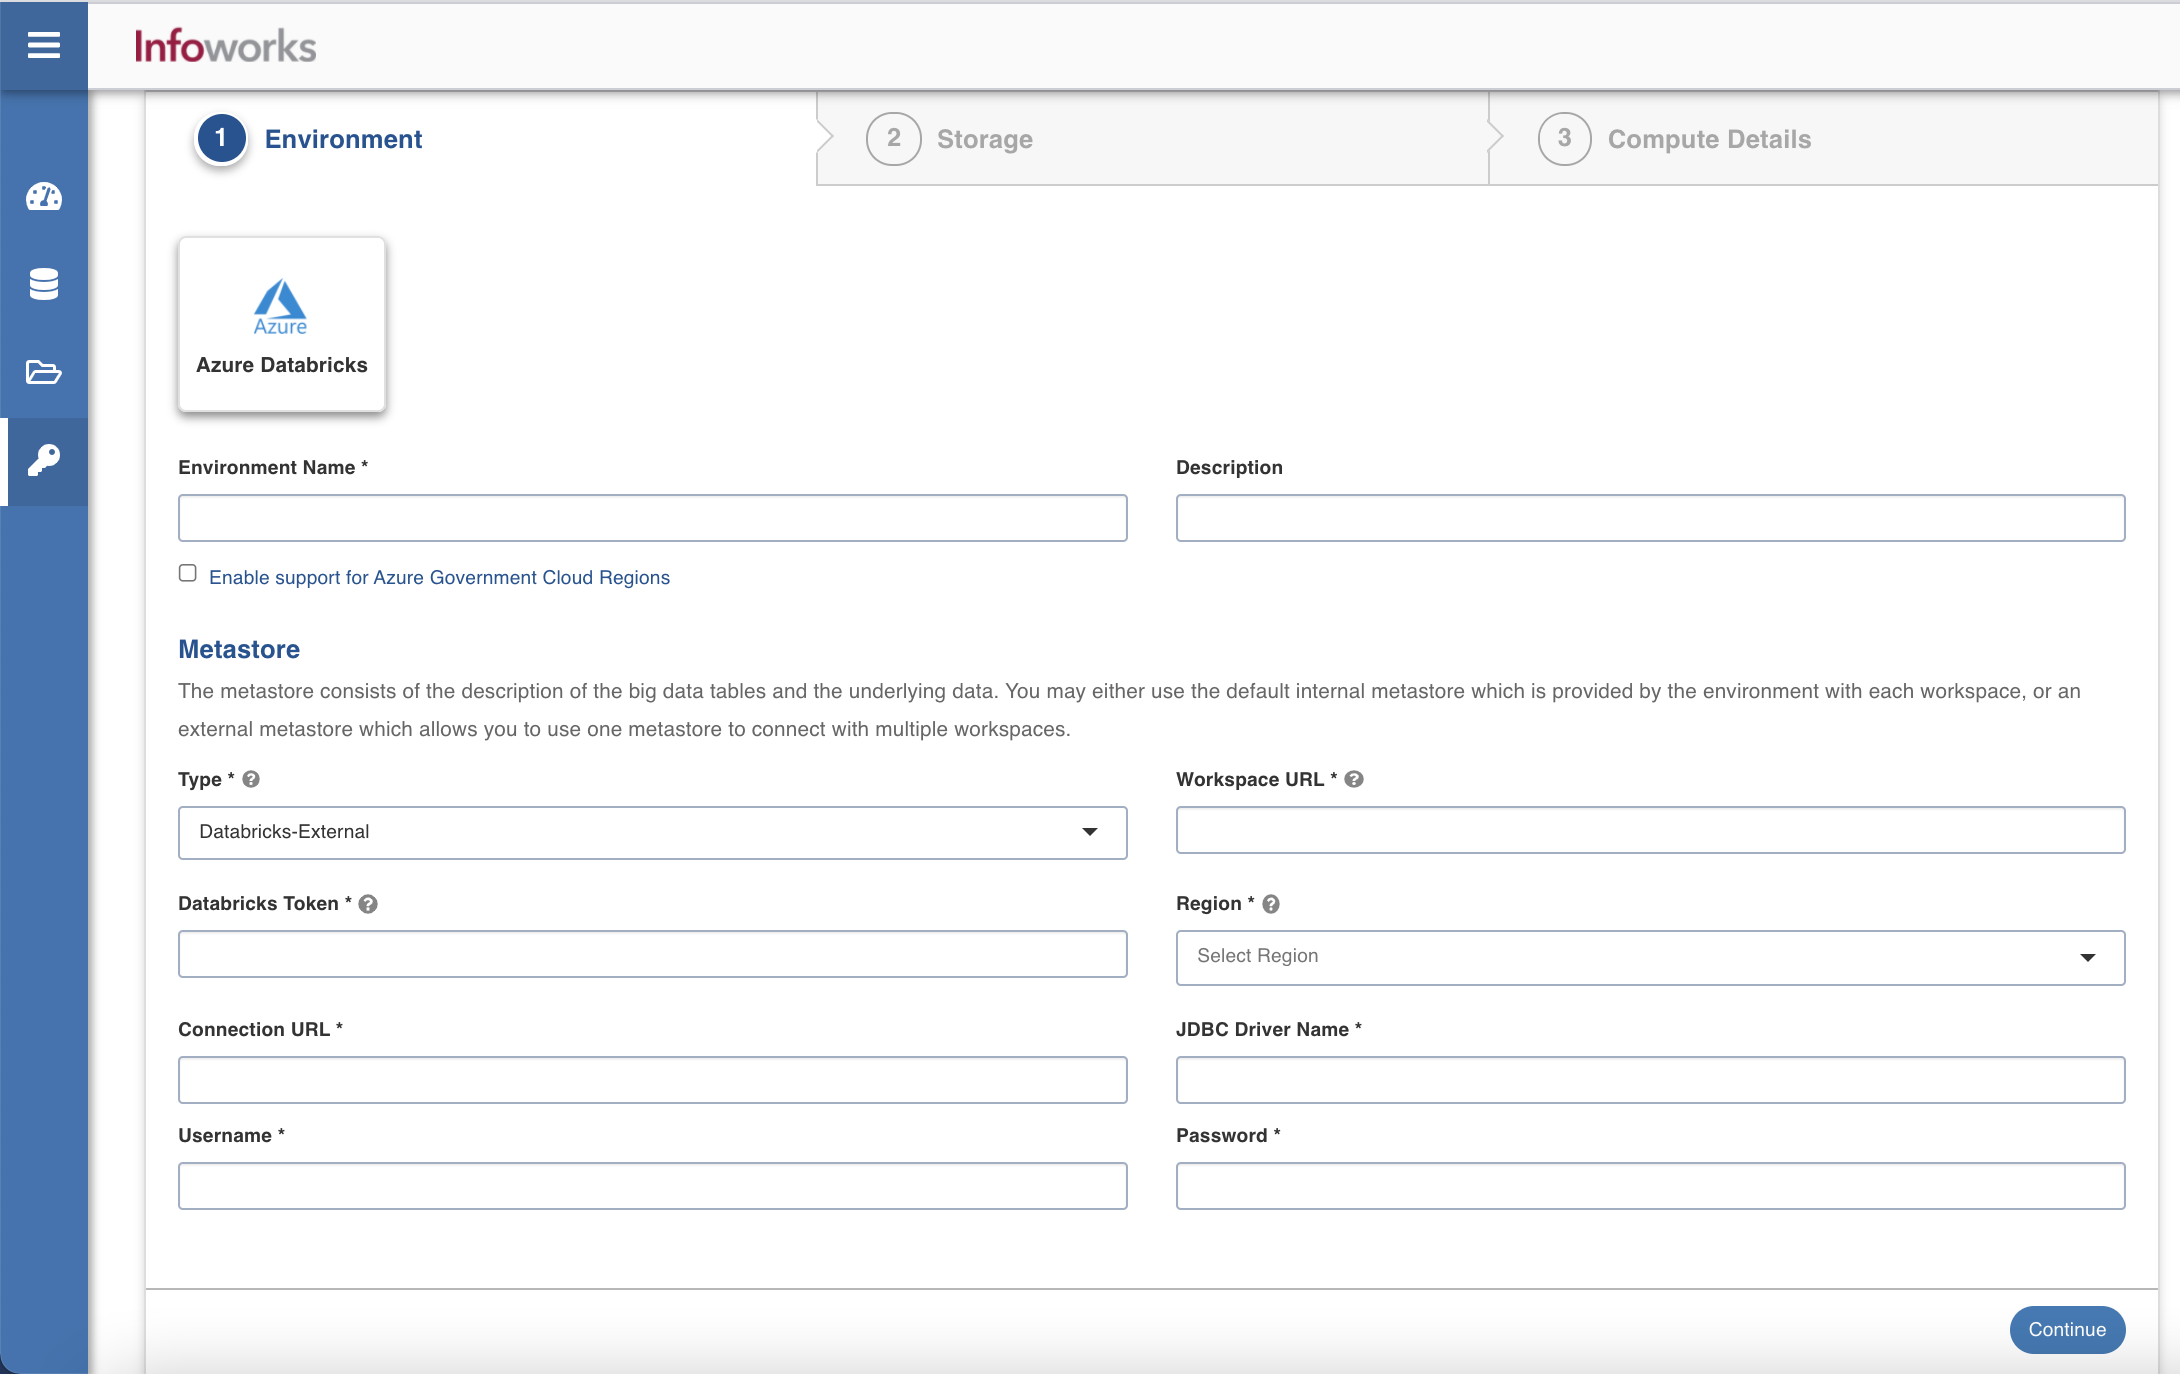
On selecting Databricks-External as the type, the following fields appear:
| Field | Description | Details |
|---|---|---|
| Connection URL | The JDBC URL for connecting to the metastore. | Provide the required JDBC URL for connectivity. |
| JDBC Driver Name | The JDBC driver class name to connect to the database. | Provide the required JDBC driver class name. |
| User Name | MySQL username. | Provide user's MySQL username. |
| Authentication Type for Password | Select the authentication type from the dropdown. For example, Infoworks Managed or External Secret Store | If you select Infoworks Managed, then provide Authentication Password for Password. If you select External Secret Store, then select the secret which contains MySQL password. |
After entering all the required values, click Continue to move to the Compute tab.
Compute
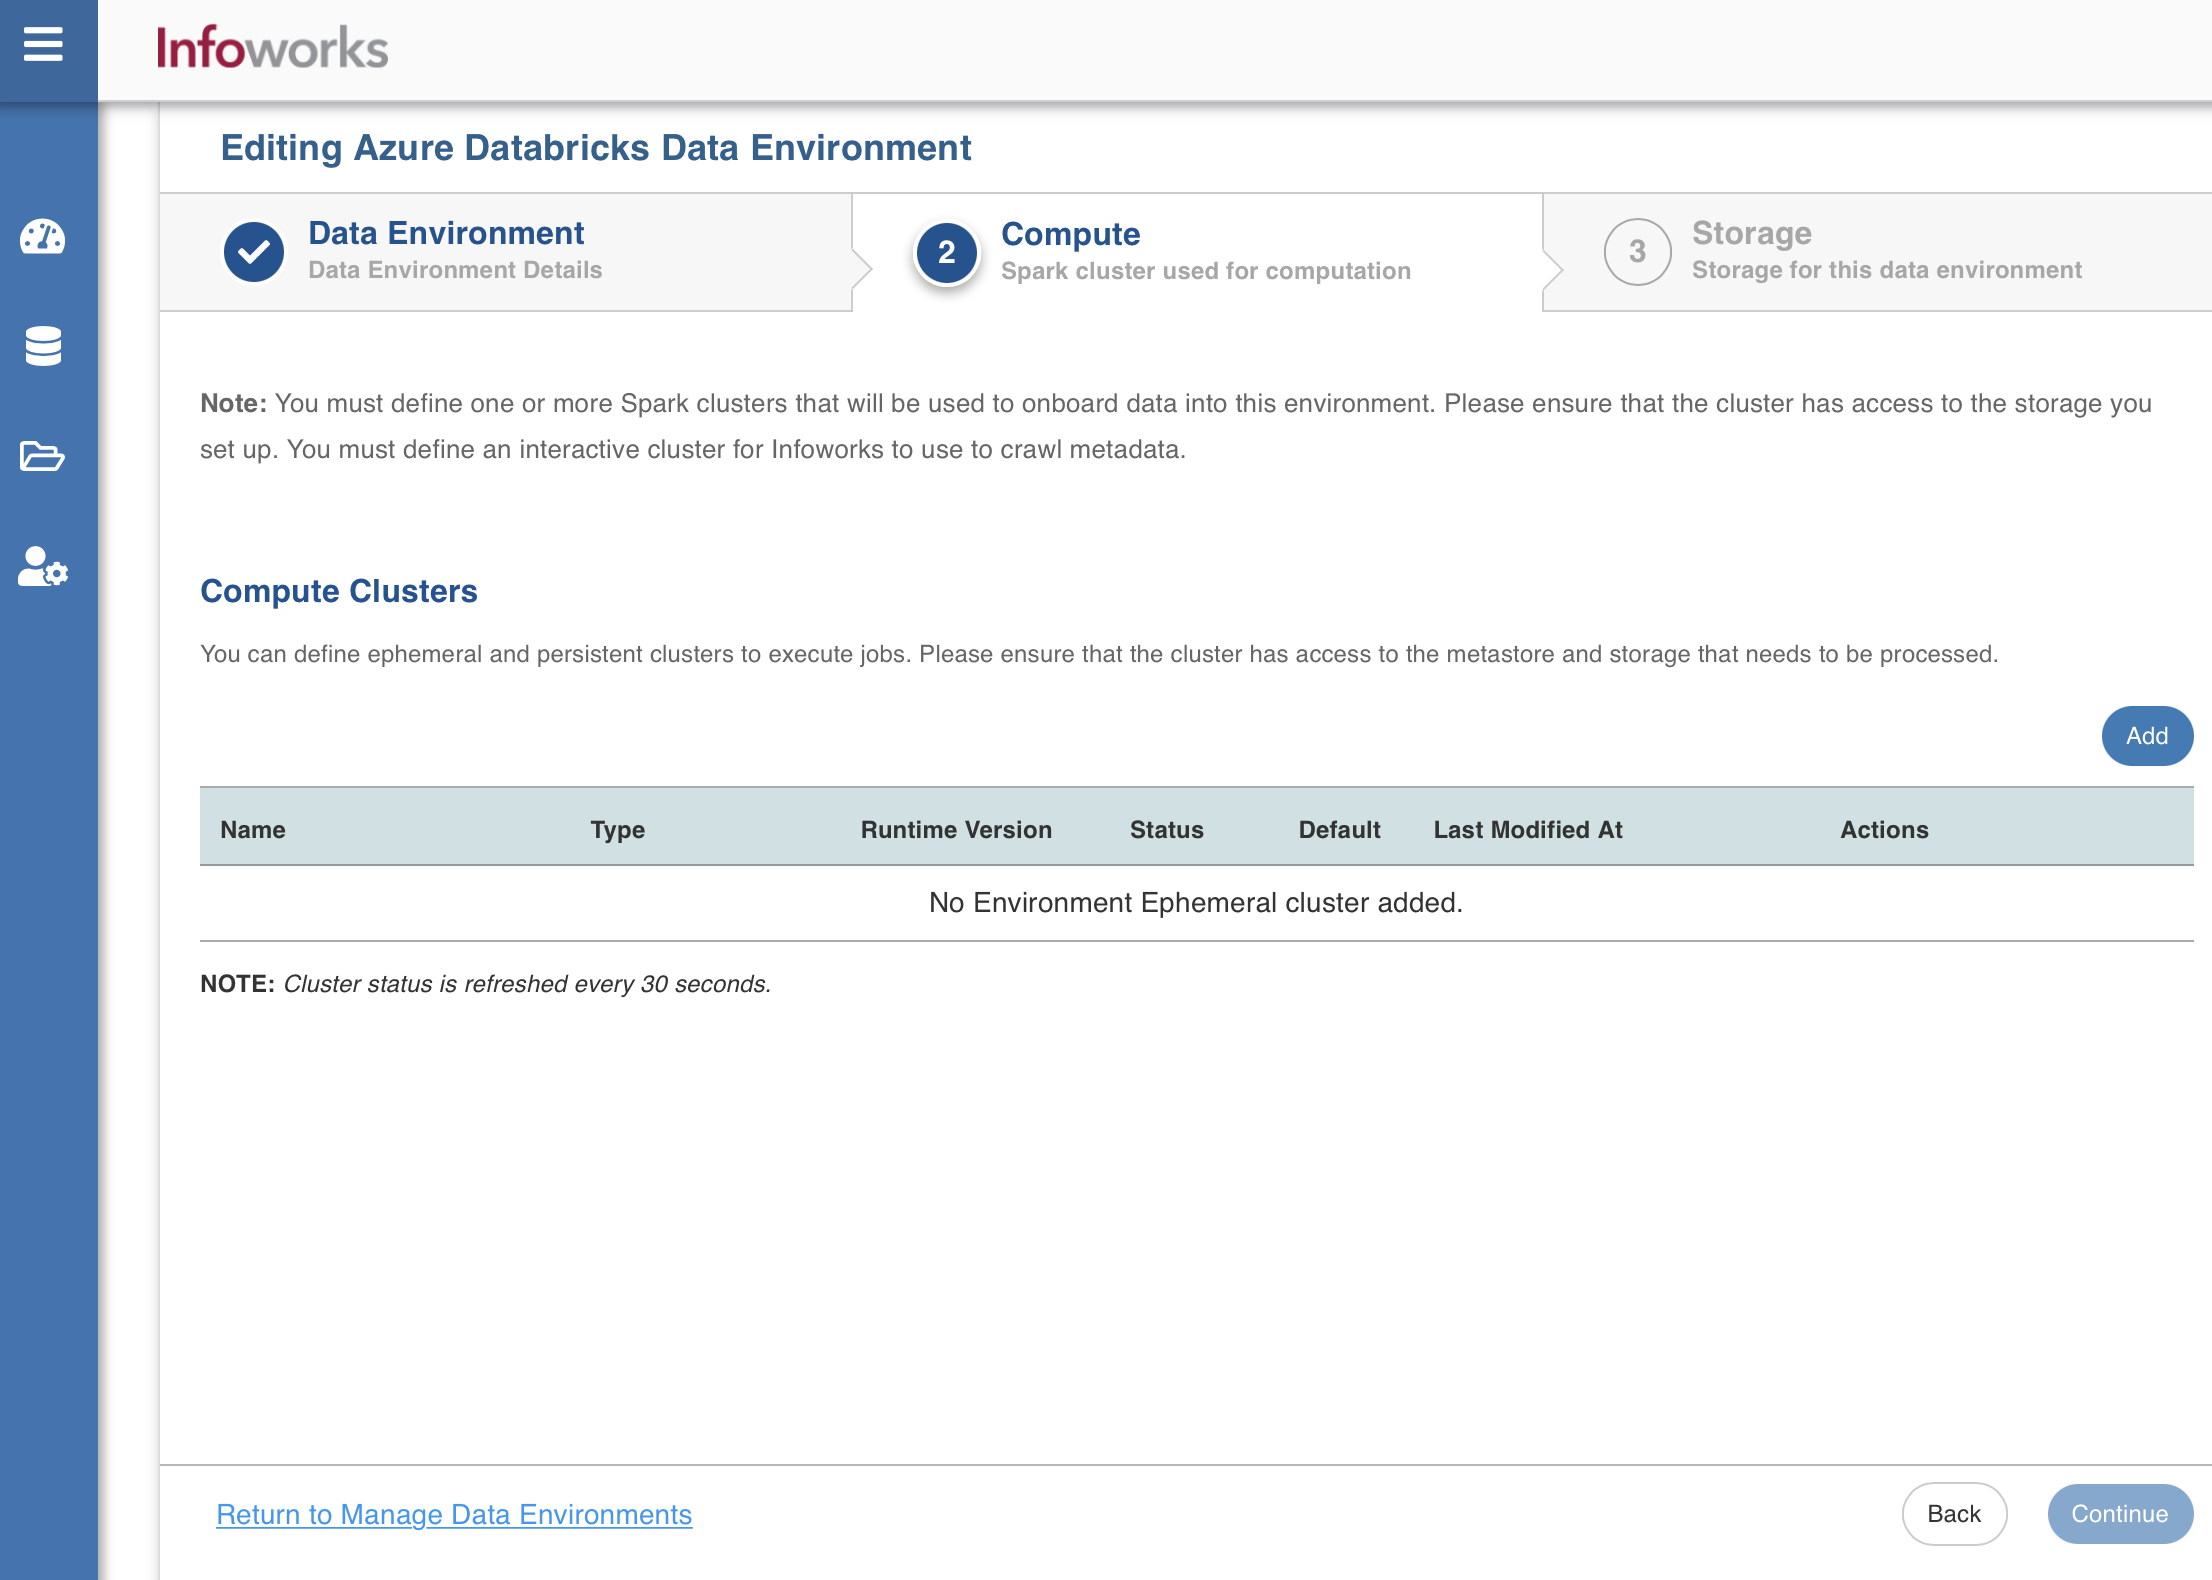
A compute template is the infrastructure used to execute a job. This compute infrastructure requires access to the metastore and storage that needs to be processed. To configure the compute details, enter values in the following fields. This defines the compute template parameters, to allow Infoworks to be configured to the required Azure Databricks instance.
Infoworks supports creating multiple clusters (persistent/ephemeral) in Azure Databricks environment, by clicking the Add button.
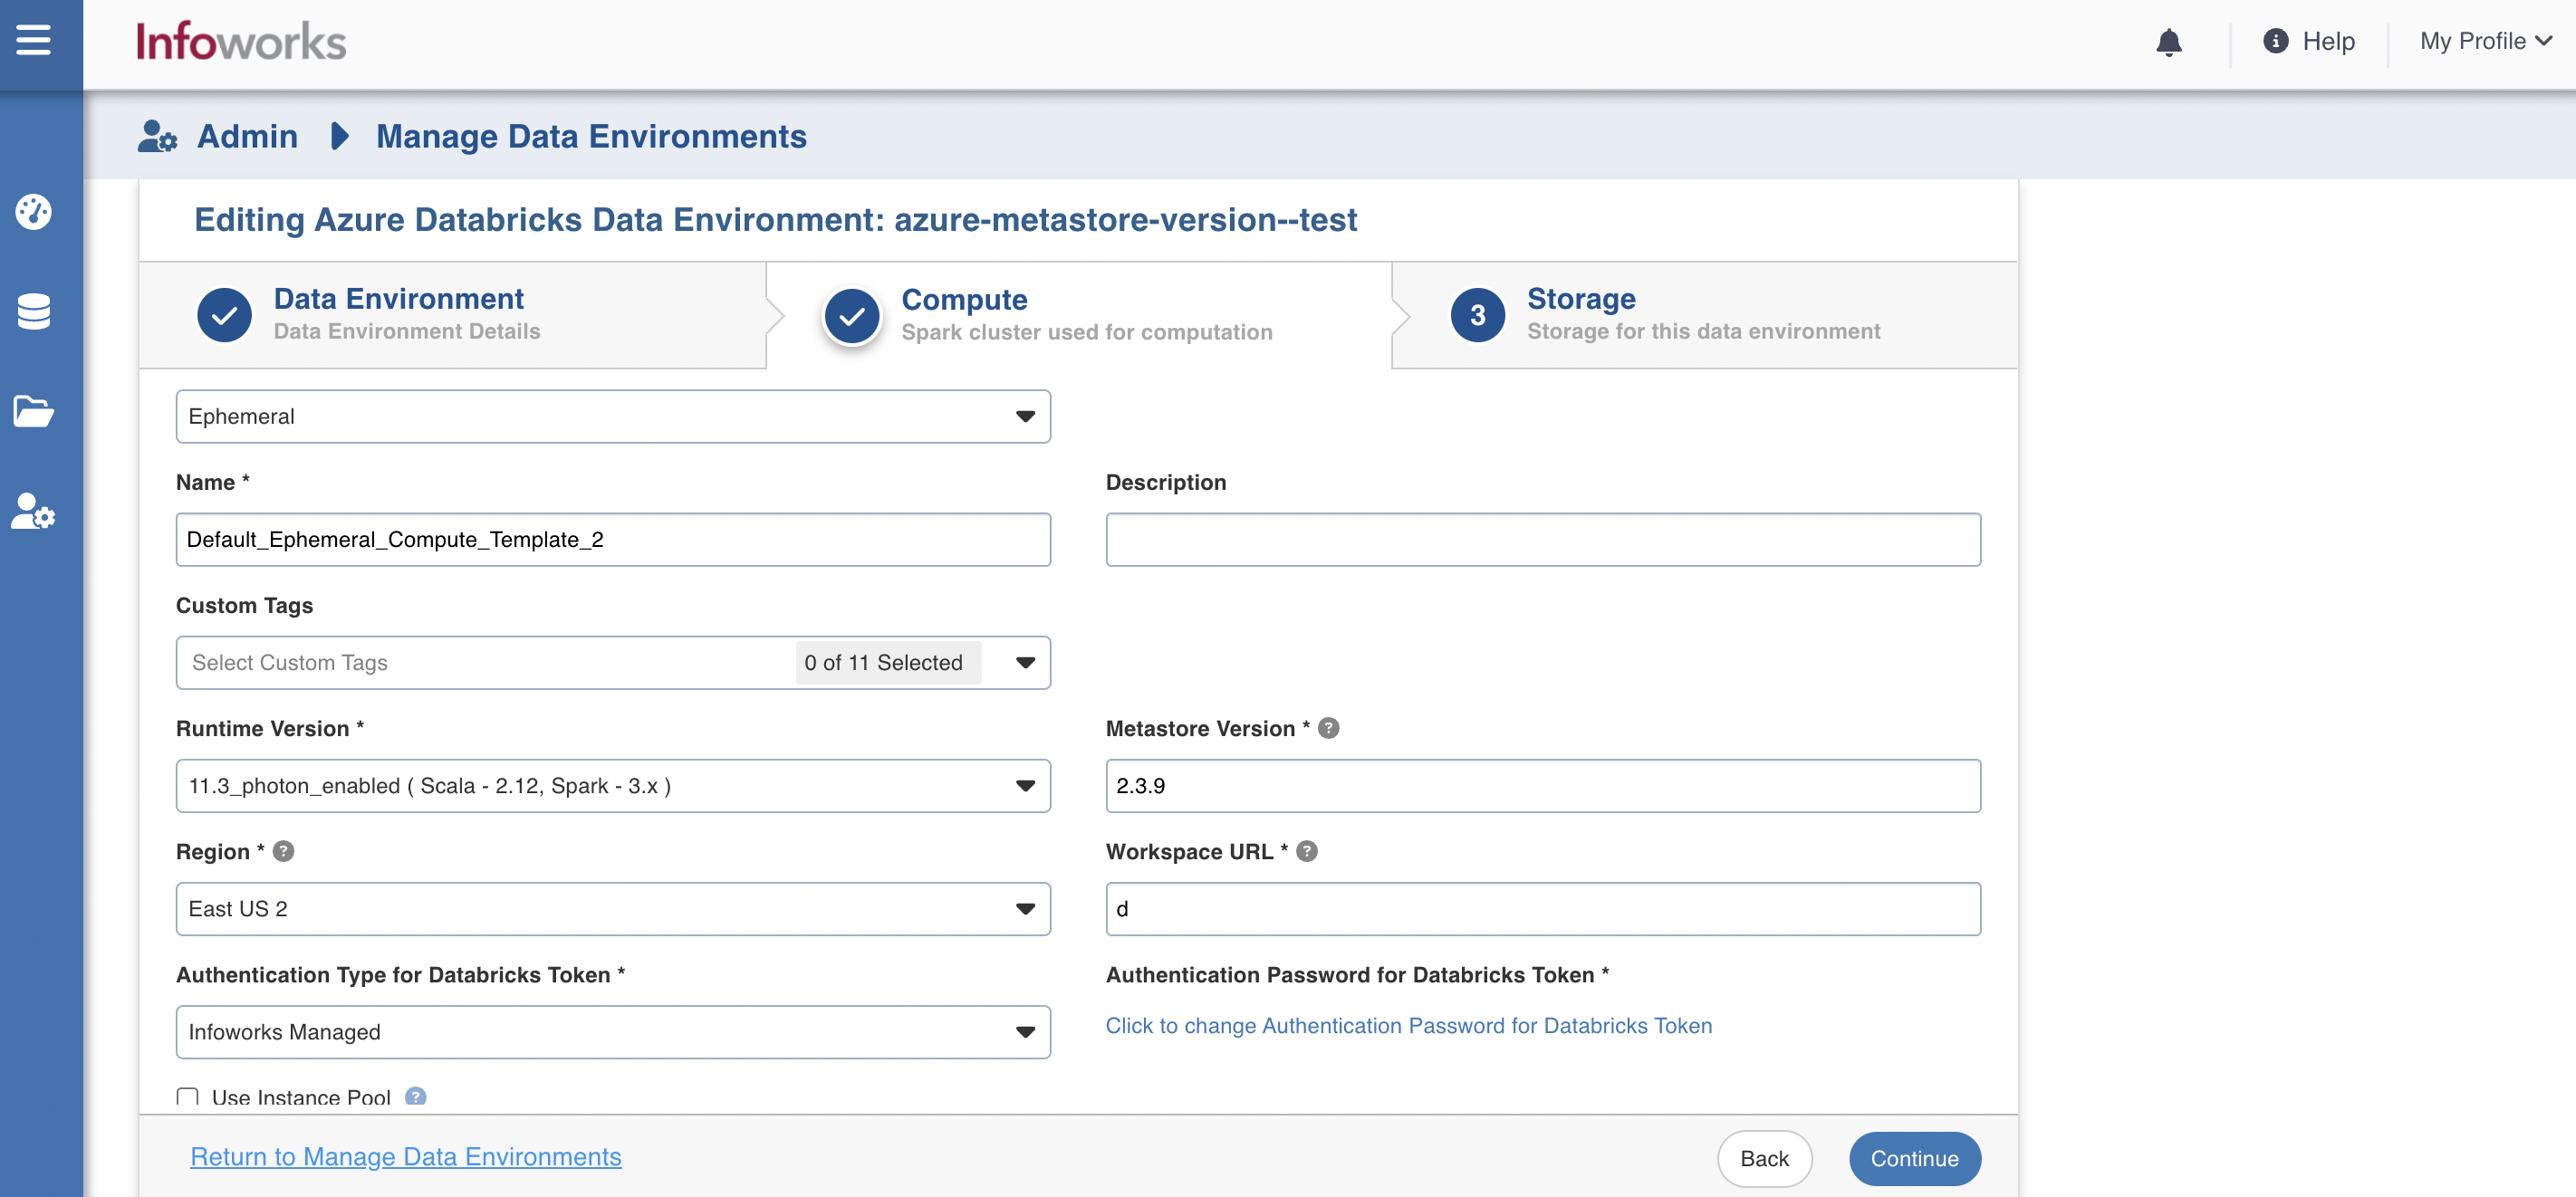
| Field | Description | Details |
|---|---|---|
| Cluster Type | The type of compute cluster that you want to launch. | Choose from the available options: Persistent or Ephemeral. Jobs can be submitted on both ephemeral as well as persistent clusters. |
| Use this as an interactive cluster | Option to designate a cluster to run interactive jobs. Interactive clusters allows you to perform various tasks such as displaying sample data for sources and pipelines. You must define only one Interactive cluster to be used by all the artifacts at any given time. | Select this check box to designate the cluster as an interactive cluster. |
| Name | Name required for the compute template that you want to use for the jobs. | User-defined. Provide a meaningful name for the compute template being configured. |
| Description | Description required for the compute template. | User-defined. Provide required description for the compute template being configured. |
| Runtime Version | Select the Runtime version of the compute cluster that is being used. | Select 9.1 (deprecated), or 11.3, or 11.3_photon_enabled from the drop-down for Azure Databricks. |
| Metastore Version | Select the Metastore version of the compute cluster that is being used. | This field appears only if the Type field under the Metastore section in the Data Environment tab is set to Databricks-External. If the Runtime Version is 9.1, the Metastore Version is automatically set to 2.3.7. If the Runtime Version is 11.3 or 11.3_photon_enabled, the Metastore Version is automatically set to 2.3.9. |
| Region | Geographical location where you can host your resources. | Provide the required region. For example: East US. |
| Workspace URL | URL of the workspace that Infoworks must be attached to. | Provide the required workspace URL. <br>For example: https://adb-xxxxx474xx93xxxxxx.x.azuredatabricks.net |
| Databricks Token | Option to use a set of idle instances which optimizes cluster start and auto-scaling times. | If Use Instance pool check box is checked, provide the ID of the created instance pool in the additional field that appears. |
| Allow single node instance | Worker type configured in the edge node. | This field appears only if Use Instance pool check box is unchecked. Provide the required worker type. For example: Standard_L4 |
| Use Instance Pool | Driver type configured in the edge node. | This field appears only if Use Instance pool check box is unchecked. Provide the required driver type. For example: Standard_L8 |
| Max Allowed Worker Nodes | Minimum number of workers that Databricks workspace maintains. | This field appears only if Enable Autoscale check box is checked. |
| Enable Autoscale | Maximum number of workers that Databricks workspace maintains. | This field appears only if Enable Autoscale check box is checked. This must be greater than or equal to Default Min Worker value. |
| Default Min Workers | Number of workers configured for availability. | This field appears only if Enable Autoscale check box is unchecked. |
| Support for Machine Learning (ML) Pipelines | Option to enable support for Machine Learning workflows. | Select this option to support ML pipelines. |
| Terminate after minutes of inactivity | Number of minutes after inactivity which the pool maintains before being terminated. | Provide the minimum number of minutes to be maintained before termination.
|
iw_environment_cluster_policy = <cluster_policy_id>.
After entering all the required values, click Save, and Continue to move to the Storage tab.
iw_environment_cluster_spark_config = spark.driver.extraJavaOptions=-DIW_HOME=dbfs://infoworks -Djava.security.properties=; spark.executor.extraJavaOptions=-DIW_HOME=dbfs://infoworks -Djava.security.properties=
By default, semi-colon will be used as a separator. To use a custom separator in place of semi-colon (;), use the following advanced configuration: advanced_config_custom_separator = <custom_separator_symbol>.
- CLUSTER_LOG_ENABLED: This flag is used for enabling or disabling to set the customised log path prefix for cluster compute by default value for this flag is true.
- CLUSTER_LOG_PATH_PREFIX: This flag is used for setting the log path prefix for cluster compute. E.g
/mnt/cluster/ - APPLICATION_LOG_PATH_PREFIX: This flag is used for setting the job log path prefix for an application entity. Eg
/mnt/app/logs/
These values can be set also in admin configuration as global config, with highest priority given to the advanced config values than admin configuration. If the user wants to use a logging path other than dbfs, then they need to add an init script with a symlink to link log files to their desired path.
Access Control List
Access Control List allows the customer to provide certain users the privileges to a cluster and/or its jobs. See Databricks documentation for more information on requirements, set up and configuration for ACL. Then users can set the access control list in Infoworks by adding the advanced configuration access_control_list in the Compute in the Environment’s sections. The value for this parameter is a JSON Array taken in the string format and is of the same format as the access_control_list parameter in the Databricks Update permissions API specified here:
For Ex: [{ "user_name": "admin@infoworks.io", "permission_level":"CAN_MANAGE_RUN"}].
Storage
To configure the storage details, enter values in the following fields. This defines the storage parameters, to allow Infoworks to be configured to the required Azure Databricks instance:

| Field | Description | Details |
|---|---|---|
| Name | Storage name must help the user to identify the storage credentials being configured. | User-defined. Provide a meaningful name for the storage set up being configured. |
| Description | Description for the storage set up being configured. | User-defined. Provide required description for the environment being configured. |
| Storage Type | Type of storage system where all the artifacts will be stored. The available options are DBFS, Type of storage system where all the artifacts will be stored. The available options are DBFS, Azure DataLake Storage(ADLS) Gen 1, Azure DataLake Storage(ADLS) Gen 2 and WASB | Select the required storage type from the drop-down menu. |
DBFS
For example: If ”/iw/sources” is mounted to ADLS container A for Databricks workspace 1, then”/iw/sources” must be mounted to ADLS container A in Databricks workspace 2.
Infoworks and Databricks recommends mounting an Azure or S3 storage to /mnt and use the mounted location as a base location path for the data lake storage. Data written to mount point paths (/mnt) is stored outside of the DBFS root. Even though the DBFS root is writeable, Databricks recommends that you store data in mounted object storage rather than in the DBFS root. The DBFS root is not intended for production customer data.
For example - If ADLS Gen 2 or S3 is the chosen storage option with a container name called edp-datalake, you must mount edp-datalake to /mnt and use /mnt/edp-datalake as the base path location for onboarding and transforming data.
For more information on the Databricks related documentation, refer to Databricks File System.
Azure DataLake Storage(ADLS) Gen 1
On selecting Azure DataLake Storage(ADLS) Gen 1as the storage type, the following fields appear:
| Field | Description | Details |
|---|---|---|
| Access Scheme | Scheme used to access ADLS Gen 1. | Select the available option: adl:// |
| Authentication Mechanism | Mechanism using which the security information is stored. Available options are Service Principal and Access Key. | Select the required authentication mechanism from the drop-down menu. |
| Storage Account Name | Name of the Azure Storage Account. | Provide the required storage account name. For example, my_data_acc. |
| Application ID | ID that uniquely identifies the user application. | Provide the required application ID. |
| Directory ID | ID that uniquely identifies the Azure AD instance. | Provide the required directory ID. |
| Service Credentials | Credential that the application uses to prove its identity. | Provide the credential string value. |
| Access Key | Storage access key to connect to the ADLS. | Provide the storage access key. This field is displayed only for Access Key authentication mechanism type. |
Azure DataLake Storage(ADLS) Gen 2
On selecting Azure DataLake Storage (ADLS) Gen 2 as the storage type, the following fields appear:
| Field | Description | Details |
|---|---|---|
| Access Scheme | Scheme used to access ADLS Gen 2. Available options are abfs:// and abfss://. | Select the required access scheme from the drop-down menu. |
| Authentication Mechanism | Mechanism using which the security information is stored. Available options are Service Principal and Access Key. | Select the required authentication mechanism from the drop-down menu. |
| File System | File system where all the data of an artifact will be stored. | Provide the required file system parameter. |
| Storage Account Name | Name of the Azure Storage Account. | Provide the required storage account name. For example, my_data_acc. |
| Application ID | ID that uniquely identifies the user application. | Provide the required application ID. |
| Directory ID | ID that uniquely identifies the Azure AD instance. | Provide the required directory ID. |
| Service Credential | Credential that the application uses to prove its identity. | Provide the credential string value. |
| Access Key | Storage access key to connect to the ADLS. | Provide the storage access key. This field is displayed only for Access Key authentication mechanism type. |
WASB
On selecting WASB as the storage type, the following fields appear:
| Field | Description | Details |
|---|---|---|
| Access Scheme | Scheme used to access WASB. Available options are wasb:// and wasbs:// | Select the required access scheme from the drop-down menu. |
| Container Name | Name of the WASB container. | Provide the WASB container name. |
| Storage Account | Account name of WASB storage. | Provide the storage account name. |
| Account Key | Access key of WASB storage. | Provide the required access key. |
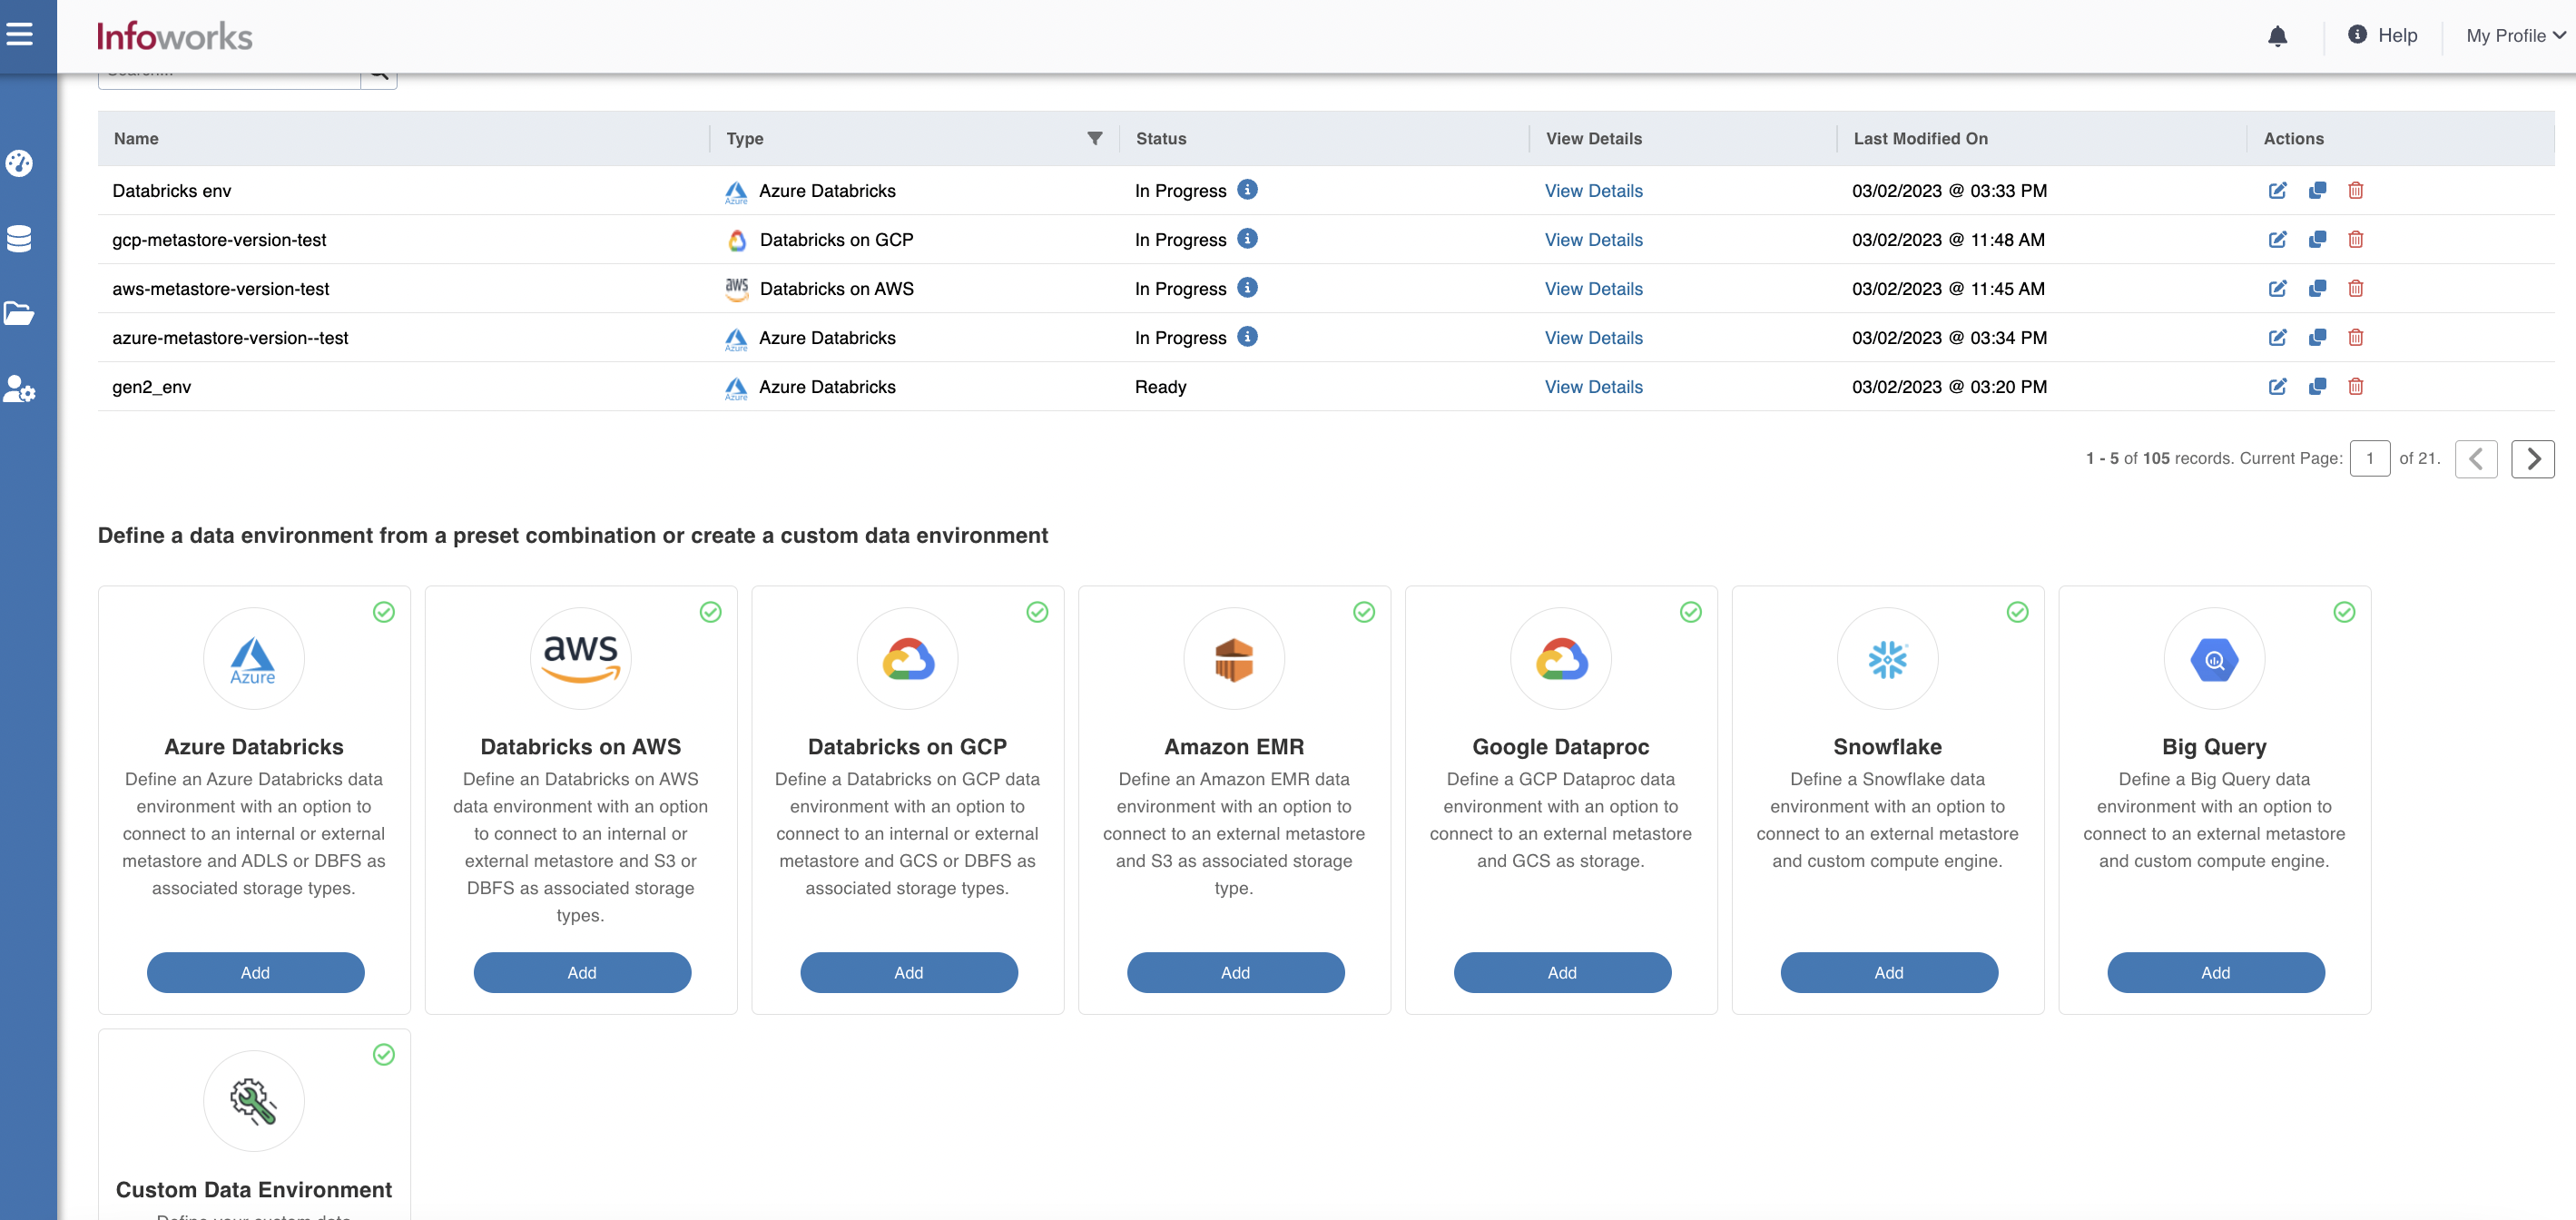
After entering all the required values click Save. Click Finish to view and access the list of all the environments configured. Edit, Clone, and Delete actions are available on the UI, corresponding to every configured environment.
Workaround:
To successfully complete the delta crawl of the delta tables created on cloud storage, you must ensure that the storage is mounted onto DBFS. This step is mandatory to access any external storage.
- Credential configuration issues: Overriding the configurations that are passed to Spark and Distributed File System on the cluster, during the job initialization is not supported in DBx persistent clusters, and could potentially lead to job failures where there are multiple environments with different credentials.
- Limitations on running CDATA source: CDATA sources require RSD files to be passed to all the worker nodes during the initialization of the cluster. This is not supported in persistent clusters, as we submit the jobs to an already running cluster.
- Limitations on number of parallel jobs: It depends on the number of resources available for a spark driver to run. Number of jobs utilizing resources of the driver can limit the driver performance as it is a single spark driver running on the cluster.
- Switching jar between different versions: If the same jar with different versions is used, then the spark always picks the one that is installed first. There is no way for the jobs to pick the right version. This is a limitation from the product side.
- Restart cluster after jar update: If a jar gets updated, then we need to uninstall the old jars from the persistent cluster and then restart the cluster for spark to pick the new updated jar. This is required in case of upgrades or patches.
- Databricks interactive clusters are not having file system access keys: While submitting batch jobs to the persistent cluster, storage configurations are not getting picked up if it is added as part of the spark session. Hence the storage configurations must be added as part of the cluster configuration.