After creating the workflow using the required tasks, the workflow is ready to be built.
Following are the steps to build a workflow:
From the Domains page, select the required workflow. The Workflow Preview page. Appears. If you are in the Workflow Editor page, exiting the editor will take you to the Workflow Preview page.
Navigate to the Workflow Preview page.
Click the Build icon. Click Run Workflow. The workflow starts building and you can see the run status under Workflow state.
The color of the tasks notifies the status of each task (success, failed, running, skipped, or queued) as per the color legends shown at the top of the Monitor Run page.
The Triggered By field indicates the event that initiated the current workflow run. This trigger can originate from:
A scheduled run.
A manual initiation by a user.
A parent workflow triggering the current run.
Select any existing builds under Run drop down to view detailed information of the workflow execution.
NOTE The failed tasks are displayed in Red. You may click the failed task to view task logs.
Build Options
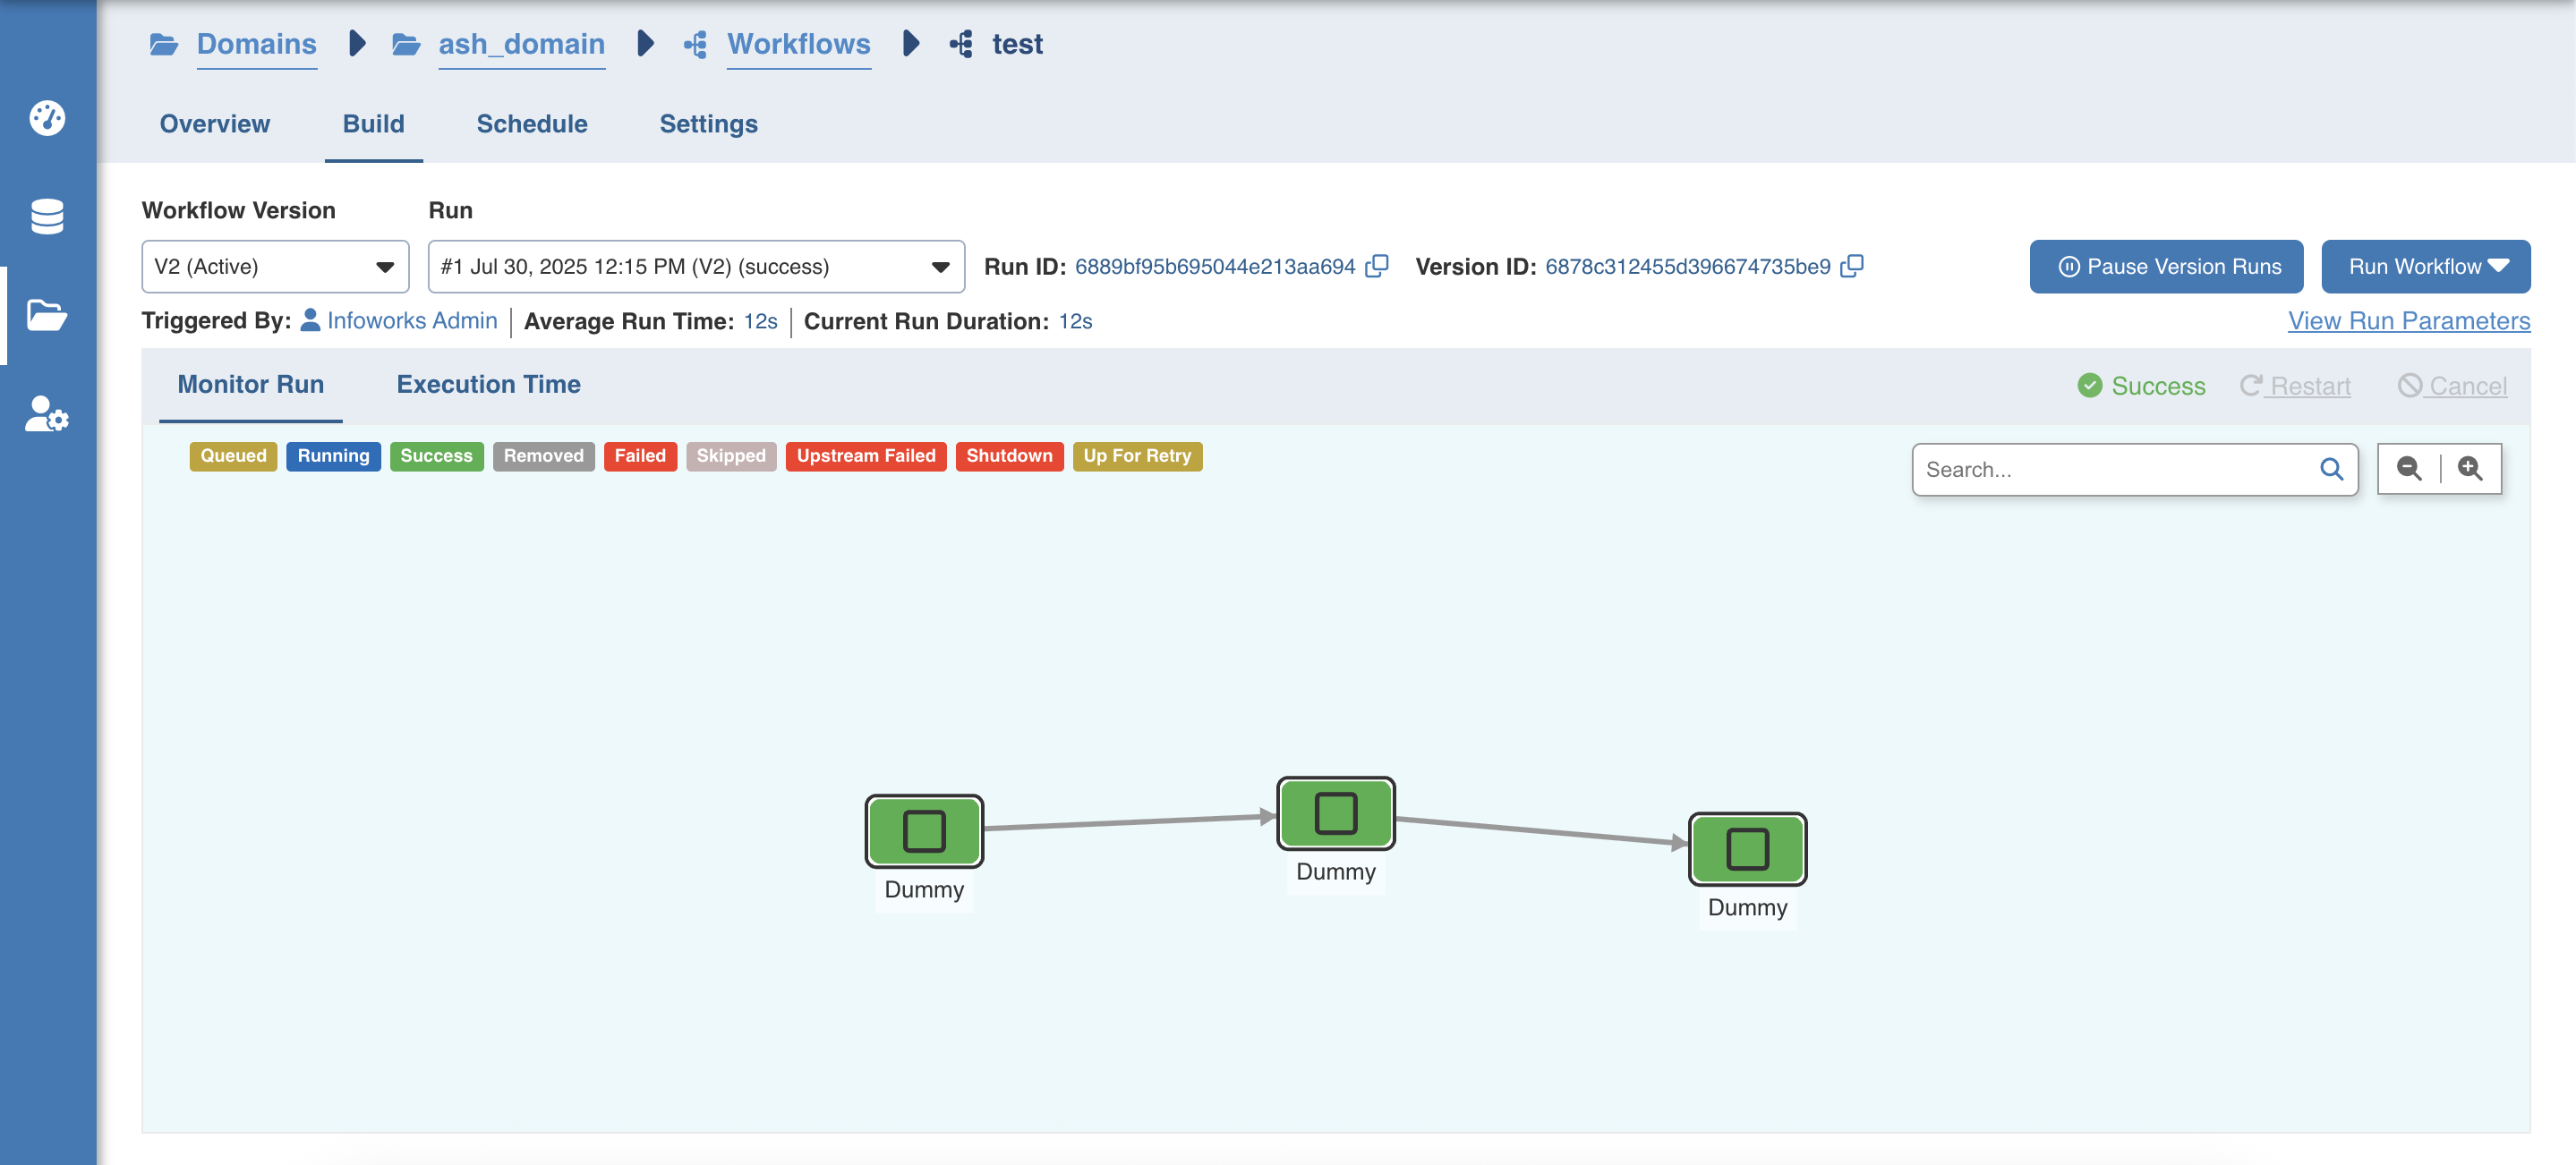
The Pause Version Runs feature is used to pause the workflows build temporarily during maintenance windows
On clicking the Restart button, the following window appears:
NOTE Restart button is active only when there are failed tasks available.

Restarting a workflow can be done in two ways by selecting either of the following options: H2M_LI_HEADER Restart from the failed task : Allows you to restart the workflow from the failed task. In case the workflow has a sub workflow with failed tasks in it, the sub-workflow would also be restarted from the failed tasks. H2M_LI_HEADER Restart from the beginning : Allows you to restart the failed workflow from the beginning, using the same run ID. Even if the failed task is inside a sub workflow, the workflow will restart the parent workflow from the beginning. Here, all children (successful and failed) nodes will also be restarted from beginning along with the parent.
NOTE The selection will be applicable to all the sub workflows in the workflow to be restarted.
Clicking the Cancel option stops the workflow build at a logical point of the build. It would complete all running tasks and then fail the remaining tasks.
Viewing Task details and Logs
You can now view the task details for individual nodes in the Workflow page. After clicking Run Workflow, click the relevant node to view its task details area. In the task details area, you can download and view the job logs, task logs, and cluster logs for certain nodes like Ingest Source, Sync to Target, and Build Pipeline.
NOTE Task details area for Ingest Source and Sync to Target are similar.
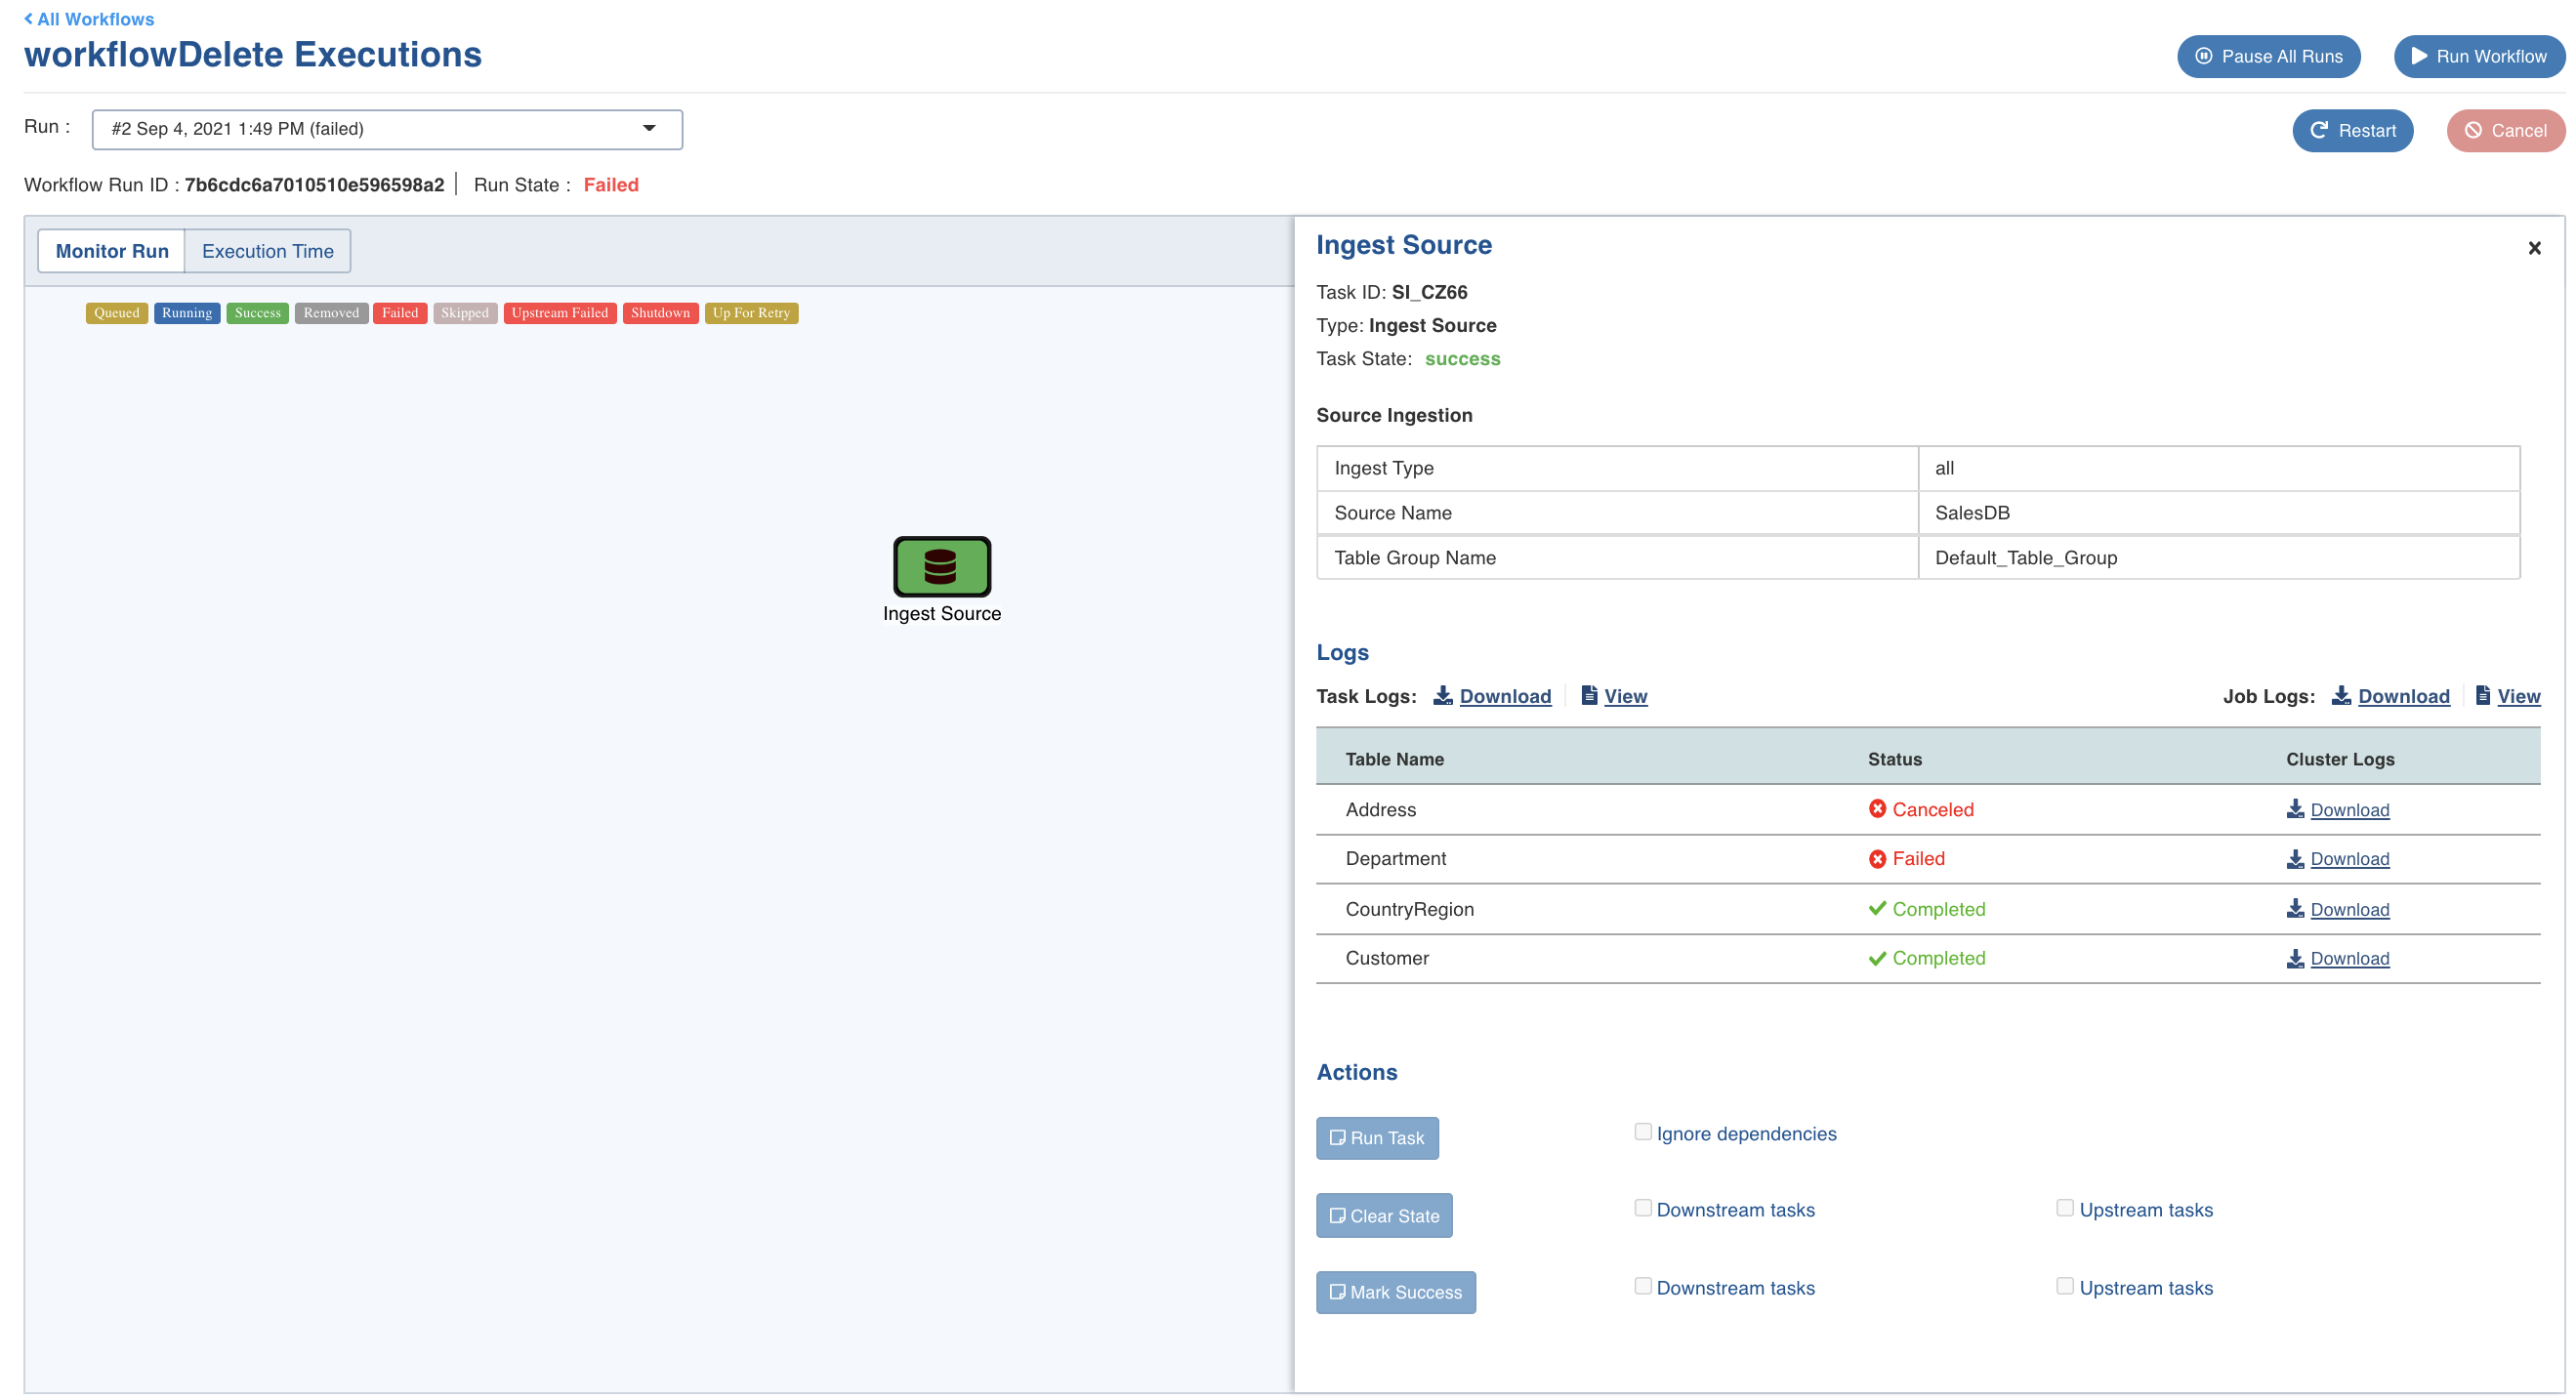
Ingest Source
Click the Ingest Source node to view the following details:_ _
NOTE You can view the below details only after the Run State value changes to Running.
Task ID: Task ID of the corresponding workflow task.
Type: Name of the task.
Task State: Status of the workflow run: Success, Running or Failed.
Source Ingestion: A table that displays the following details:
Ingest Type: The type of synchronization for the table.
Source Name: A source name for the target table.
Table Group Name: The name of the table group that is ingested.
Logs: Links to download or view task logs, job logs, and a table that displays the following details:
Table Name: Name of the table.
Status: Status of the ingestion job for that specific table.
Cluster Logs: Click the download icon against the relevant table to download the cluster logs.
Actions: This feature is not supported in 5.1.
Build Pipeline
Click the Build Pipeline node to view the following details:
Task ID: Task ID of the corresponding workflow task.
Type: Name of the task.
Task State: Status of the workflow run: Success, Running or Failed.
Pipeline Properties: Link to view the pipeline, and a table that displays the following details:
Key: Signifies name of the pipeline parameter
Value: Signifies content of the pipeline parameter
Logs: Links to download or view task logs, job logs, and a table that displays the following details:
Pipeline Build ID: Identifier for the pipeline build job
Status: Status of the workflow run.
Cluster Logs: Click the download icon to download the cluster logs.
Actions: This feature is not supported in 5.1.
Viewing Execution Time
Click the Execution Time option to view the time taken to execute each task, as shown below.
You can mouse-over on each task to view more information about that task.
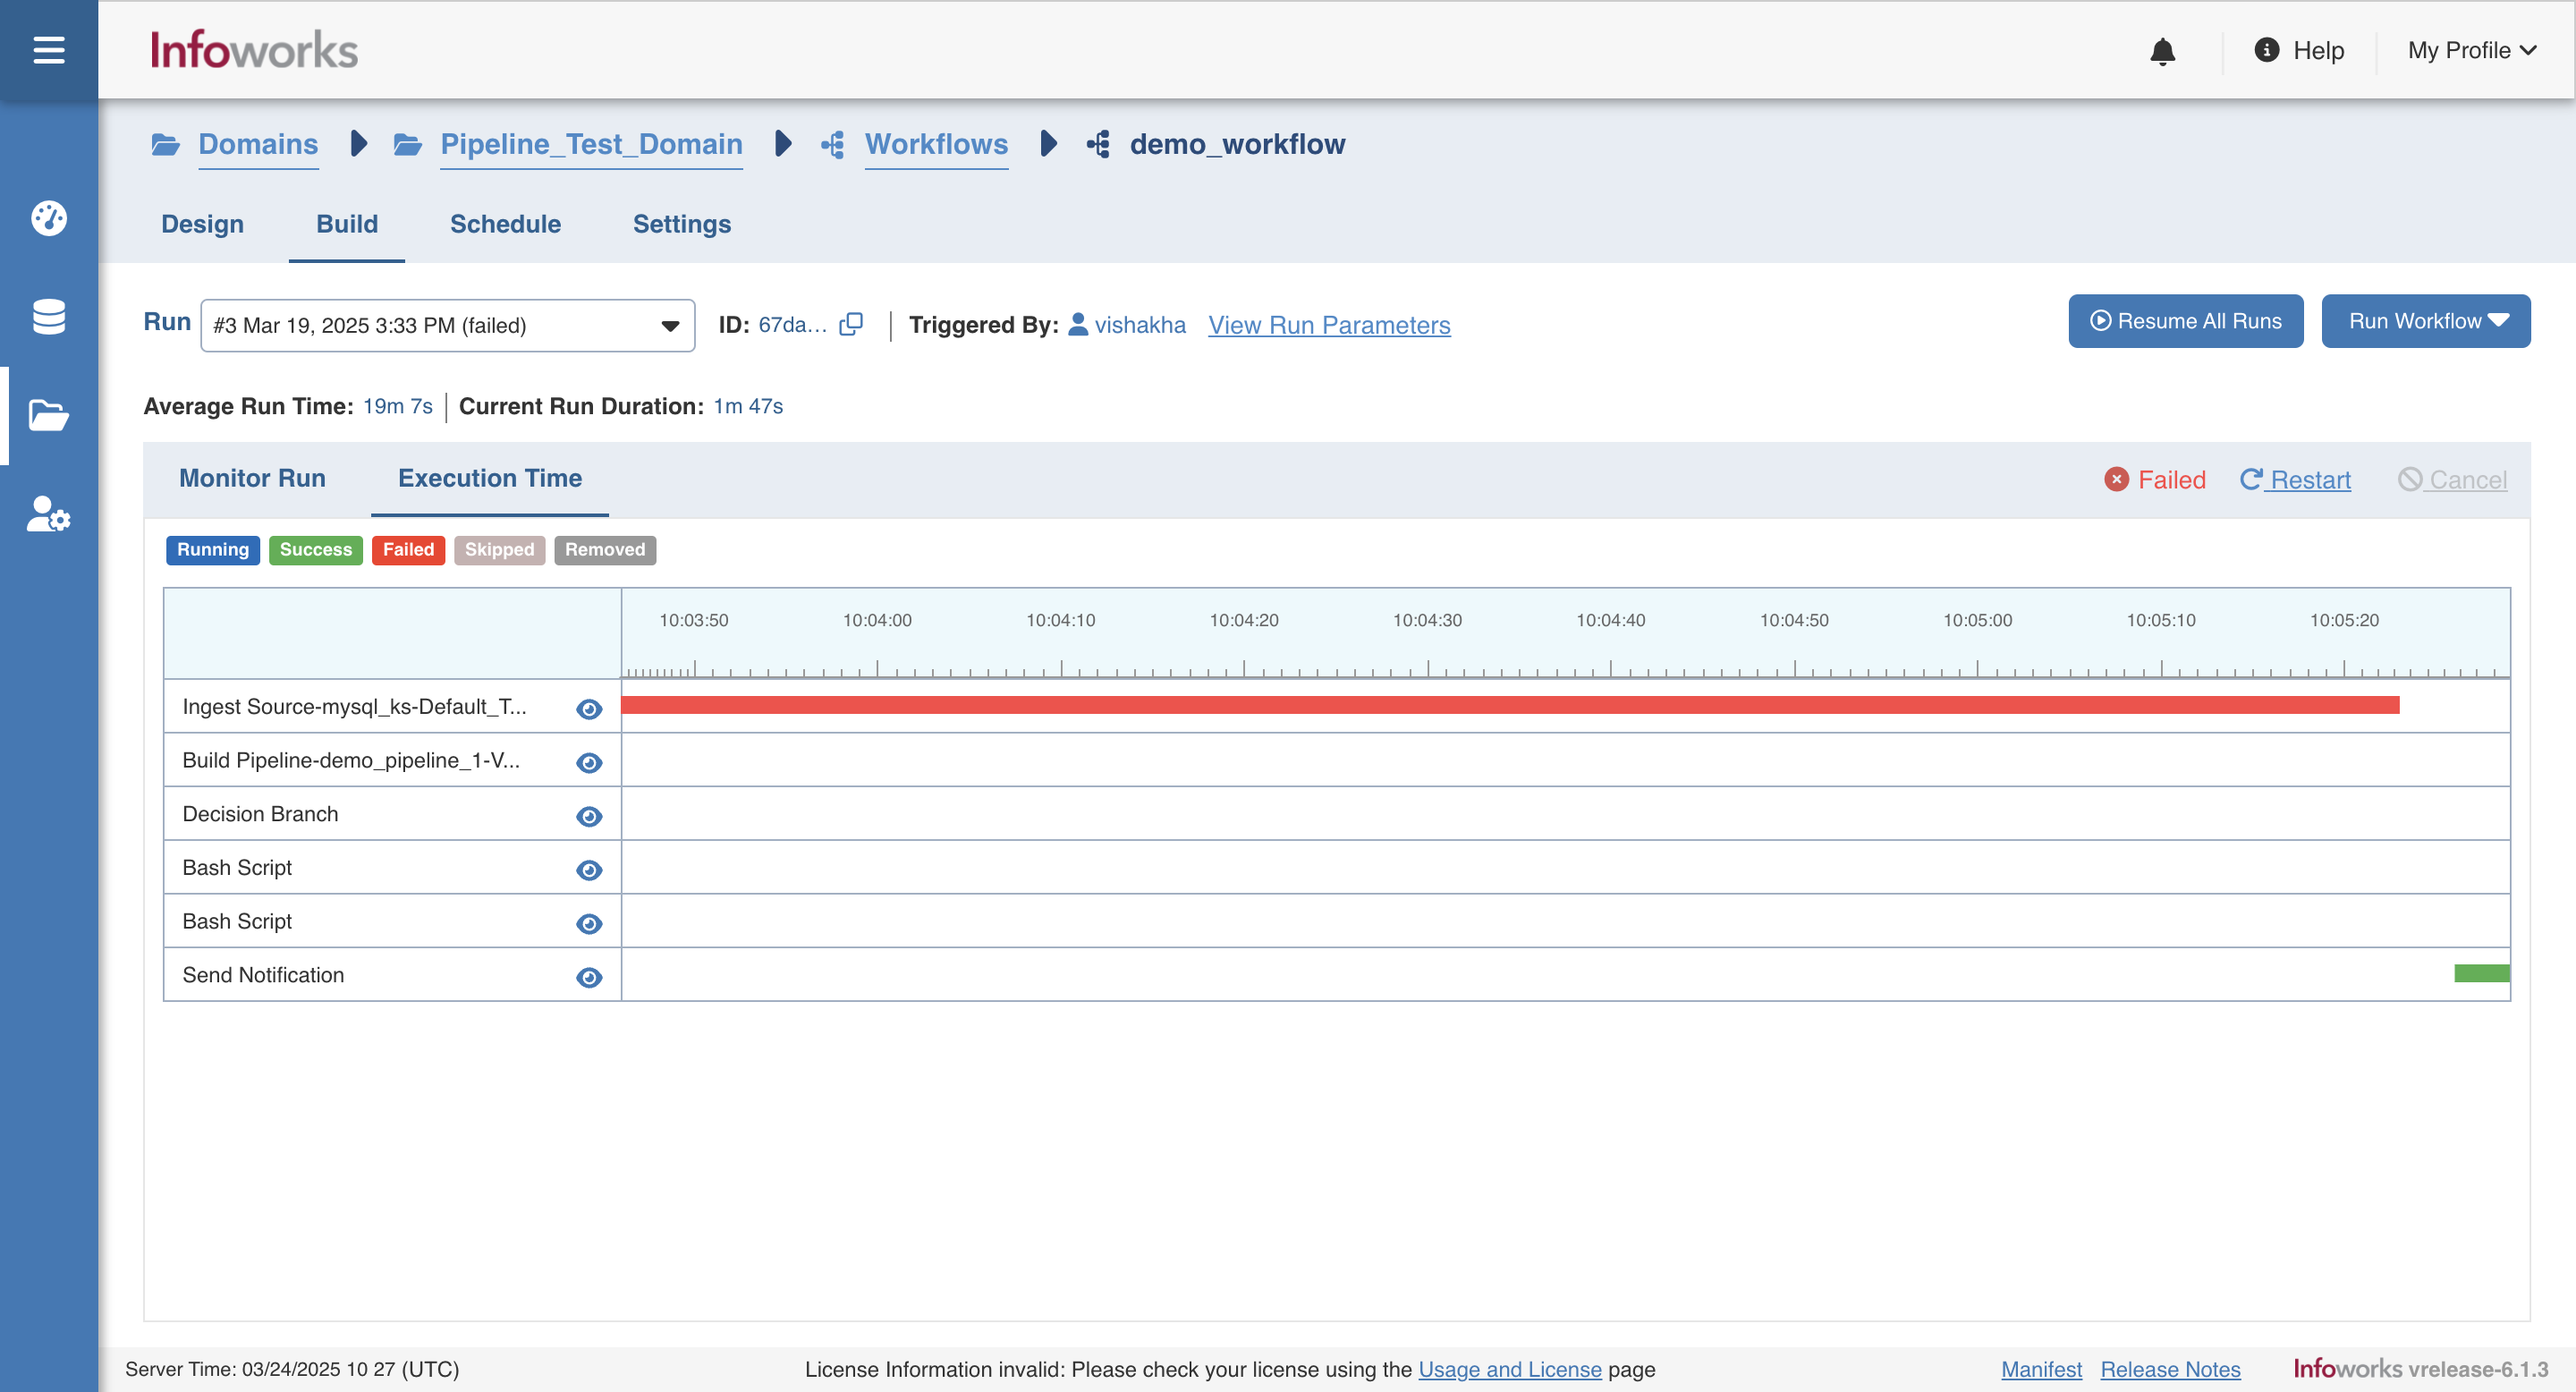
You can click on the eye icon on any task to view task logs and job logs for the selected task.
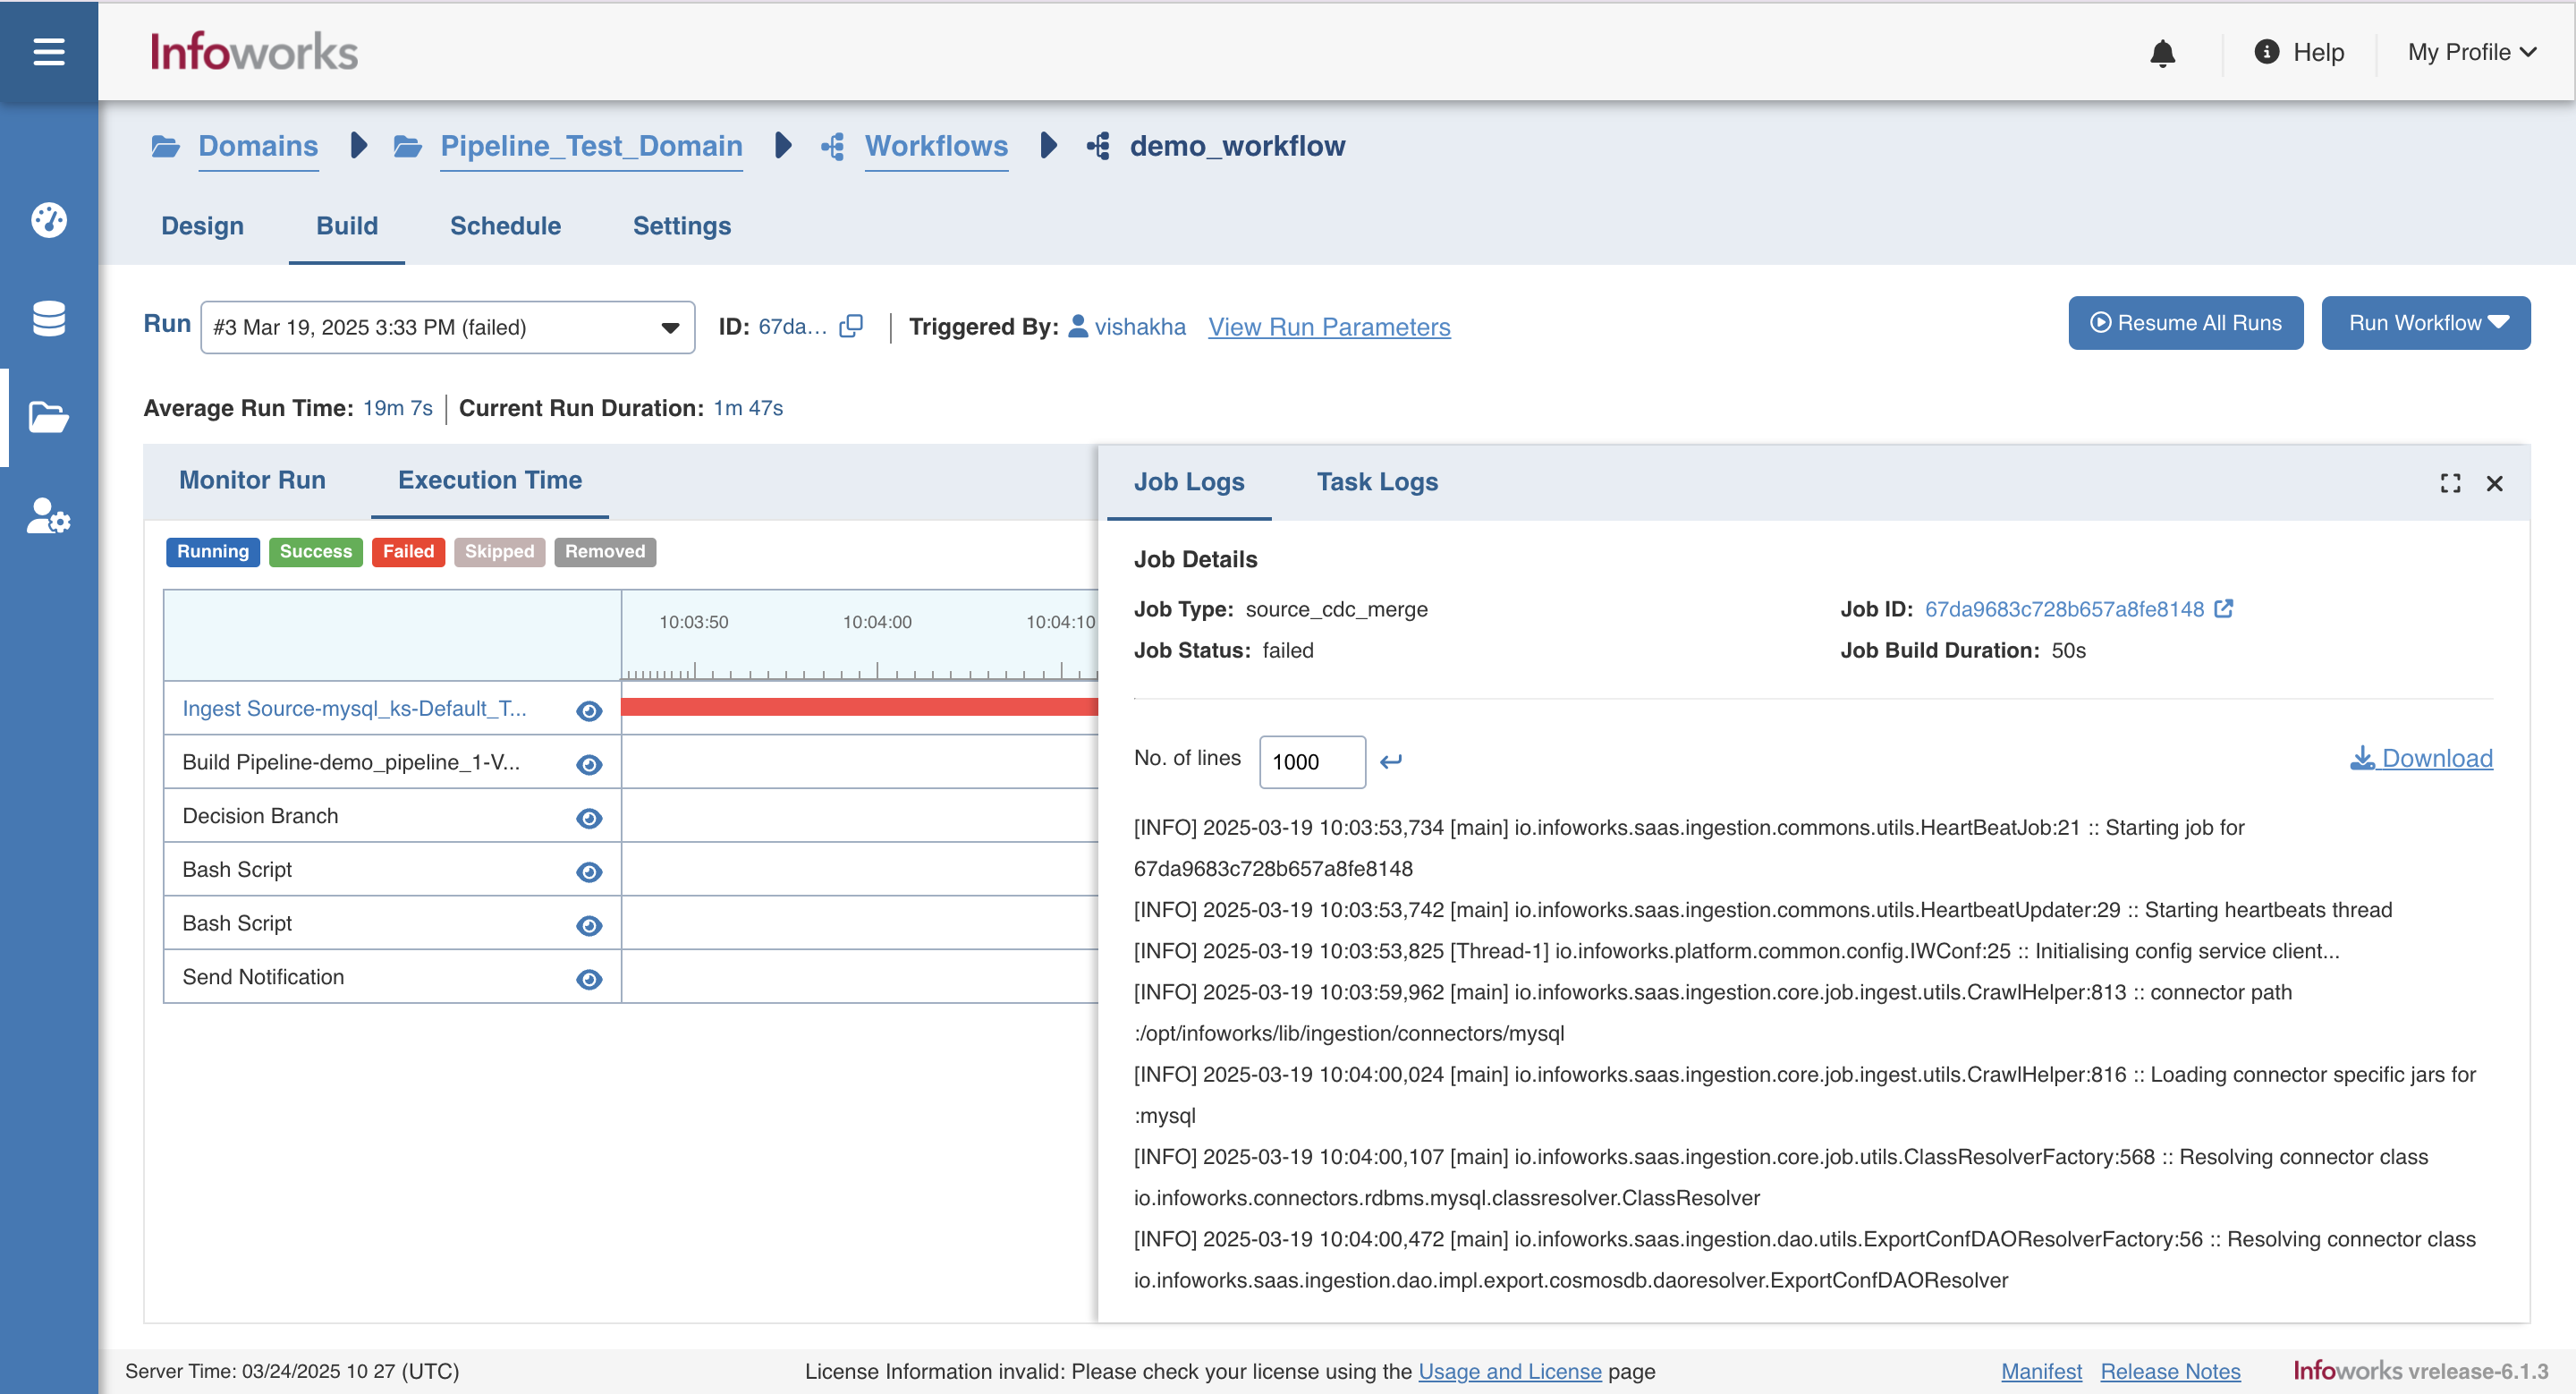
You can click on the maximize icon on the side panel to view the logs in fullscreen.
NOTE Job logs tab will not be shown for the tasks for which jobs do not get submitted.
Scheduling Workflow Build
Following are the steps to schedule a workflow build:
In the Workflows page, select the workflow to be scheduled and click the Schedule icon. The following page is displayed:
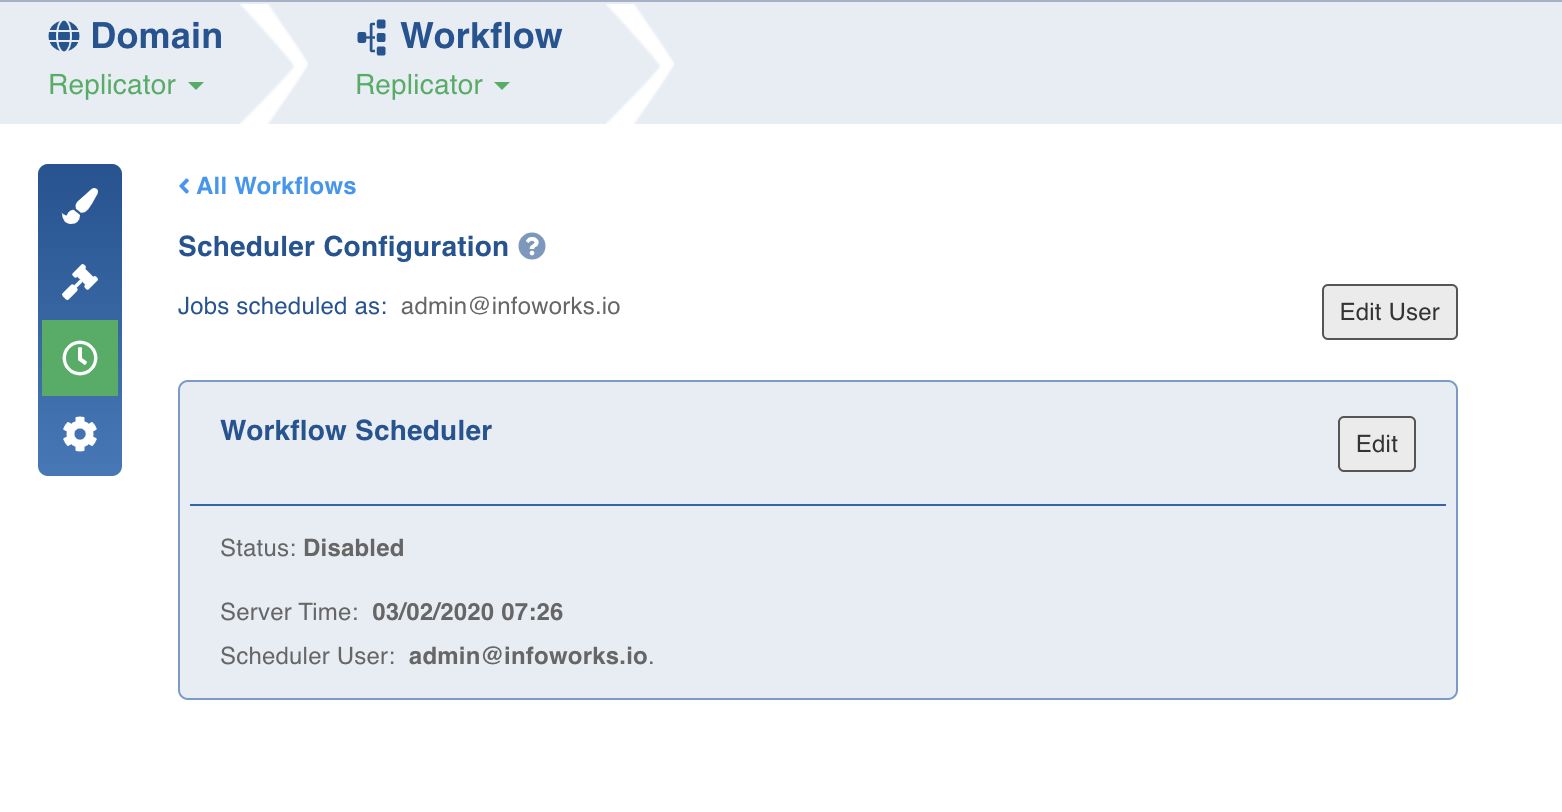
Click the Edit User button to set the user details and choose to run the schedule as the current user or a different user. If you choose to select "Different User" as an option, please provide the Email Id and the Refresh Token of the other user.
The Refresh Token can be retrieved by logging in to the user account and navigating to My Profile and clicking on Settings.
Click Save. The details set up defines the user who would run the workflow.
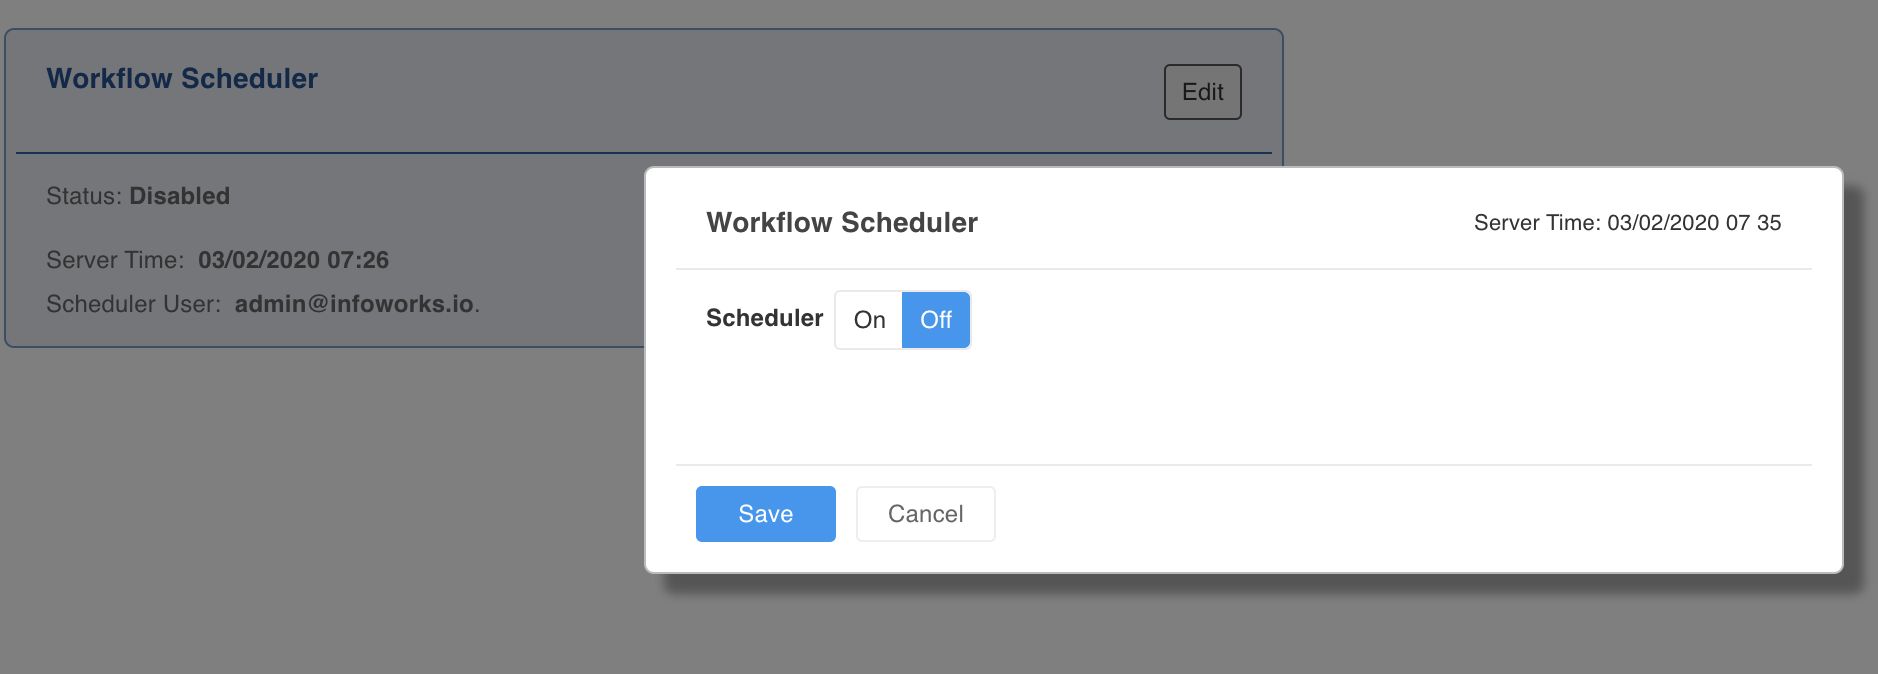
In the Workflow Scheduler section, click Edit to set the schedule for running the workflow. The Workflow Scheduler window is displayed.
Select On using the Scheduler slide button.
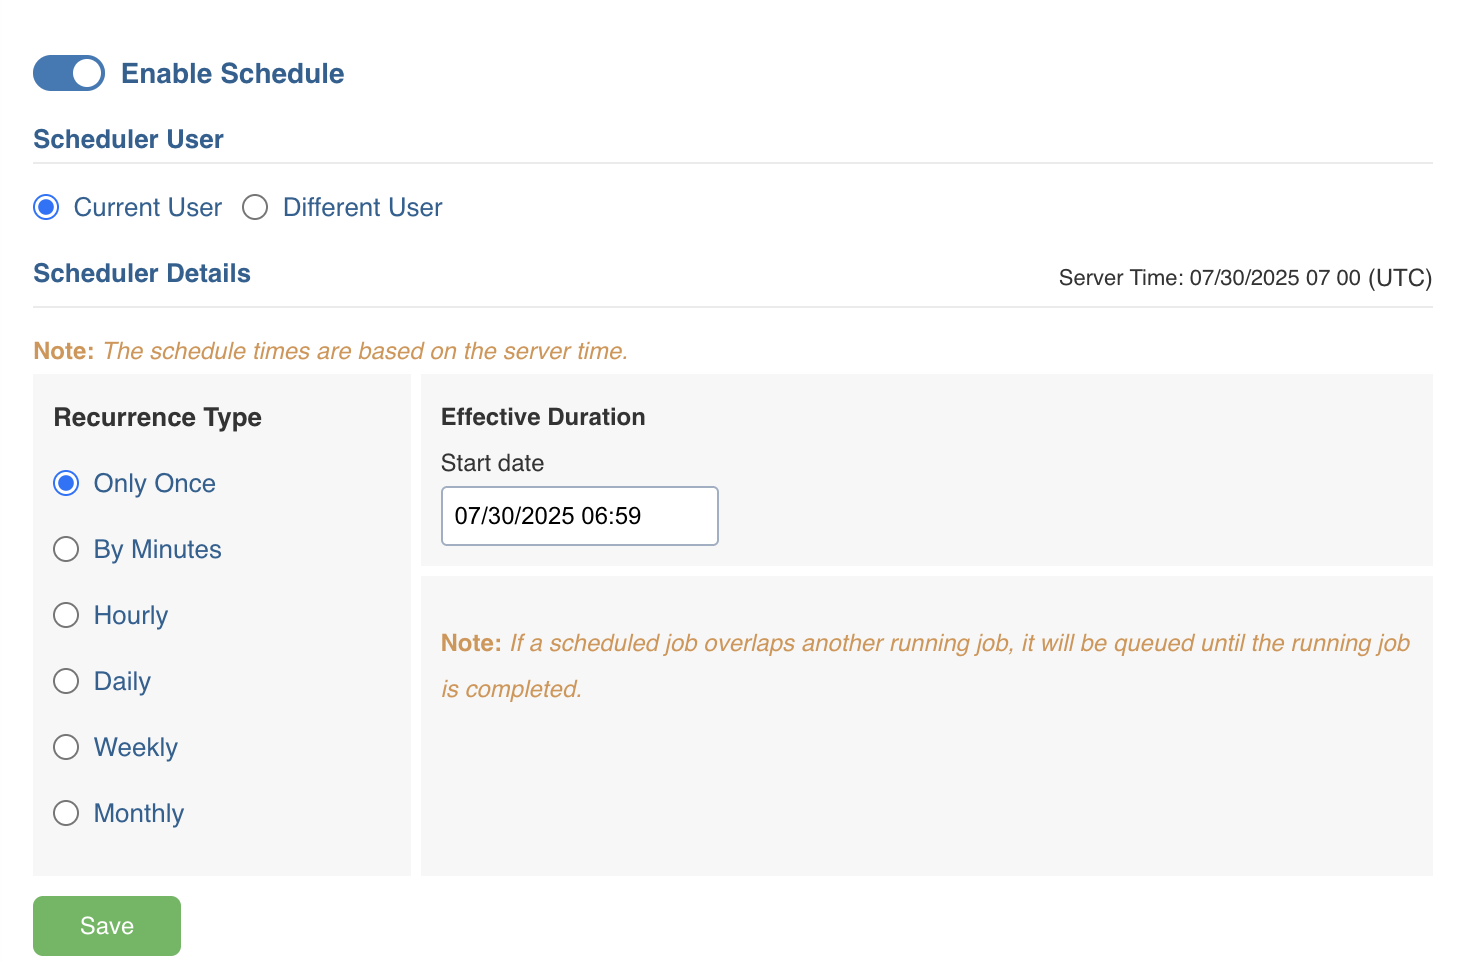
6. Select the required option for Recurrence Type and Effective Duration fields. The options available under the Recurrence Type field processes accurately as their names suggest. Effective Duration field allows you to configure the date, time, execution options, and customisations of the respective Recurrence Type field value selected.
Save the configured settings by clicking the Save button. The workflow build will be scheduled accordingly.
NOTE If a job scheduled overlaps another running job, the scheduled job will be queued until the running job is completed.
IMPORTANT
For a Schedule set to run multiple times in a day, all the executions throughout the day will be missed, if the scheduler misfires/fails at the first schedule of the day. The schedules set for the next day (or interval), will execute as configured.
For example, suppose that your schedule starts on the 1st of June, and runs every hour from 0900hrs to 1700hrs, and executes every two days. If the scheduler misses the execution at 0900 hrs on the 3rd of June, all the executions for the whole day will be missed. It will try to execute the schedule at 0900hrs to 1700hrs on the 5th of June, and at every two days interval thereafter.
Ensure to take configure dates such as 29, 30, and 31 of the month as specified days. If your interval causes the scheduler to execute in a month where the specified date does not occur, the scheduler will permanently set the date to the last available date of the month.
For example, suppose that your schedule starts on the 1st of May, at 0900 hrs, and executes on 30th and 31st of every month. This schedule will execute on the 30th of May at 0900 hrs, and on the 31st of May at 0900 hrs. It will then execute twice on 30th June, as it resets the 31st June Schedule to the last available date in June (ie., the 30th). It will then continue to execute twice on 30th July, and so on thereafter. It is recommended to use the “Last day of the month” option to execute schedules on month-ends to avoid errors.
Workflow Concurrent Runs
Admin Users can set a default value (e.g., 3) for the iw_workflow_concurrent_runs parameter in the Admin Configuration. This enables the concurrent run limiting feature for all workflows by default. Workflow owners can override this value at the workflow version level with a lower or higher limit as needed.