Exporting Data to Snowflake
Snowflake is a cloud-based data warehouse-as-a-cloud-service (SaaS for DB) that requires no hardware or software installation. The maintenance and tuning of cloud infrastructure is handled by Snowflake. It is based on a new SQL database engine with unique features and advantages over more traditional data warehousing technology approaches. |
The process to export data to a Snowflake is described in the following sections.
Define the Snowflake Target Data Connection > Create a Pipeline to Add Snowflake Node > Export the Data |
Define the Snowflake Target Data Connection
The following are the steps to configure a Snowflake data connection:
| Field | Description |
|---|---|
| Type | The type of target data connection. Select Snowflake. |
| Name | The name for the target data connection. The connection name must be unique across the specific domain. |
| Description | The description for the target data connection. |
| Account Name | The Snowflake account name. The full account name might include additional segments that identify the region and cloud platform where the account is hosted. <br>For example, xy12345 for US West (Oregon), xy12345.us-east-2.aws for US East (Ohio), and xy12345.us-east-1 US East (N. Virginia). |
| Connection URL | The URL to connect to Snowflake which specifies the hostname for the account in the format, .snowflakecomputing.com |
| User Name | The username of the Snowflake account. |
| Password | The password of the Snowflake target account. |
| Warehouse | The Snowflake warehouse name. |
| Additional Params | The optional JDBC parameters. |
- Click Save.
Create a Pipeline to Add Snowflake Node
Following are the steps to add a new pipeline to the domain:
- Click the Domains menu and click the required domain from the list. You can also search for the required domain.
- Click the Pipelines icon.
- In the Pipelines page, click the New Pipeline button.
- Enter the following details:
| Field | Description |
|---|---|
| Name | Unique name for the pipeline. |
| Description | Description for the pipeline. |
| Execution Engine | The execution engine to communicate with Hadoop daemons such as Name node, Data nodes, and job tracker to execute the Hive query on top of Hadoop file system. |
| Environment | The environment selected while creating the corresponding domain. |
| Run driver job on data plane | Select this checkbox to run the job driver on data plane. |
| Compute Cluster | The compute cluster that is spin up for each table. |
| Snowflake Warehouse | Snowflake warehouse name. |
Design a pipeline
- Following are the steps to design a pipeline:
- In the Pipelines page, click the new pipeline created. The Overview page is displayed with the pipeline version details and a blank design space.
- Click Open Editor or click on the blank design space to open the editor page.
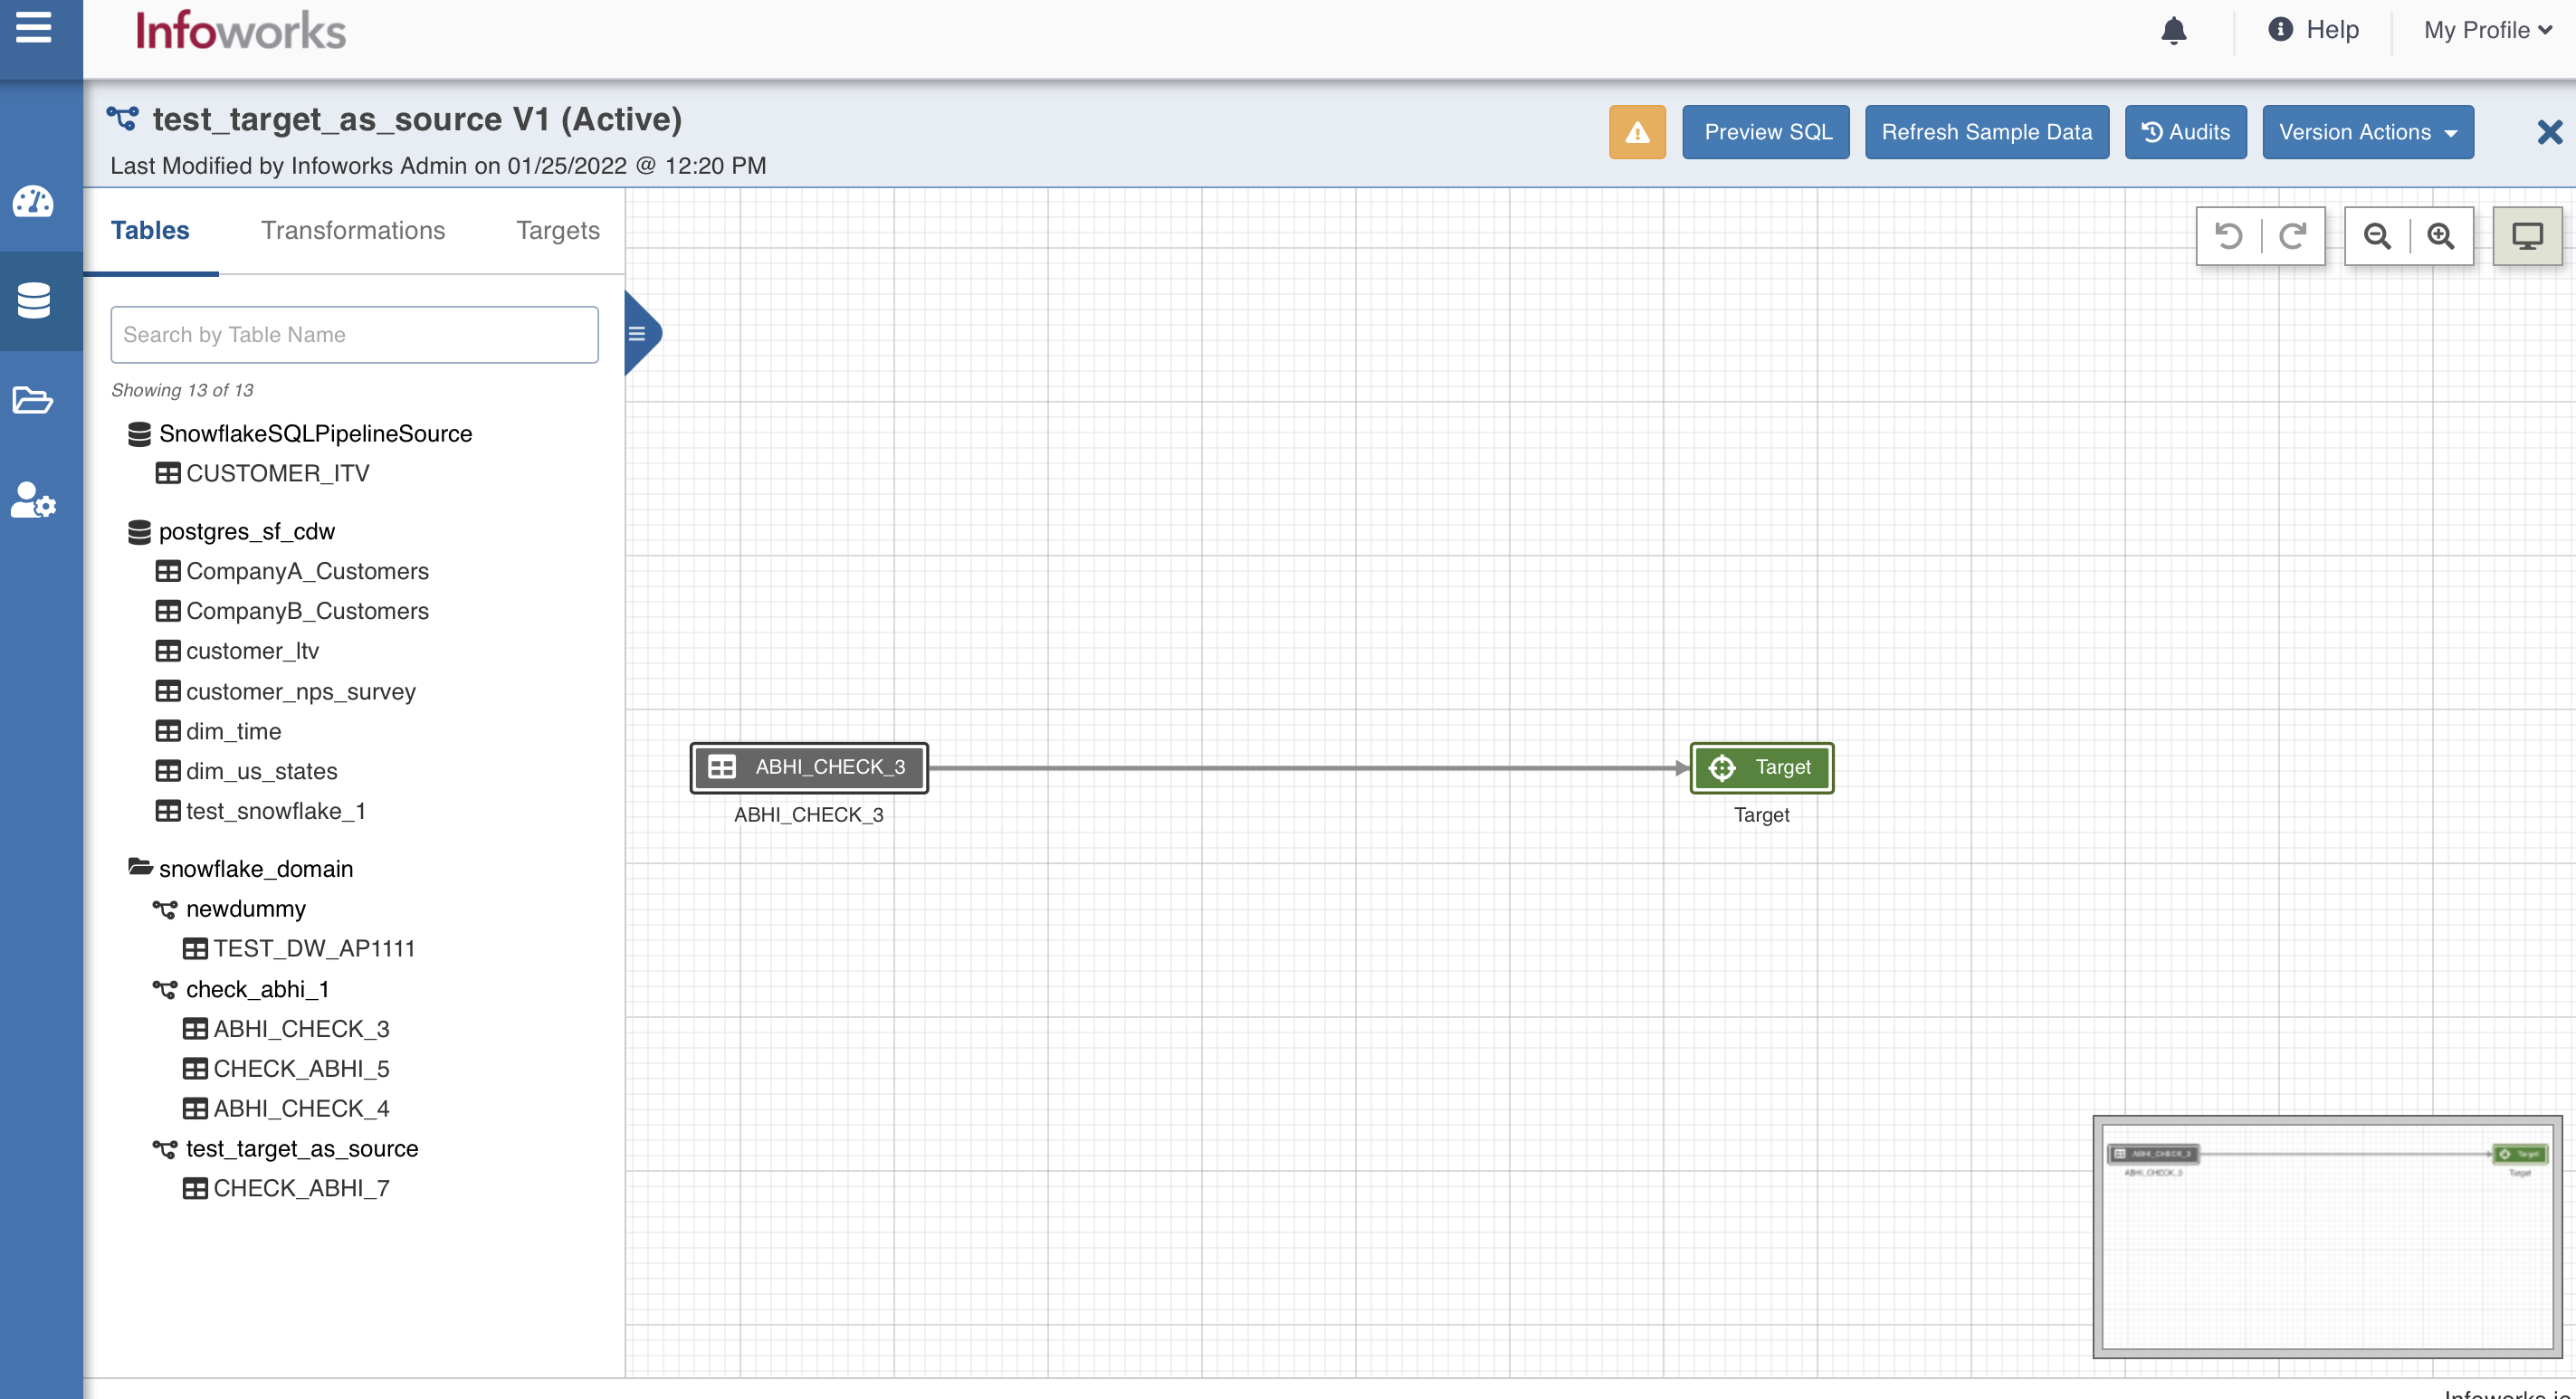
- From the left panel, drag and drop the required Source tables from the Datalake Tables tab, and SnowflakeTable node from the Transformations tab, to the pipeline editor and connect them to design a pipeline.

Snowflake Target Properties
Following are the steps to use snowflake target in pipeline:
Step 1: Double-click the Snowflake Table node. The properties page is displayed.
Step 2: Click Edit Properties, and set the following fields:
| Field | Description |
|---|---|
| Build Mode | The options include overwrite, append, merge, update, and delete. Overwrite: Drops and recreates the snowflake target. Append: Appends data to the existing snowflake target. Merge: Merges data to the existing table based on the natural key. Update (Applicable only for CDW environments): Updates the records in the existing table based on natural key or matching condition. Delete (Applicable only for CDW environments): Deletes the records in the existing table based on natural key or matching condition. Update requires a JOIN/FILTER and DERIVE node before the target, where JOIN/FILTER matches the records and DERIVE sets the required columns. Delete requires a JOIN/FILTER to match the records meant for deletion. Matching condition can be configured to use the natural keys or join condition from JOIN/FILTER node using the following advanced configuration. For Update mode: For Delete mode: |
| Reference Table | On changing sync type to append/merge, a dropdown for reference table appears. All built pipeline tables are part of the reference table option. On reference table selection, properties such as schema name, table name, HDFS path etc, are visible. The appendable/mergeable target will by default have these properties of reference table. These properties are non-editable from the target node. |
| SCD Type | Supported types are SCD1 and SCD2 |
| Staging Database Name | Staging Database name of the snowflake target. |
| Database Name | Database name of the snowflake target. |
| Create a staging database if it does not exist | Enable this option to create a new staging database with the name provided above. Ensure that the user has sufficient privileges to create a staging database in Snowflake target. |
| Create a database if it does not exist | Enable this option to create a new database with the name provided above. Ensure that the user has sufficient privileges to create a database in Snowflake target. |
| Staging Schema Name | Staging schema name of the snowflake target. |
| Schema Name | Schema name of the snowflake target. |
| Create a staging schema if it does not exist | Enable this option to create a new staging schema with the name provided above. Ensure that the user has sufficient privileges to create a staging schema in Snowflake target. |
| Create a schema if it does not exist | Enable this option to create a new schema with the name provided above. Ensure that the user has sufficient privileges to create a schema in Snowflake target. |
| Table Name | Table name of the snowflake target. |
| Natural Keys | The required natural keys for the snowflake target. |
| Query Tags | A string that is added to the Snowflake query and can be accessed via Query history in Snowflake. |
Step 3: Click Save.
Export the Data
Following are the steps to build a export the data:
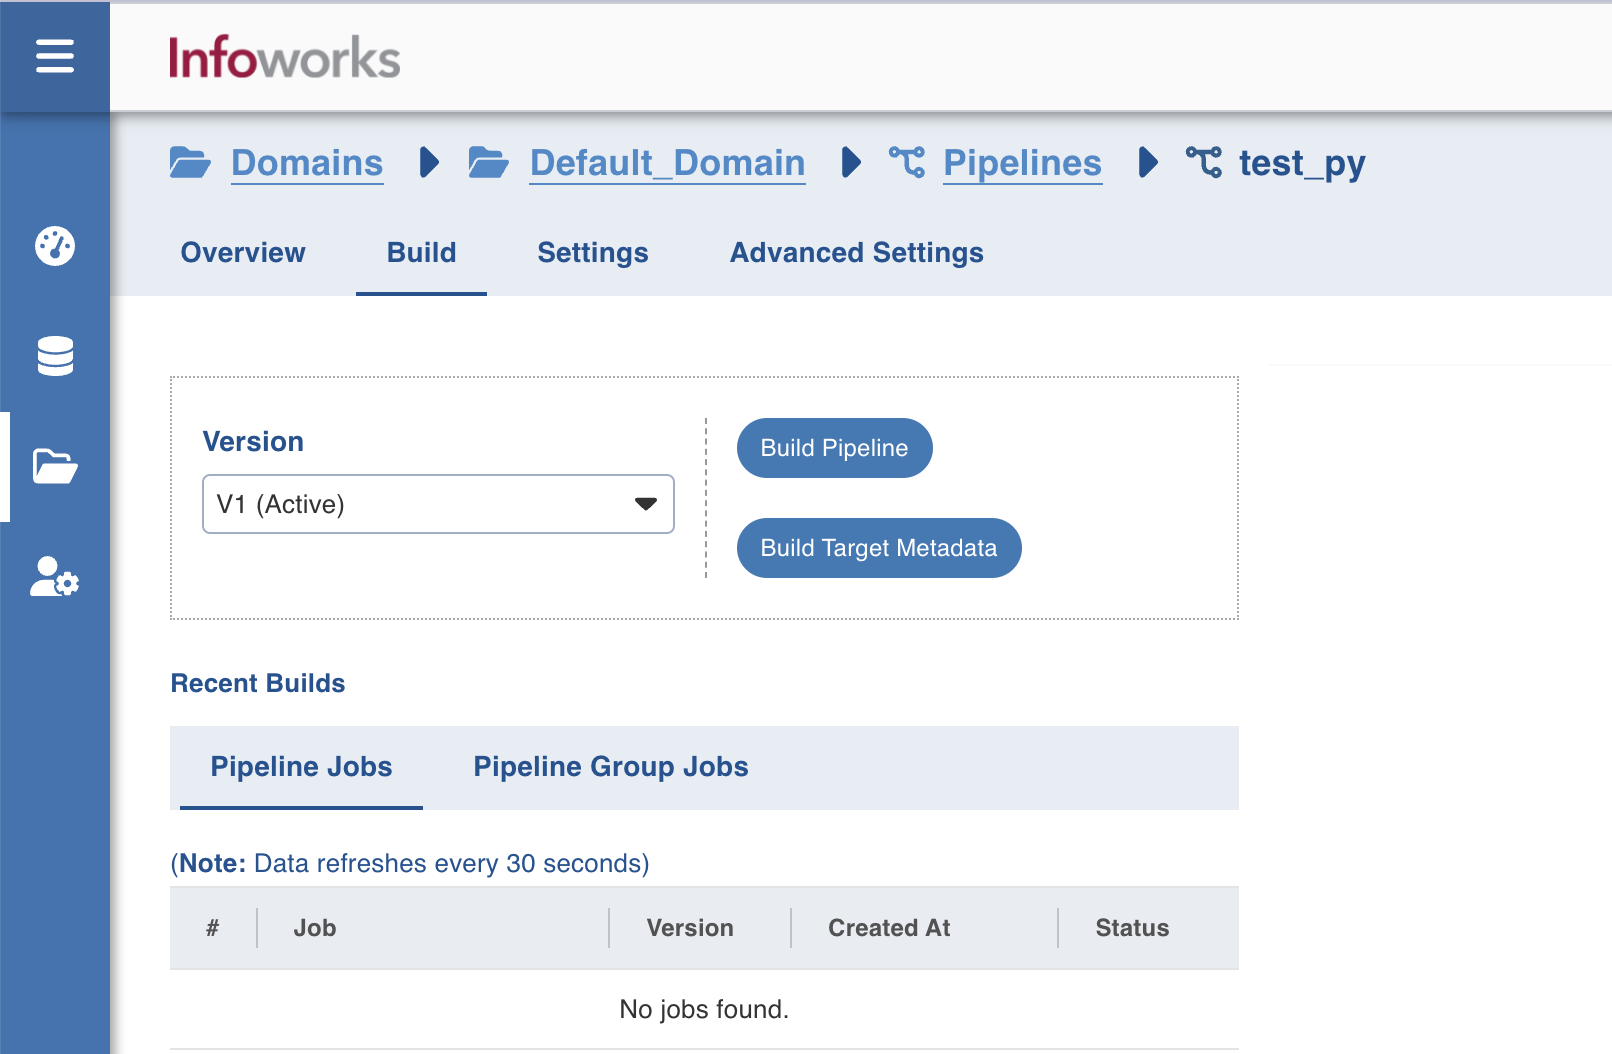
- Navigate to the required pipeline and click the Build icon.

2. Select the Version and click Build Pipeline to build the pipeline version.
- You can click the Build Target Metadata button to enable import of multiple, sequential pipelines with export configuration.
- Click any of the existing builds under the Recent Builds section to view the detailed information of the job. You can view the summary. You can also download the logs of the job.
Best Practices
For best practices, see Data Transformation Target Configurations.
Snowflake Spark Configurations
Snowflake Spark connector is used to write data to a table in Snowflake. Spark connector writes the data to a temporary location and then uses the Snowflake COPY command to load the data to a table in Snowflake. Snowflake deletes the intermediate data after loading to the Snowflake table.
Snowflake Intermediate Storage
The temporary location where Snowflake writes the intermediate data can be internal or external storage. The internal storage is created and managed by Snowflake while the external storage is created and managed by the user. For more details on Snowflake internal and external storage, see Data Transfer.
The Snowflake Spark connector uses the Snowflake connection details to write to the Snowflake.
You can use the following configuration to set additional options to the connector.
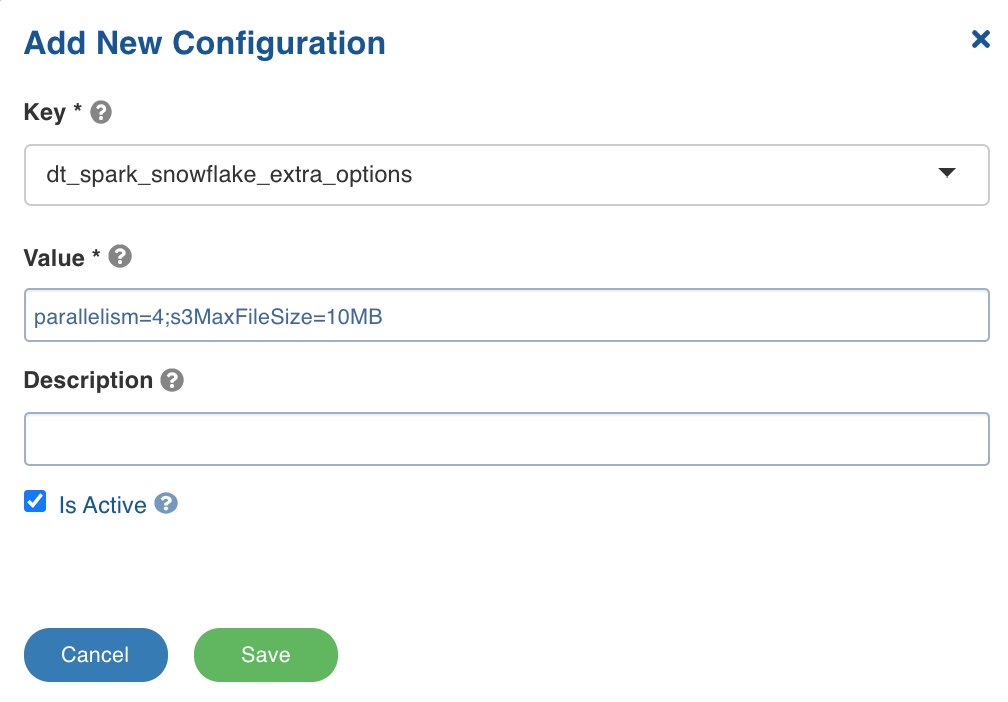
dt_spark_snowflake_extra_options: The configuration to set additional options to the Snowflake connector using semicolon-separated (;) values. For example, the value can be parallelism=4;s3MaxFileSize=10MB.
You can set this key in the pipeline Settings > Advanced Configurations > Add Configuration section.

Following are some of the Snowflake Spark connector additional configurations:
parallelism: The size of the thread pool to use for data upload and download between Snowflake and Spark. The default value is 4.s3MaxFileSize: The size of the file used when moving data from Snowflake to Spark. The default value is 10MB.continue_on_error: The option to control whether the COPY command must abort if the data is invalid. The values include ON and OFF.truncate_table: The option for Spark connector to drop and create a new table in the case of overwrite mode. To retain the schema of the target table, set thetruncate_table=on.
For other options, see Snowflake Additional Options.
dt_spark_snowflake_extra_options configuration.