Combining Data - Union
The Union node allows you to combine the data from two or more tables (nodes). |
Following are the steps to apply the Union node in a pipeline:
Drag and drop the Union node from the Transformations section to the pipeline editor page.
Connect the source node to the Union node.
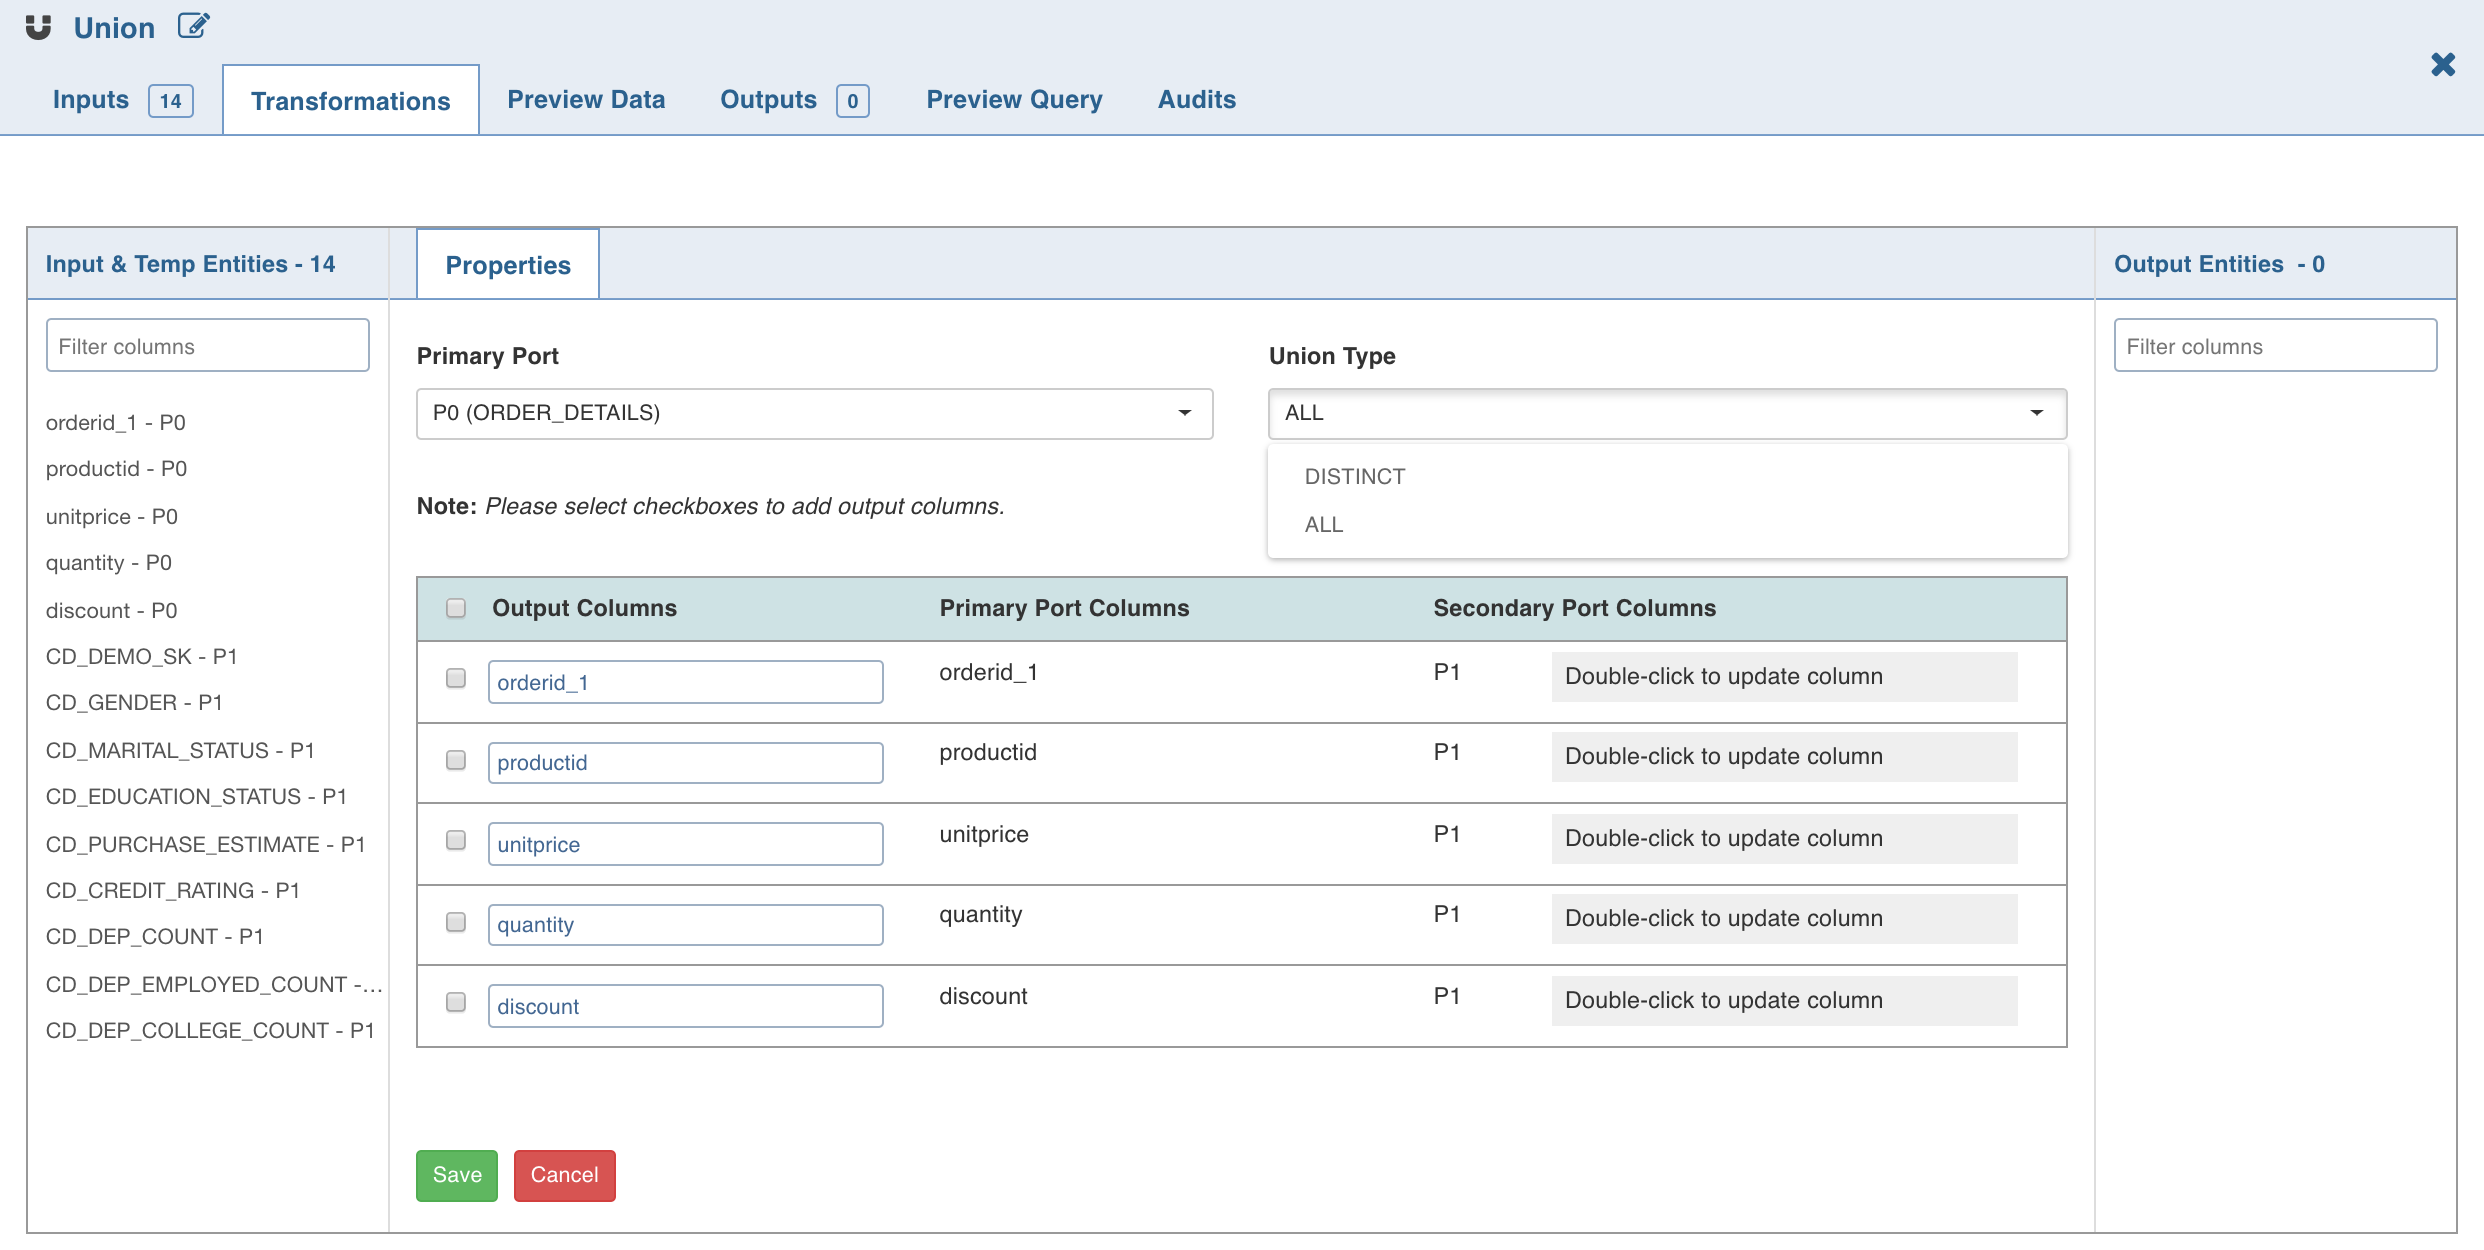
Double-click the Union node. The properties page is displayed.
Click Edit Union to add union data. The tables (nodes) involved in the union condition are displayed along with column name section.
Select the following details and click Save:
- Primary Port to which the tables will be combined.
- Type: The ALL option adds all the rows to the union node. DISTINCT adds only the distinct rows to the union node.
- If required, rename the columns under Column Name. The Column Name includes the columns of the Primary Table and only these names can be edited.
- Map/rearrange the column order of the other tables (based on name) using edit. The edit feature is not available for primary tables.
- Use the checkboxes on the left of primary table column names to add or remove the columns in the union node.

The changes made to the upstream nodes such as Aggregate and Distinct nodes, connecting to the Union node may not propagate into the Union node. Workaround: To have the changes propagated in the Union node, click Edit Union and remap it.