For an easy workflow configuration migration, the sources and table groups, pipelines and domains, cubes and domains in the exported file must exactly match the names in the environment where the workflow configuration is being imported. It is also possible to manually map the respective sources and table groups, pipelines and domains, cubes and domains, in the exported file to the target import workflow.
This feature:
- Allows you to map tablegroup to any tablegroup in the source.
- Allows you to map pipeline to any pipeline in the domain.
- Allows you to map cube to any cube in the domain.
Exporting Workflow Configuration
To export a workflow configuration, follow these steps:
Click the Domains menu and click the domain where the workflow is created.
On the Workflows page of the respective domain, click the workflow for which configuration must be migrated.
Click the Settings icon.
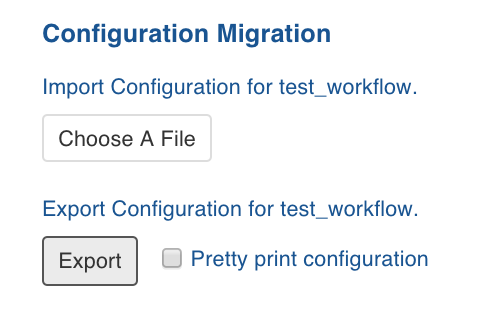
On the Settings page, locate the Configuration Migration section.
Click Export. The workflow configuration gets downloaded in the .json format.

Importing Workflow Configuration
To import a workflow, follow these steps in the target environment:
Click the Domains menu and click the domain where the workflow is created.
On the Workflows page of the domain, click the workflow for which configuration must be migrated.
Click the Settings icon.
In the Settings page, locate the Configuration Migration section.
Click Choose A File and select the required workflow configuration file.
The following page is displayed:
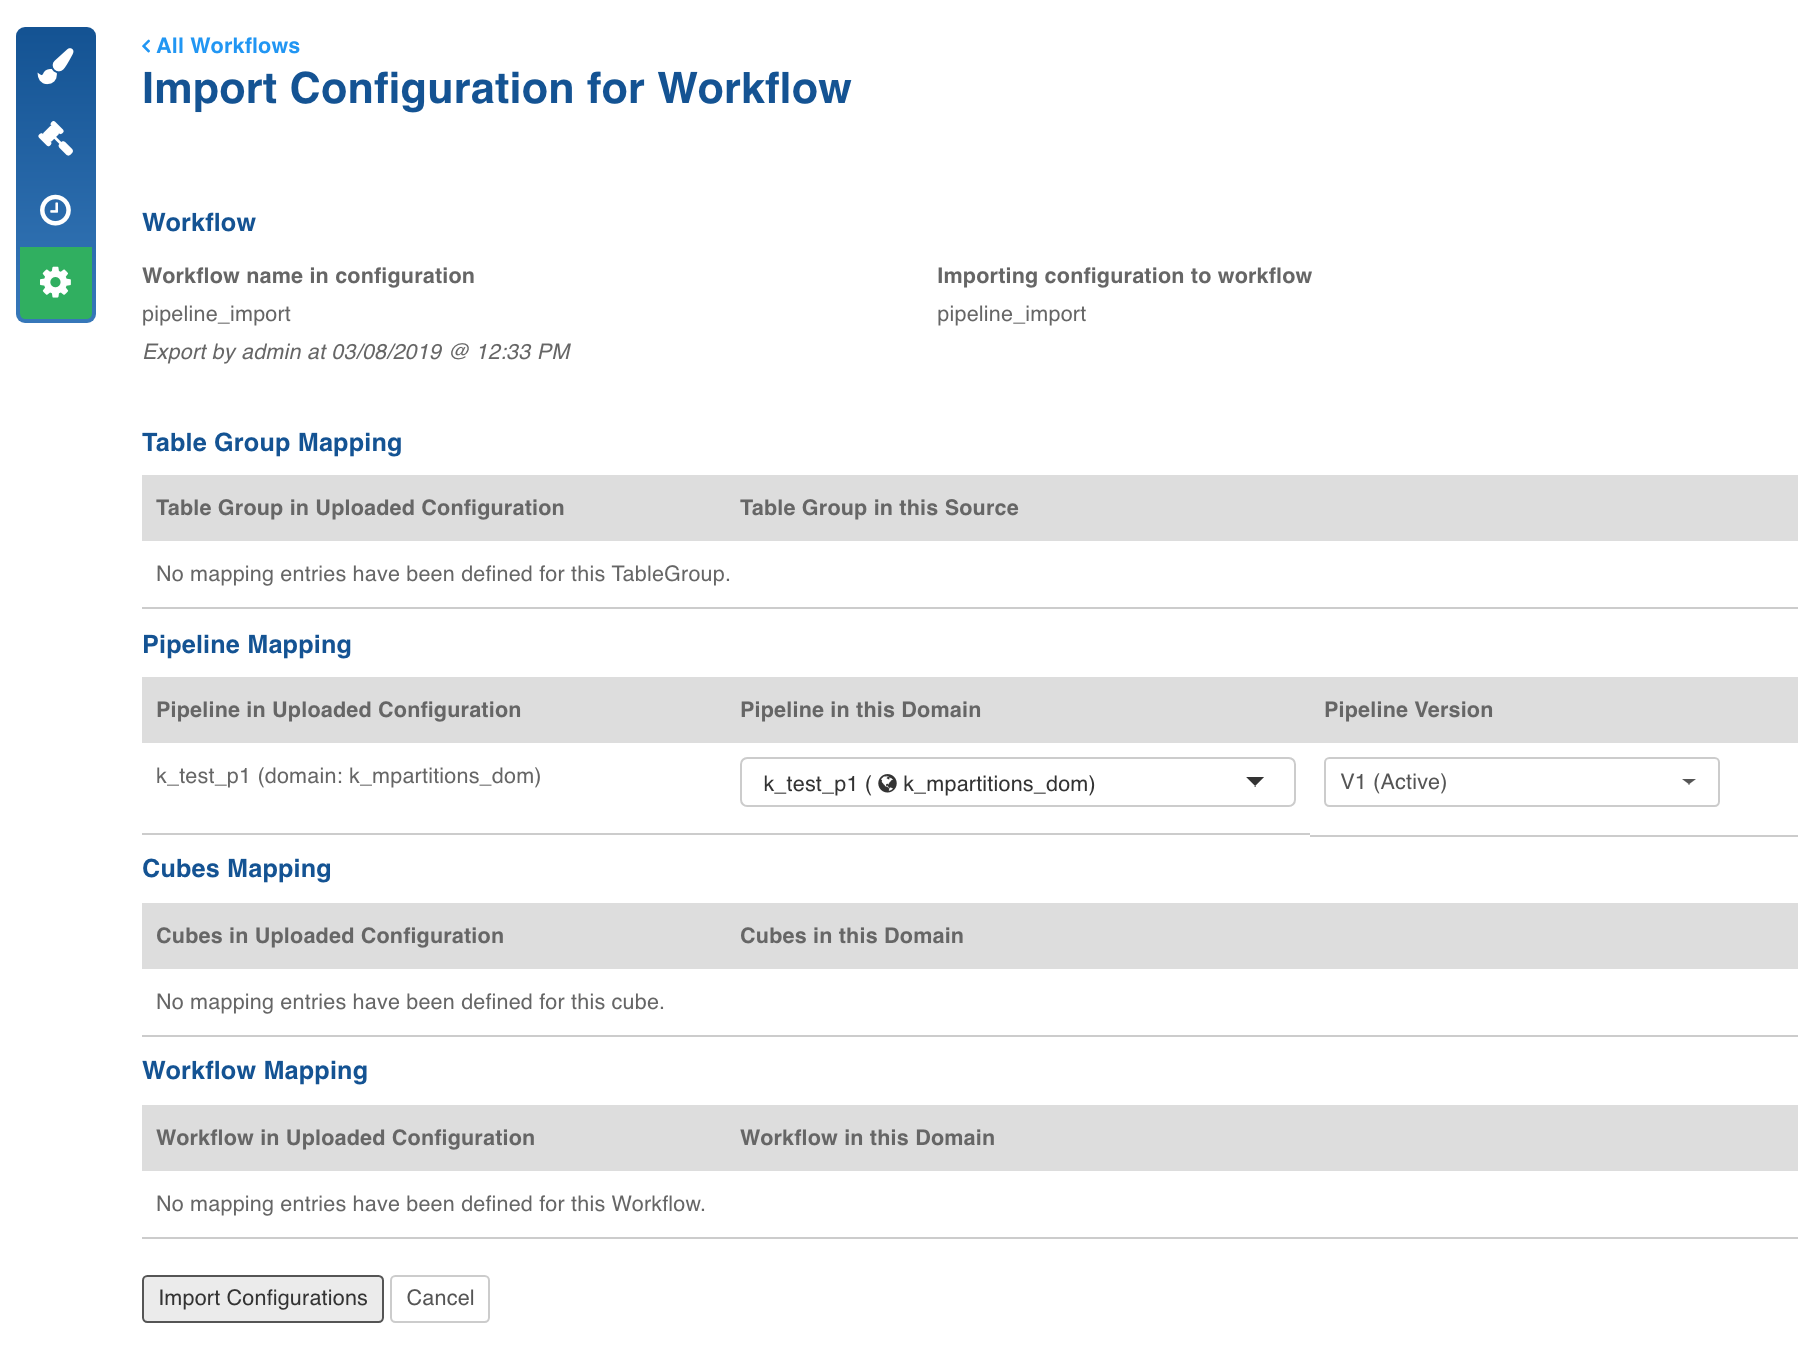
If a table group, pipeline, cube or workflow mapping is not available, an error is displayed next to the mapping. In this case, select the desired option from the respective drop-down menu.
Follow the steps below to manually map the entities from the import file to the target environment:
Select the required table group from the Table Group in this Source drop-down list to map it with the Table Group in the Uploaded Configuration.
Select the required pipeline from the Pipeline in this Domain drop-down list to map it with the Pipeline in the Uploaded Configuration.
Select the required cube from the Cubes in this Domain drop-down list to map it with the Cube in the Uploaded Configuration.
Select the required workflow from the Workflow in this Domain drop-down list to map it with the Workflow in the Uploaded Configuration.
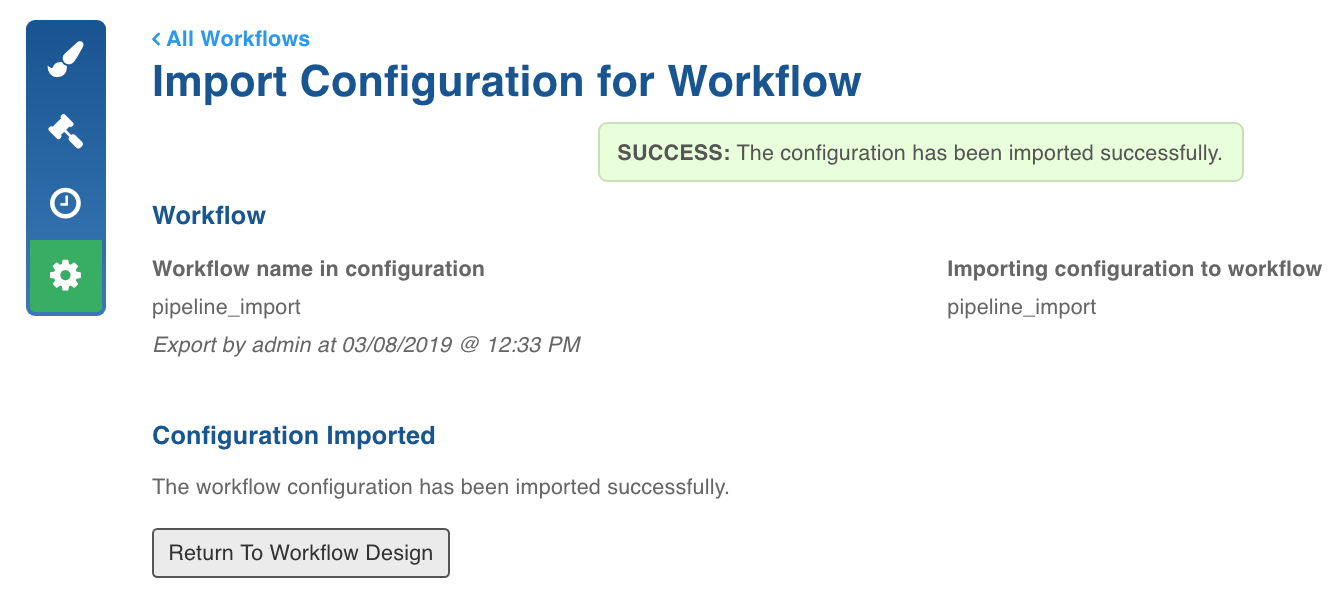
Click Import Configurations. The screen with a success message is displayed.
- Importing a workflow which is already opened in a workflow editor is not supported.
- Modifying the design of workflow or importing workflow configuration with a different design when an instance of the workflow is already running might lead to intermittent failures.
- Existing workflow metrics for all workflow runs prior to 2.6.0 will not be available.
Orchestrator Log Files Cleanup
To archive old logs, and to avoid disk space issues while running a workflow, cleanup orchestrator log files using the following steps:
- Stop the orchestrator services using the following command:
$W_HOME/bin/stop.sh orchestrator - Ensure that no orchestrator services are running using the following command:
ps -ef | grep airflow
ps -ef | grep orchestrator
- If the processes is still running, use the following command to kill the process:
pkill -f airflow; pkill -f orchestrator - Cleanup the log directories using the following commands:
To delete the complete logs for all historical dates:
rm -rf $W_HOME/orchestrator-engine/logs/scheduler/*To delete the logs for specific historical dates:
rm -rf $W_HOME/orchestrator-engine/logs/scheduler/<date folders to remove>Cleanup the log files using the following commands:
rm -rf $W_HOME/orchestrator-engine/airflow-scheduler.logrm -rf $W_HOME/orchestrator-engine/airflow-scheduler.out
Deleting Workflow
In the Settings page, click the Delete button to delete the workflow.

If the workflow impacts any other workflow, a pop up message indicating the impact will be displayed.