
NOTE If you have not installed Azure Kubernetes Service, refer to Installing Azure Kubernetes Service (AKS).
Prerequisites
Package Installer | Version Used |
|---|---|
Kubernetes | 1.23 |
Kubectl | 1.21.x-1.23.x |
Helm | 3.7.x-3.9.x |
Ingress-Controller | 4.2.5 |
Python | 3.8 |
NOTE
If you are using MAC OS to deploy Infoworks on to cluster, you must install the following package:
Package Installer | Version Used |
|---|---|
GNU-SED | 4.8 or more |
Ensure that AKS Kubernetes cluster is connected to internet.
Set up AKS Kubernetes cluster. For more information, refer to the Azure Docs.
Ensure that Kubernetes version should be 1.23.x.
Infoworks recommends creating the AKS Kubernetes cluster with private access and a VM as a Bastion host with Ubuntu 20.04 OS should be created within the VPC.
To use an external Azure Container Registry (ACR) for pulling the images for Infoworks setup, ensure that all the required images are pushed to the the specified external registry and it is integrated with AKS. This is applicable if
IW_HOSTED_REGISTRYis set to false. To get the required container images, contact your Infoworks representative.If INGRESS_CONTROLLER_CLASS is set to nginx, then Infoworks recommends setting up ingress-controller externally with the required configurations. To set up nginx ingress-controller externally, refer to External Setup for Ingress Controller.
Install Azure CLI, Helm, and Kubectl on the Bastion host VM instance.
Verify the following prerequisites
Run
az versionto ensure that az is installed.Run
helm versionto ensure that Helm is installed.Run
kubectl versionto ensure that Kubectl is installed.Run
python3 -Vto ensure that python (with venv) is installed.Run
sudo apt install python3-venvto install python Virtual Environment package.
Set up Kubernetes Cluster in AKS for connection using
az
linkerd is the service mesh currently supported by Infoworks. At the time of setup, the Linkerd latest version is 2.12. To install Linkerd, refer to Linkerd documentation from step 0-3.
NOTE The following procedure is a one-time activity for the user.
Step 1: Execute az login.
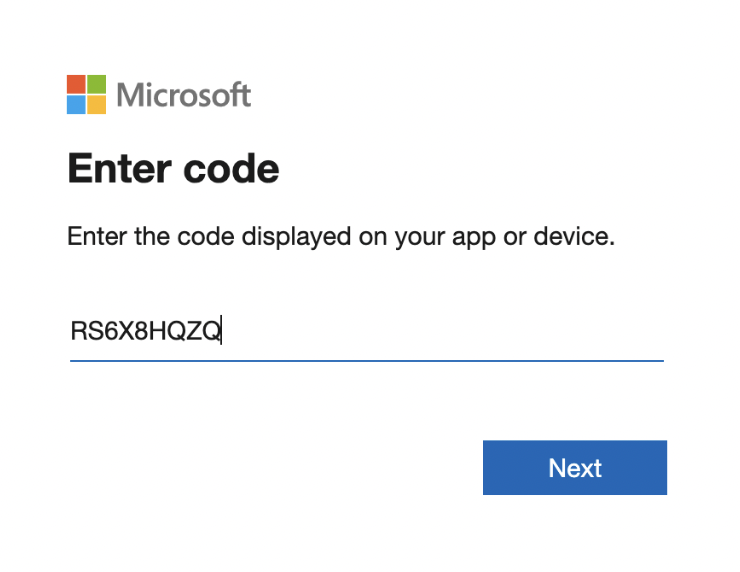
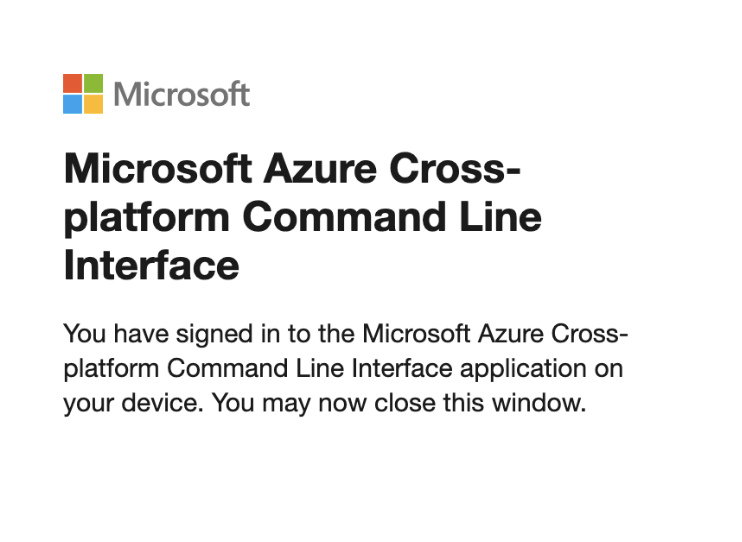
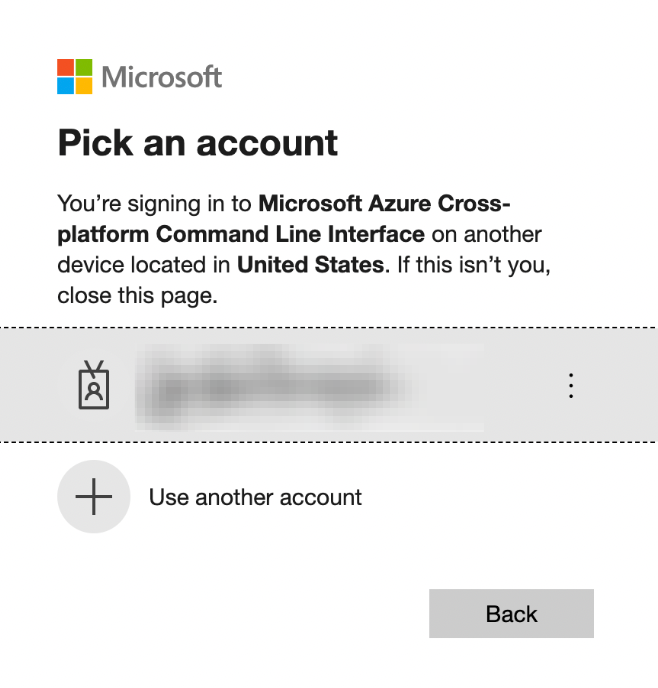
After successful verification, the following confirmation message appears.
Step 2: Identify the cluster name, zone/region, and project you want to connect to. Run the following command with these details:
Persistent Storages
NOTE Azure Kubernetes Service RBAC Cluster Admin is required to run Infoworks installation.
Persistence ensures to persist the data even if a pod restarts or fails due to various reasons. Infoworks needs the following persistent storages to be configured:
Databases (MongoDB and Postgres) and RabbitMQ
Infoworks Job Logs and Uploads
Run the following command to fetch the storage classes:
NOTE The storageclass should have the reclaim policy Retain.
Storage Class Category | Comments |
|---|---|
azurefile-premium | It comes along with the cluster. It is recommended for NFS (logs, uploads, etc.). |
azurefile-csi & azurefile-csi-premium | It comes along with the cluster if CSI driver is enabled. |
managed-premium | It comes along with the cluster. It is recommended for databases. |
managed-csi & managed-csi-premium | It comes along with the cluster if CSI driver is enabled. |
Installing Infoworks on Kubernetes
Take a backup of values.yaml file before every upgrade.
NOTE Assuming IW_HOME=/opt/infoworks.
NOTE The following steps must be performed by the user who has completed the prerequisites procedure mentioned earlier.
Step 1: Create Infoworks directory under /opt.
sudo mkdir -p /opt/infoworks
Step 2: Change permissions of /opt/infoworks directory to a desired user.
sudo chown -R <user>:<group/user> /opt/infoworks
Step 3: Change the directory path to /opt/infoworks.
cd /opt/infoworks
Step 4: To download Infoworks Kubernetes template, execute the following command:
Step 5: Extract the downloaded file.
Step 6: Navigate to the extracted directory iw-k8s-installer.
Step 7: Open configure.sh file in the directory.
Step 8: Configure the following parameters as described in the table, and then save the file
NOTE Namespace and release names should not contain underscore (_). Release names should not start with numbers.
NOTE If you want to enable SSL before installing Infoworks, refer to Enabling SSL section.
The following configurations are generic configuration for the Infoworks deployment.
Field | Description | Details |
|---|---|---|
IW_NAMESPACE | Namespace of Infoworks Deployment | This field is autofilled. However, you can also customize the namespace as per your requirement. |
IW_RELEASE_NAME | Release Name of Infoworks Deployment | This field is autofilled. However, you can also customize the release name as per your requirement. |
IW_CLOUD_PROVIDER | Name of the cloud provider of Kubernetes cluster | Enter azure. |
NFS_STORAGECLASS_NAME | Name of the NFS storage class | Enter a valid Storage class name. Ex: azurefile-premium . |
DB_STORAGECLASS_NAME | Name of the Database Storage Class | Enter a valid Storage class name. Ex: managed-csi |
INGRESS_ENABLED | This field indicates enabling Ingress for Infoworks Deployment | Select true or false. Default: true. Infoworks requires you to select true. |
INGRESS_CONTROLLER_CLASS | Name of the ingress controller class | Default value: nginx. |
INGRESS_TYPE | Name of the ingress type | Two values: external and internal. Default value: internal. external: Infoworks app is exposed to internet. internal: Infoworks app is restricted to internal network. |
INGRESS_AUTO_PROVISIONER | This field indicates installing ingress controller provisioner | Select true or false. Default: true. If ingress-controller is already installed, set this as false. NOTE Infoworks recommends setting up ingress-controller externally with the required configurations. To set up ingress-controller externally, refer to External Setup for Ingress Controller. |
IW_DNS_NAME | DNS hostname of the Infoworks deployment | Enter a valid DNS name. NOTE If ingress is enabled, make sure to create the respective DNS records to the IP address/DNS address of LoadBalancer for DNS to resolve in your Domain service provider. |
IW_SSL_PORT | This field enables port and protocol for SSL communication | Select true or false. Default: true |
IW_HA | This field enables high-availability of Infoworks deployment. | Select true or false. Default value: true. Infoworks recommendation: true i.e. enabling HA. |
USE_GCR_REGISTRY | This field enables separate registry for cloud. GCR is being used by Infoworks by default. To override cloud specific registry images, provide input "false". | Select true or false. Default value: true. |
External Container Registry Configurations
The following table lists the External Container Registry Configurations for Infoworks Setup. These configurations should be set only if the Container Registry used to pull the images is different from the one hosted by Infoworks.
Field | Description | Details |
|---|---|---|
IW_HOSTED_REGISTRY | This field indicates if the Container Registry hosted by Infoworks | Select true/false. If the registry is different from the one hosted by Infoworks, set the value to false. |
The following fields are valid if IW_HOSTED_REGISTRY set to false
Field | Description | Details |
|---|---|---|
IMAGES_BASE_REGISTRY | The field is about Container Registry Server URL hosted by the user. | Provide the Container Registry Server URL. NOTE Ensure to integrate the Container Registry to the AKS Cluster. |
IMAGES_SECRET_NAME | Provide the image secret | Provide the name of the secret created to authorize and authenticate (if any) to access all the Infoworks Images. If Container Registry is integrated with the AKS cluster, then no authorization is required and you should keep the value for this field empty. |
Service Mesh Configurations for Security
NOTE Infoworks supports linkerd as of now.
Field | Description | Details |
|---|---|---|
SERVICE_MESH_ENABLED | This field enables to configure service mesh to Infoworks deployment | Select true or false. Default value: false. |
SERVICE_MESH_NAME | This field is the name of the service mesh. | Provide the name of the service mesh. Default value: linkerd |
NOTE
The following are the External MongoDB Configurations for MongoDB Atlas. These configurations are not required if MongoDB is internal.
Field | Description | Details |
|---|---|---|
EXTERNAL_MONGO | This field enables external mongoDB support for Infoworks deployment | Select true or false. Default value: false. |
The following fields are applicable if EXTERNAL_MONGO is set to true.
Fields | Description | Details |
|---|---|---|
MONGO_SRV | This field enables DNS connection string for MongoDB Atlas | Select true or false. Default value: true (If external MongoDB Atlas is enabled) |
MONGODB_HOSTNAME | It is the hostname of MongoDB Atlas. | Provide the hostname of the MongoDB Atlas from the connection endpoint string. NOTE Infoworks recommends enabling private connection endpoint for best practices. |
MONGODB_USERNAME | This is MongoDB Atlas Username to connect to Atlas | Provide the MongoDB username |
MONGODB_USE_SECRET_PASSWORD | This field enables user to configure MongoDB password in the secrets before installing Infoworks. Steps will be documented | Select true or false. Default Value: false. If value is false then we need ENCRYPTED_PASSWORD field to be filled, else secret name is required. (Optional value) |
MONGODB_SECRET_NAME | This is the name of the MongoDB encrypted password stored in secrets. (Manual Creation) | User will create the secret and has to provide the name of the secret. (Optional value) Keep it empty if not sure. For more information, refer to the "For MongoDB" section mentioned below. Limitation Ensure that your password for the secret does not contain any special characters. For example, #, $, @, /, &, :, ?, and [ ]. |
MONGODB_ENCRYPTED_PASSWORD | This field is encrypted MongoDB password | Keep it empty if not sure. During Installation password prompt will be displayed and then Infoworks encrypts the password on the fly. Limitation Ensure that your password does not contain any special characters. For example, #, $, @, /, &, :, ?, and [ ]. |
MONGO_FORCE_DROP | This field delete all the data in the MongoDB Atlas and initialize the data freshly. | Select true or false. Default value: false. Infoworks recommends to keep the value to false always. |
INFOWORKS_MONGODB_DATABASE_NAME | This field indicates the name of the Infoworks MongoDB database in Atlas. | Provide the name of the database for Infoworks setup. |
INFOWORKS_SCHEDULER_MONGODB_DATABASE_NAME | This field indicates the name of the Infoworks scheduler MongoDB database in Atlas | Provide the name of the scheduler database for Infoworks setup. |
External POSTGRESDB Configurations for Postgres
NOTE
The below configurations are not required if PostgresDB is internal.
Field | Description | Details |
|---|---|---|
EXTERNAL_POSTGRESDB | This field enables external PostgresDB support for Infoworks deployment | Select true or false. Default value: false. |
Below fields are applicable if EXTERNAL_POSTGRESDB is true.
Field | Description | Details |
|---|---|---|
POSTGRESDB_HOSTNAME | Postgres connection endpoint | Provide the hostname of the Postgres. Infoworks recommends providing a private connection endpoint. |
POSTGRESDB_USERNAME | This is Postgres username to connect | Provide the Postgres username |
POSTGRESDB_USE_SECRET_PASSWORD | This field enables user to configure Postgres password in the secrets before installing Infoworks. Steps will be documented | Select true or false. Default Value: false. If value is false then we need ENCRYPTED_PASSWORD field to be filled, else secret name is required. (Optional value) |
POSTGRESDB_SECRET_NAME | This is the name of the Postgres encrypted password stored in secrets. (Manual Creation) | User will create the secret and has to provide the name of the secret. (Optional value) Keep it empty if not sure. For more information, refer to the "For Postgres" section mentioned below. |
POSTGRESDB_ENCRYPTED_PASSWORD | This field is encrypted Postgres password | Keep it empty if not sure. During Installation password prompt will be displayed and then Infoworks encrypts the password on the fly. |
INFOWORKS_POSTGRESDB_DATABASE_NAME | This field indicates the name of the Infoworks Postgres database in the Postgres server. | Provide the name of the database for Infoworks setup. NOTE Hyphens are not allowed. |
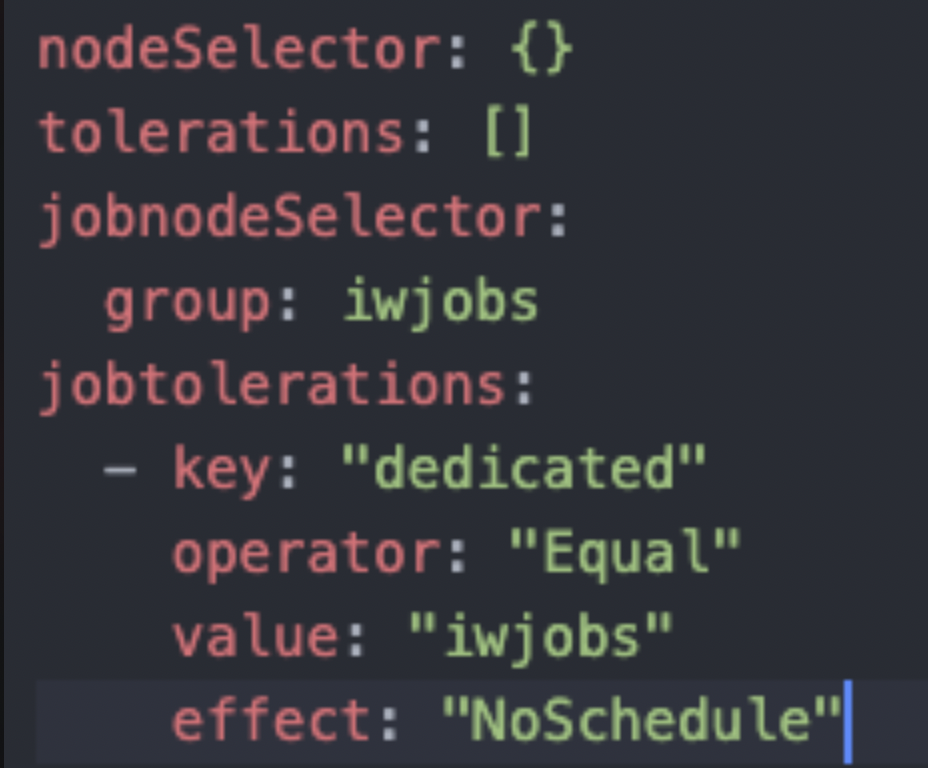
Step 9 (Optional): To run Infoworks jobs on separate workloads, edit values.yaml file under infoworks folder. Specifically, you need to edit jobnodeSelector and jobtolerations fields based on the node pool you created in the Installing Azure Kubernetes Service.
NOTE If you want to run Infoworks services on other node pools, you can edit nodeSelector and tolerations fields.
Step 10 (Optional): To define the PaaS passwords, there are two methods:
First method
The password must be put in pre-existing secrets in the same namespace.
For MongoDB
(i) Set MONGODB_USE_SECRET_PASSWORD=true
(ii) To create the custom secret resource, run the following commands from the iw-k8s-installer directory.
NOTE Set the MONGODB_SECRET_NAME and IW_NAMESPACE according to the inputs given to the automated script. <mongo-password> is the plaintext password.
For Postgres
(i) Set POSTGRESDB_USE_SECRET_PASSWORD=true
(ii) To create the custom secret resource, run the following commands from the iw-k8s-installer directory.
NOTE Set the POSTGRESDB_SECRET_NAME and IW_NAMESPACE according to the inputs given to the automated script. postgres-password is the plaintext password.
Second Method
You can give the password to the Automated Script, which will encrypt it to store it in the templates.
Step 11 (Optional): Enable NodeSelector/Toleration and Custom annotations etc. by editing values.yaml file manually before deploying Infoworks deployment.
Step 12: To run the script, you must provide execute permission beforehand by running the following command.
Step 13: Run the script.
NOTE If you see this error, "INSTALLATION FAILED: failed post-install: timed out waiting for the condition", you can ignore this as it does not affect Infoworks installation.
Since the above installation was configured for ingress-controller, run the following command to get the domain mapping done.
NOTE Make sure to enable DNS mapping for IP address as per the above sample output.
Get the application URL by running these commands: http://sample.infoworks.technology
Enabling Linkerd Service Mesh for Ingress Controller
To enable the communication between the ingress controller and the infoworks pods via linkerd service mesh, perform the following steps:
There are two options to enable the communication which depends on the method by which ingress controller was set up.
Option 1 - Infoworks deployed the ingress controller.
If INGRESS_AUTO_PROVISIONER is set to true during installation:
Step 1: Retrieve Name of the nginx deployment.
NOTE Set the IW_NAMESPACE according to the inputs given to the automated script.
Output: This prints the name of the ingress-controller pod.
Step 2: Edit nginx deployment.
Step 3: Update .spec.template.metadata.annotations (ensure that the full yaml path is updated, not just the annotations field) and save this file.
Step 4: Wait for the ingress-controller pods to be updated.
Option 2 - User deployed the Ingress Controller
If INGRESS_AUTO_PROVISIONER is set to false during installation, refer to the official Linkerd documentation to enable service mesh for your corresponding ingress controller.
Enabling SSL
If you set INGRESS_CLASS to nginx, add SSL Termination in the TLS section of values.yaml file either before running the automated script or after the deployment.
Step 1: Log in to Linux machine on the latest Debian-based OS.
Step 2: Ensure libssl-dev package is installed.
Step 3: Provide DNS Name for Infoworks deployment
Generating Self-Signed SSL Certificate:
To generate SSL, run the following commands:
NOTE Refer the following commands to replace "Infoworks.domain" and "subdomain.infoworks.domain" keywords with required domain and subdomain name.
Keep a note of server.crt and server.key files for self-signed certificates for Nginx SSL Termination and provide the valid values for ingress_tls_secret_name and namespace_of_infoworks.
Run the following command to add the tls certificates to the Kubernetes cluster.
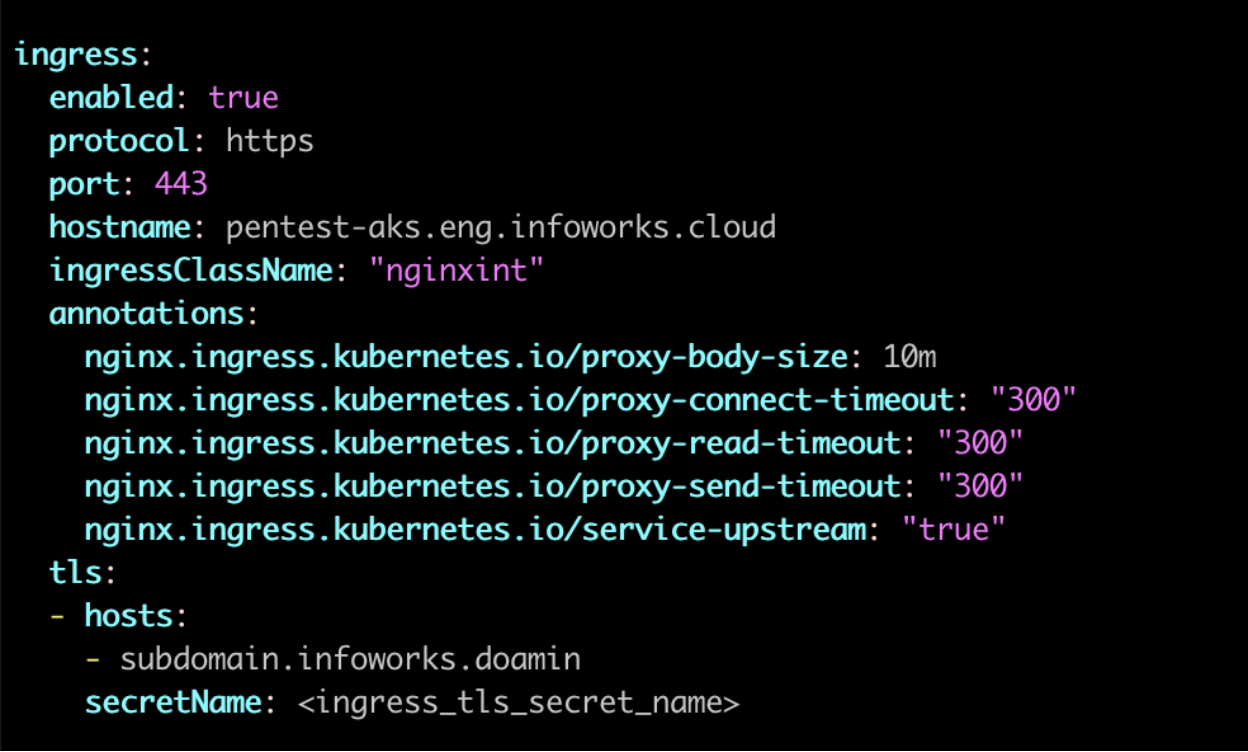
Edit values.yaml file to look similar to the following sample file.
It is suggested to make changes in the values.yaml file and add the below parameters as annotations in the ingress block.
After adding the annotations, the values.yaml file should look as shown below.
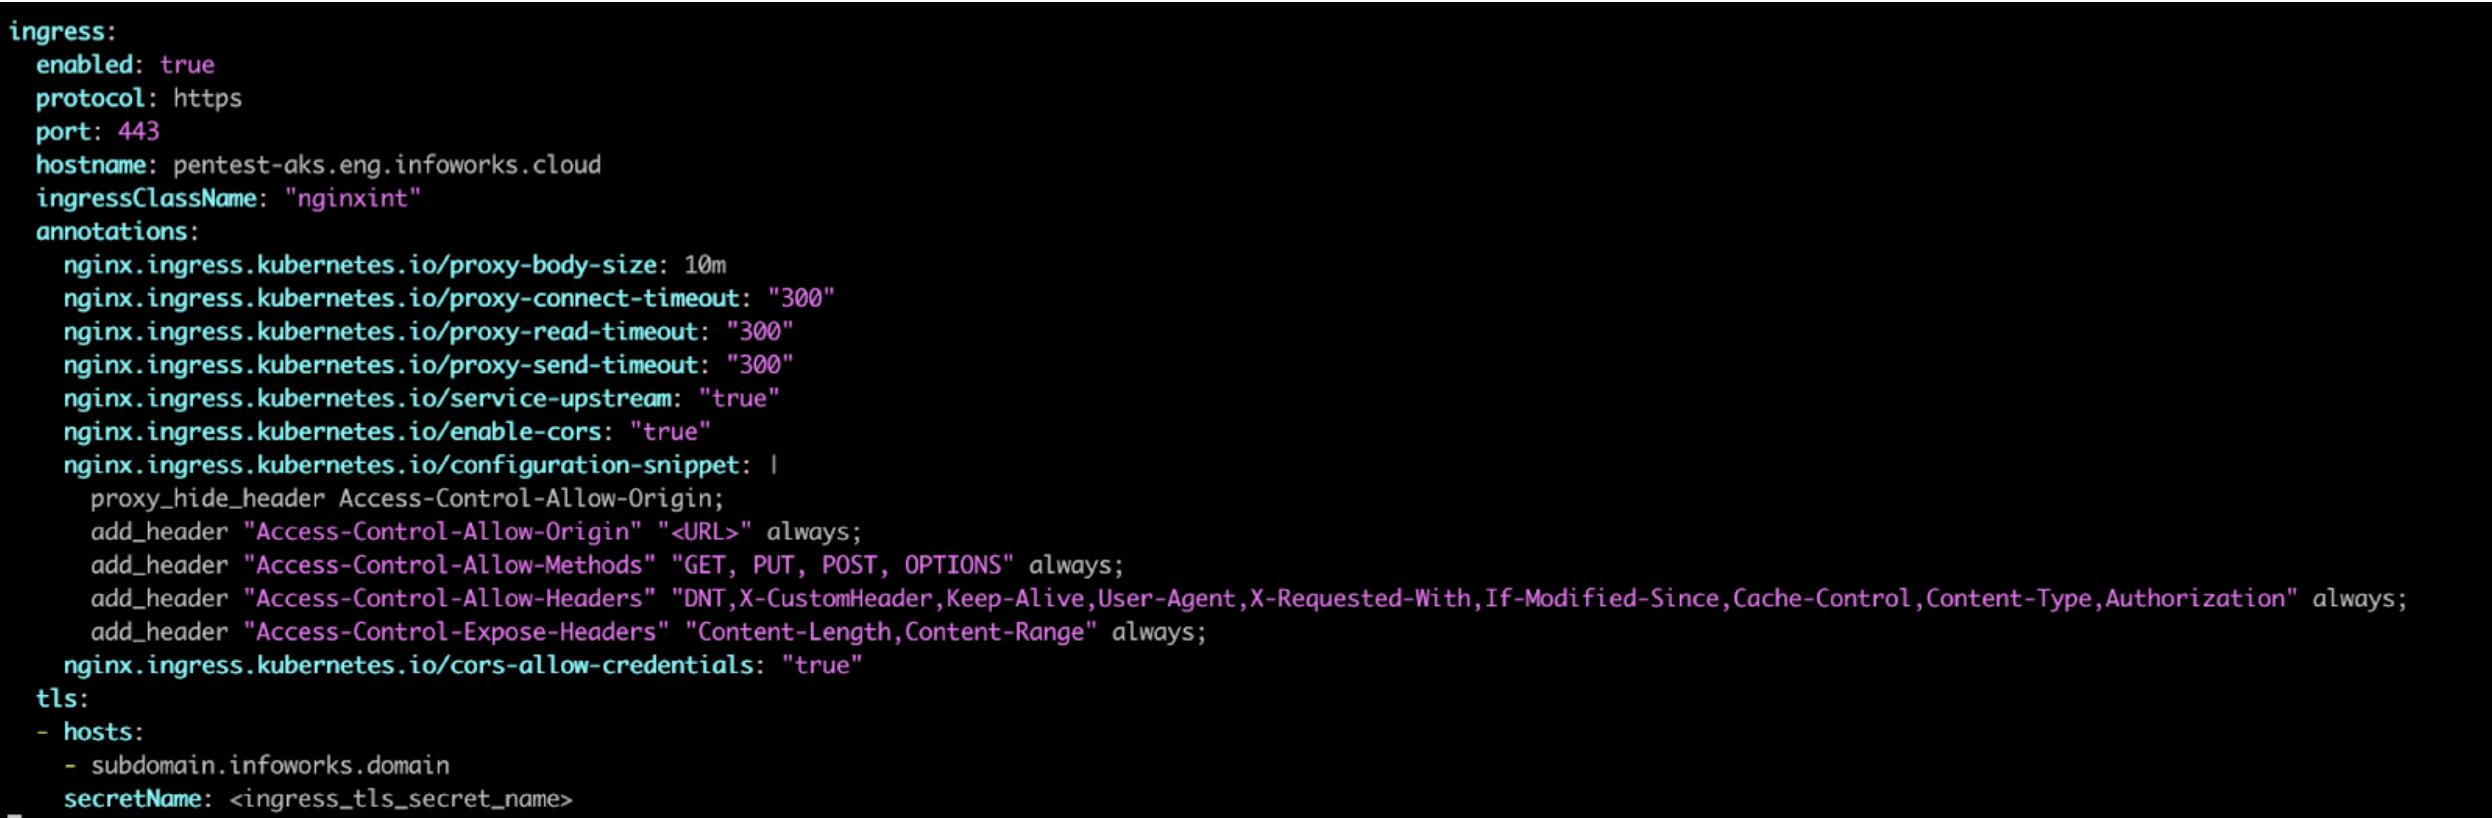
NOTE If you have already performed the deployment and edit the values.yaml file, then run helm upgrade command.
Enabling High-Availability and Scalability
Enabling High-Availability
Infoworks installation enables high-availability configuration while setting up Infoworks in Kubernetes. You can enable high-availability by editing the helm file called values.yaml.
Step 1: To edit values.yaml file, perform the action given in the following snippet.
Step 2: Run HELM upgrade command.
This enables the high availability for Infoworks.
Limitation For Kubernetes HA setup, Postgres database is not completely HA compliant. In certain conditions, if the Postgres containers crash, it might result in workflow failures.
Enabling Scalability
Infoworks installation supports manual scaling of any pods.
For a scalable solution:
There must be a minimum of two replicas.
They can be scaled to any number based on available resources (CPU and memory).
Infoworks supports scalability of source, pipeline, and workflow jobs out of the box. Ensure that there are available resources in the Kubernetes cluster.
There are two ways to enable scalability:
1. By editing the values.yaml file.
Step 1: Edit the values.yaml file.
NOTE The “deploymentname” mentioned in the above parenthesis is given just for the ease of understanding. This deployment name can be a platform, UI, etc. with actual name.
For example:
Step 2: To increase the scalability manually, run HELM upgrade command:
2. Using Kubectl
NOTE The “deploymentname” mentioned in the above parenthesis is given just for the ease of understanding. This deployment name can be a “releasename-platform-id” with the actual name.
For example:
Compute Environment Support
Increasing the Size of PVCs
To scale the size of PVCs attached to the pods:
Step 1: Note the storage class of the PVCs to be scaled.
Step 2: Ensure allowVolumeExpansion is set to true in the storageClass.
Step 3: Delete the managing statefulset without deleting the pods.
Step 4: For each PVC, upscale the size (ensure all PVCs attached managed by a single statefulset have the same size. For example, all Postgres managed PVCs must have the same size).
Step 5: Navigate to the helm chart used for Infoworks deployment.
Step 6: Edit the values.yaml file to update the size of the corresponding database to the new value.
Step 7: Run the helm upgrade command.
Warning
Above upgrade command will recreate all pods with the same PVCs.
Updating the MongoDB and PostgresDB Credentials
To update the MongoDB and/or PostgresDB credentials in the Infoworks deployment, follow the below given procedure.
Updating the MongoDB Credentials
Updating Encrypted Passwords Stored in values.yaml
There are two methods to update password:
Method 1
To update MongoDB encrypted passwords that are stored in values.yaml file, with the existing configure.sh file, use the IW_DEPLOY script to populate values.yaml:
Step 1: Download and untar the Infoworks kubernetes template, if not already present, according to the iwx-version in your existing deployment.
Step 2: If a new template was downloaded, replace the iw-k8s-installer/configure.sh as well as iw-k8s-installer/infoworks/values.yaml with the older file.
Step 3: Change the directory path to iw-k8s-installer.
Step 4: Replace the following values with a blank string in the configure.sh file.
Step 5: Run iw_deploy.sh. Once you receive "Seems like you have already configured Infoworks once. Do you want to override? y/n Default: n", enter “Y”. This will prompt the user to provide input for the values that were blank in the previous step. The script will then replace the infoworks/values.yaml file with the updated values.
Step 6: Run the following command to upgrade by specifying your namespace and helm release name according to the values given in the configure.sh file.
Method 2
To update MongoDB encrypted passwords, you can directly modify the values.yaml file.
Step 1: Download and untar the Infoworks Kubernetes Template, if not already present, according to the iwx-version in your existing deployment.
Step 2: If a new template was downloaded, replace the iw-k8s-installer/infoworks/values.yaml with the older file.
Step 3: Change the directory path to iw-k8s-installer directory.
Step 4: Generate the encrypted passwords as needed. To generate any encrypted string, execute the following command.
This generates your passwords in a secure encrypted format, which has to be provided in the following steps.
Step 5: Replace the following yaml keys with the new values in the infoworks/values.yaml file, if needed.
Step 6: Run the following command to upgrade by specifying your namespace and helm release name according to the installed kubernetes deployment specifications.
Updating Encrypted Passwords Stored as a Separate Secret
To update the MongoDB password:
Step 1: Run the following commands from the iw-k8s-installer directory.
Step 2: Restart all pods except the databases.
Updating the PostgresDB Credentials
Updating Encrypted Passwords Stored in values.yaml
There are two methods to update password:
Method 1
To update PostgresDB passwords that are stored in values.yaml file, with the existing configure.sh file, use the IW_DEPLOY script to populate values.yaml.
Step 1: Download and untar the Infoworks Kubernetes Template, if not already present, according to the iwx-version in your existing deployment.
Step 2: If a new template was downloaded, replace the iw-k8s-installer/configure.sh as well as iw-k8s-installer/infoworks/values.yaml with the older file.
Step 3: Change the directory path to iw-k8s-installer.
Step 4: Replace the following values with a blank string in the configure.sh file.
Step 5: Run iw_deploy.sh. Once you receive "Seems like you have already configured Infoworks once. Do you want to override? y/n Default: n", enter “Y”. This will prompt the user to provide input for the values that were blank in the previous step. The script will then replace the infoworks/values.yaml file with the updated values.
Step 6: Run the following command to upgrade by specifying your namespace and helm release name according to the values given in the configure.sh file.
Method 2
To update PostgresDB encrypted passwords, you can directly modify the values.yaml file.
Step 1: Download and untar the Infoworks Kubernetes Template, if not already present, according to the iwx-version in your existing deployment.
Step 2: If a new template was downloaded, replace the iw-k8s-installer/infoworks/values.yaml with the older file.
Step 3: Change the directory path to iw-k8s-installer.
Step 4: Generate the encrypted passwords as needed. To generate any encrypted string, execute the following command.
This generates your passwords in a secure encrypted format, which has to be provided in the following steps.
Step 5: Replace the following yaml keys with the new values in the infoworks/values.yaml file, if needed.
Step 6: Run the following command to upgrade by specifying your namespace and helm release name according to the installed kubernetes deployment specifications.
Updating Encrypted Passwords Stored as a Separate Secret
To update the PostgresDB password:
Step 1: Run the following commands from the iw-k8s-installer directory.
Step 2: Restart the orchestrator and orchestrator-scheduler pods.
Limitations
MongoDB Limitations
With HA enabled, scaling the pods from higher to lower has the following limitations:
Pods need to be manually deleted from replication configuration.
Disabling HA to Non-HA is not supported once HA is enabled.
Database Limitations
Applicable to PostgresDB, MongoDB, and RabbitMQ.
PVC’s size can’t be decreased.
Increasing a PVC’s size requires downtime.
After downscaling pods, the extra PVCs needs to be manually deleted.
PostgresDB Limitations
In the current HA architecture, on Postgres connection disruption, airflow is unable to reconnect via new connection. Furthermore, the current Postgres proxy is too simplistic to handle connection pools. Hence, if a Postgres master goes down, all running workflows will fail.