Extensions can be used to extend the functionality of IWX features in a predefined way.
The following table illustrates the different extensions supported, along with the programming languages. Each of these extensions are run on specific clusters during the execution of workflow, pipeline, or ingestion. The extensions that are executed depends on the IWX version used.
Extension | Where it Runs | When it Runs | Programming Language | IWX Version | |||
|---|---|---|---|---|---|---|---|
Bash node | IWX edge node | As part of workflow | bash | 4.x+ | |||
Pipeline Extension/Custom Target | Data plane/Spark Cluster | As part of pipeline | Java, Python | 4.x+ | |||
Source Extension (Pre-ingestion hook) | Data plane/Spark Cluster | As part of ingestion, before data is read, before data is written | Java | 5.0+ | |||
Pre/post-ingestion job hook | Data plane/Spark Cluster | Before/after ingestion job | Python, bash | 5.1+ |
NOTE Bash nodes are not supported on Kubernetes in IWX 5.1.
Managing Generic Source Type
To manage the generic source type, perform the following steps:
Navigate to Admin > Extensions > Generic Source Types.
Click the Add Generic Source Type button.

Managing Pipeline Extensions
To manage the Pipeline Extensions, perform the following steps:
In Infoworks, navigate to Admin > Extensions > Pipeline Extensions.
Click Create Pipeline Extension.
In the Add Pipeline Extension page, enter the following details:
Extension Type: Choose Custom Transformation or Custom Target.
Execution Type: Select Java.
Name: A user-friendly name for the group of transformations under one project. For example, SampleExtension.
Upload the files or enter the path to the folder where the jars have been uploaded. For example, /home//pivottransformation/.
The classes implementing the SparkCustomTransformation API which must be available as transformations within Infoworks.
Alias: A user-friendly alias name for the transformations. For example, Sample.
ClassName: A fully qualified class name. For example, io.infoworks.awb.extensions.sample.SparkCustomTfmSample.
You can click Add to add multiple pairs of Alias and Class Names.
Click Save.
LIMITATION Absolute system path is not allowed in Kubernetes deployments. Users must always upload these extension files. However, you can provide a relative path (for example, by using $IW_HOME), for the extensions to run on data plane.
Managing Source Extensions
This procedure allows users to integrate custom code/third party data masking/obfuscation to allow users to secure the data before it lands in the data lake for all source types. These extensions may be used with all data source types.
In the Infoworks left navigation pane, navigate to Admin > Extensions > Source Extensions.
Click Create Source Extension.
In the Add Source Extension page, enter the following details:
Extension Type: Select Hive UDF or Custom Extension.
If the Extension type is selected as Custom Extension enter the following details:
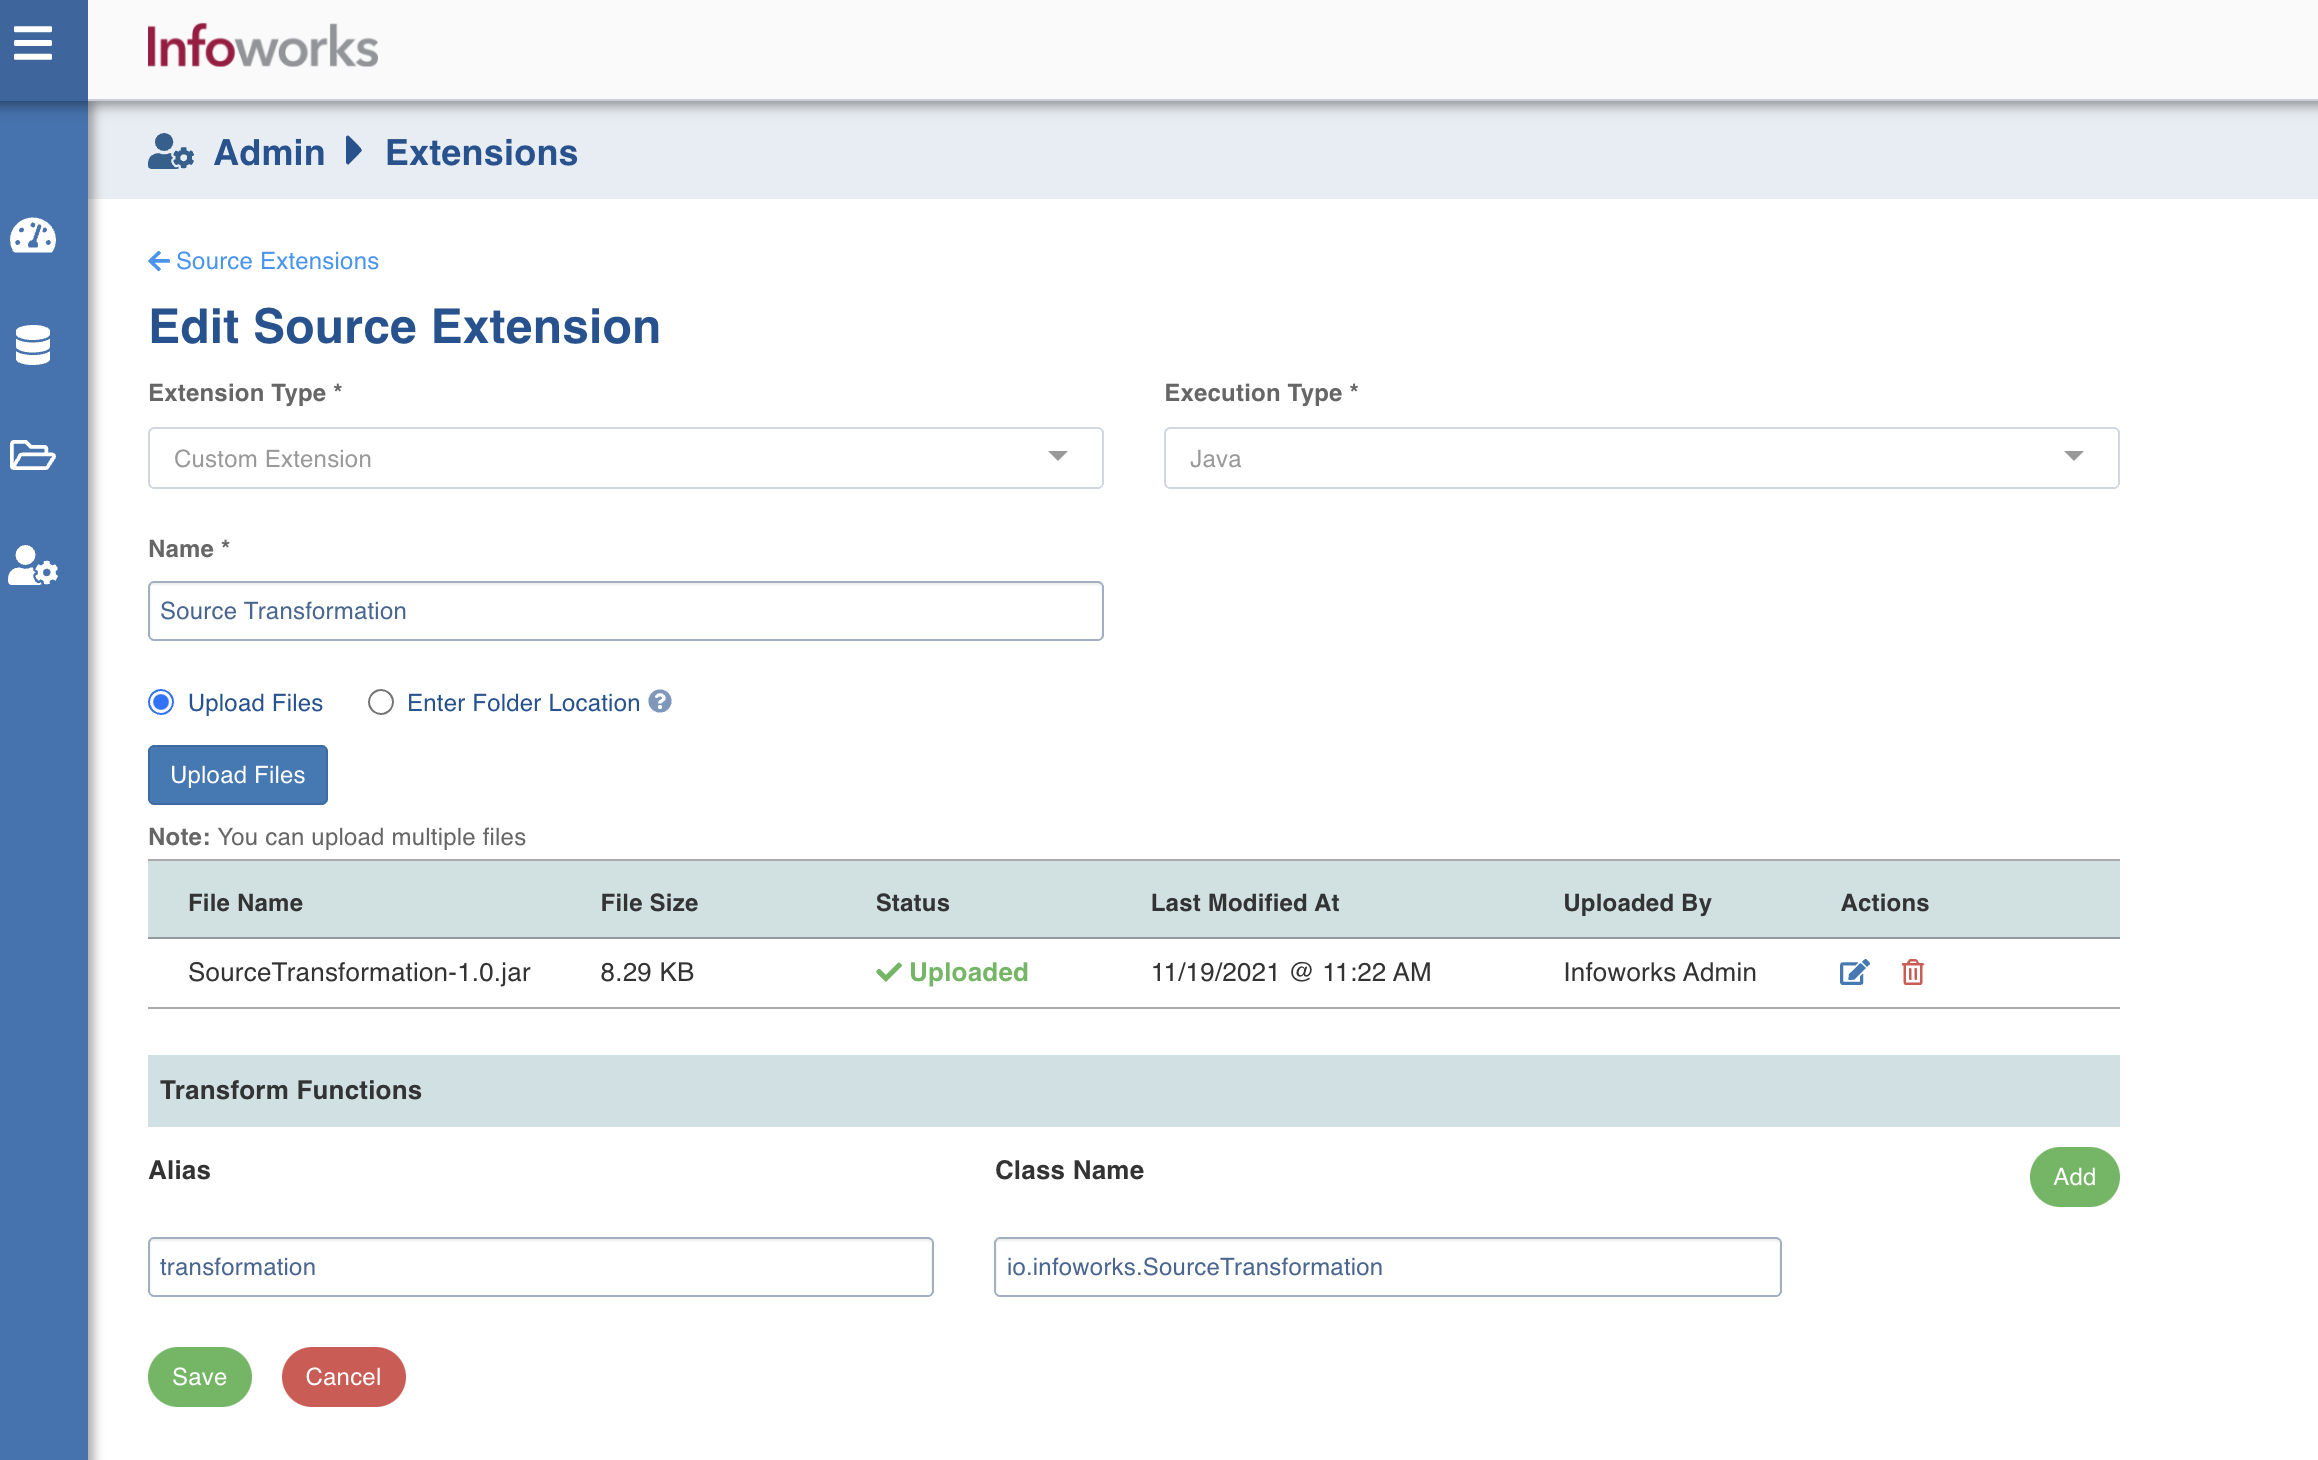
Execution Type: Select Java.
Name: A user-friendly name for the group of transformations under one project. For example, Source Transformation.
Upload the jar files or enter the path to the folder where the jars have been uploaded. For example, /home/source_transformation.
In the Transform Functions section, enter the fields in the Alias and Class Name.
Click Add to add a new Transform function, if required.
Click Save to save the changes.
If the Extension type is selected as Hive UDF enter the following details:
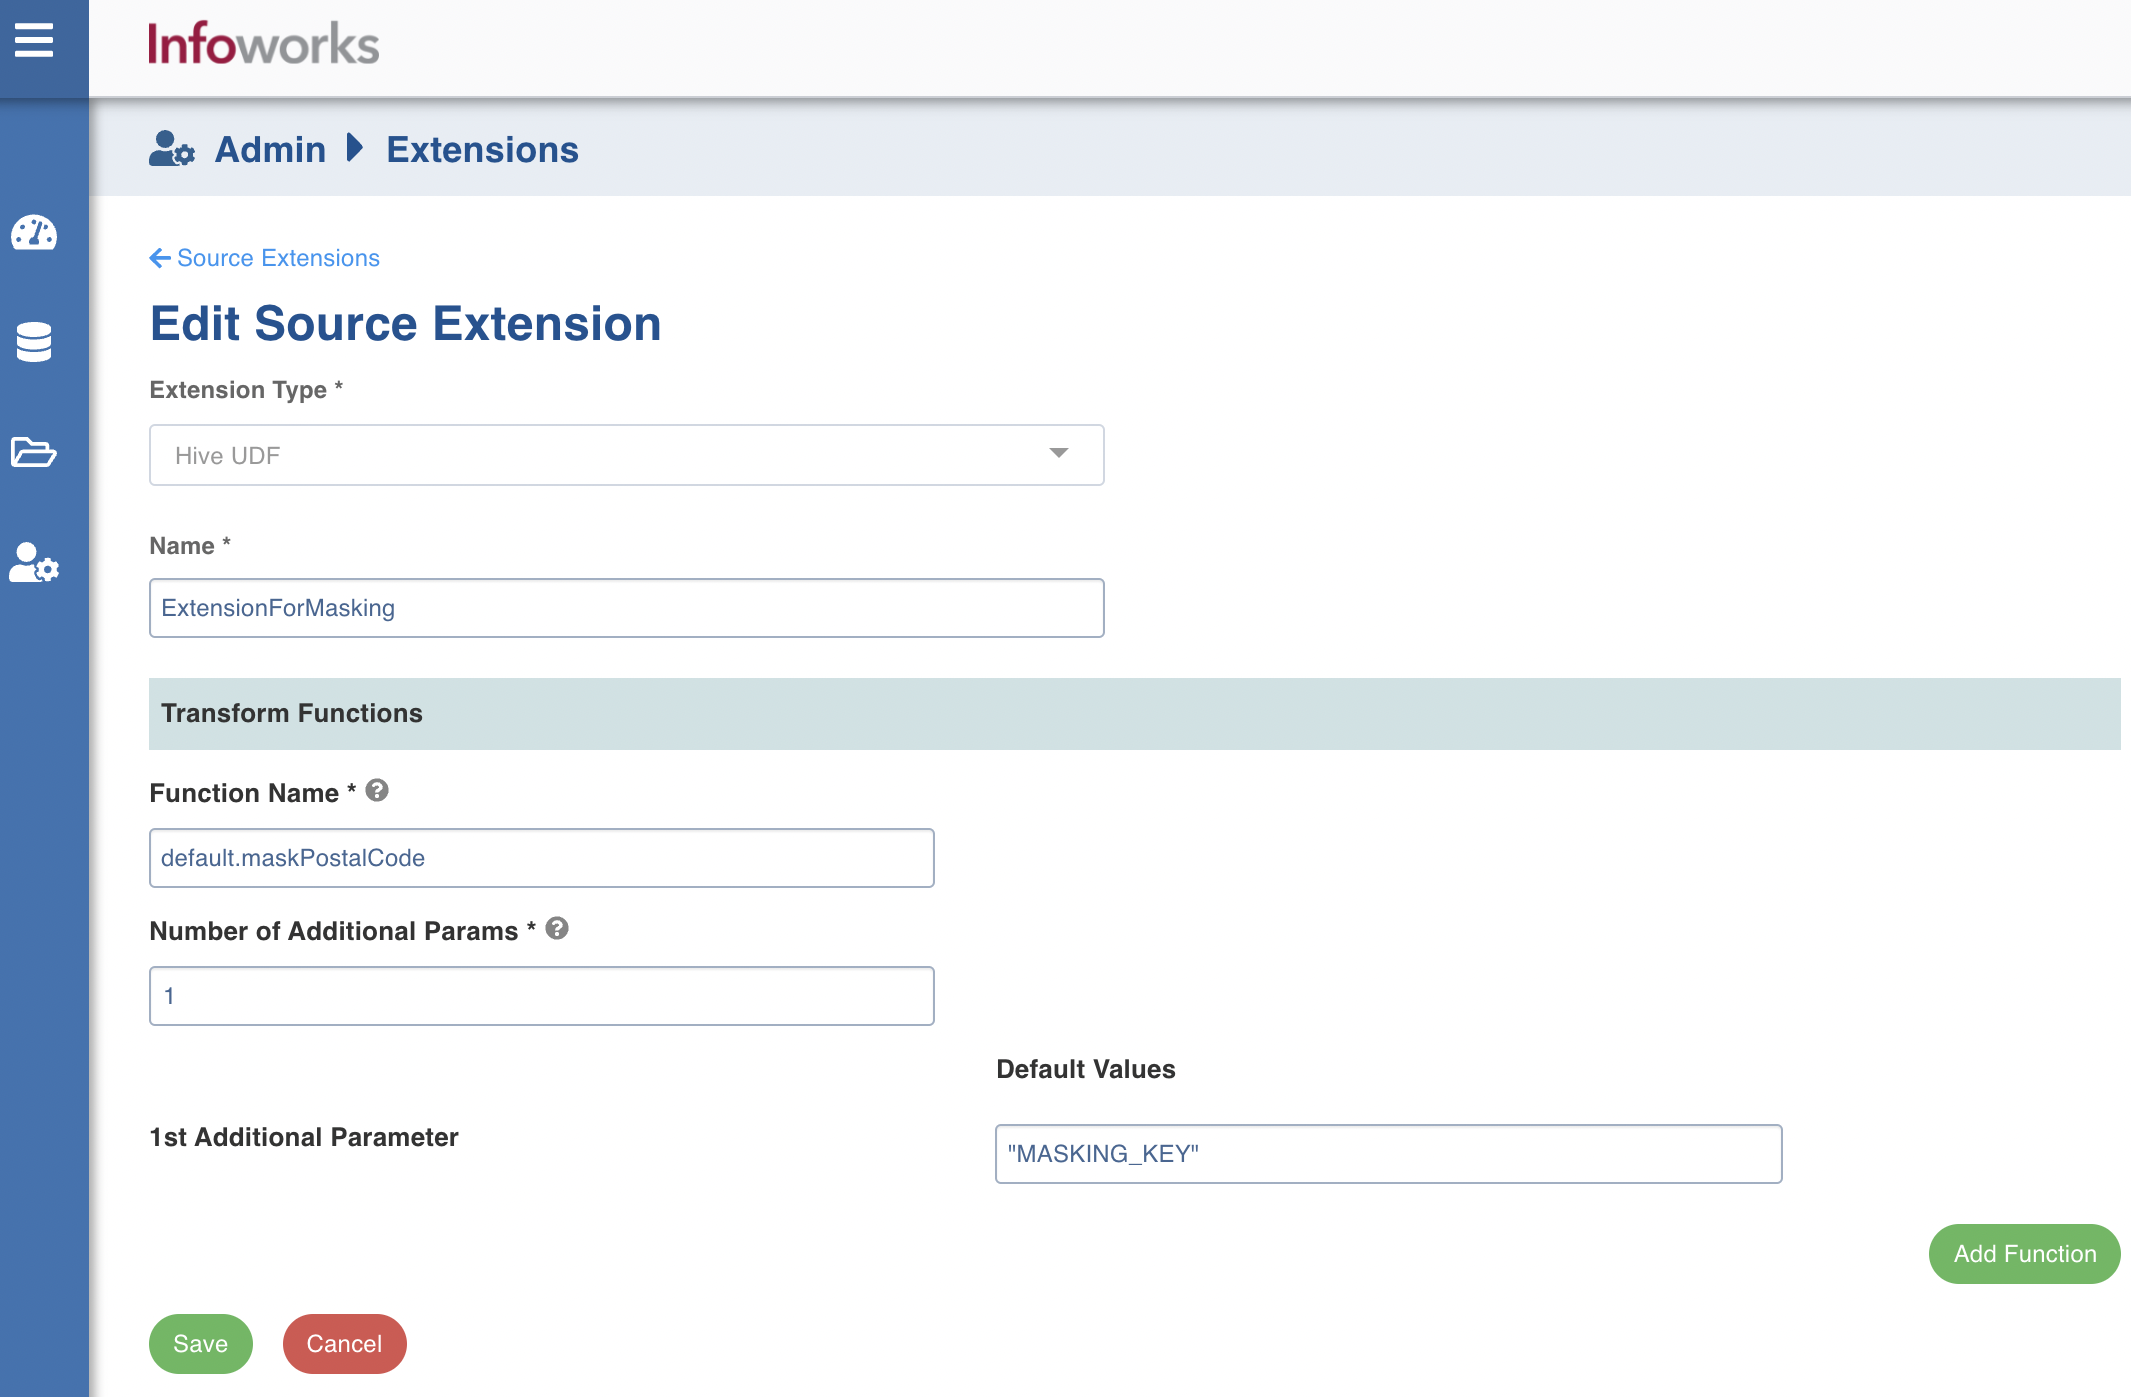
Name: A user-friendly name for the group of transformations under one project. For example, Source Transformation.
In the Transformation Functions section, enter the following details:
Function Name: Name of the function with schema included which is registered at hive metastore. For example, dwu_edw_iwx_0820.encryptConfidentialENT
Number of Additional Params: Number of parameters needs to be passed other than source column. For example, for dwu_edw_iwx_0820.encryptConfidentialENT(PAYER_LVL_1_ID, 'ACCOUNT_MVP', count will be 1)
Default Values: Value of param that needs to be passed to the function.
NOTE Add double quotes to the string type values.
Click Add Function to add a new transform function, if required.
Click Save to save the changes.
Registering Hive UDFs on Spark Cluster
NOTE This is applicable only if you have installed the 5.3.0.9 patch.
To register Hive UDFs on Spark Cluster:
Step 1: Navigate to the ingestion core folder cd /opt/infoworks/lib/ingestion/core/.
Step 2: Place your Jar which contains the classes that implement UDFs.
Step 3: Enter the following configuration either in the Admin or in the Source Setup page.
Key | Value |
|---|---|
should_register_hive_udfs | true |
hive_udfs_to_register | <functionName1>:<fullyQualifiedclassNameImplementingFunction1>;<functionName2>:<fullyQualifiedclassNameImplementingFunction2> |
Deregistering Hive UDFs on Spark Cluster (if needed)
Step 1: Enter the following configuration either in the Admin or in the Source Setup page.
Key | Value |
|---|---|
should_deregister_hive_udfs | true |
hive_udfs_to_deregister | <functionName1>:<functionName2> |
LIMITATION Absolute system path is not allowed in Kubernetes deployments. Users must always upload these extension files. However, you can provide a relative path (for example, by using $IW_HOME), for the extensions to run on data plane.
Procedure to Build the Jar for Upload
Perform the following steps to build the jar for upload.
Create a java Class in which you must implement Function and Serializable Interface similar to following code, where:
Interface | Description |
|---|---|
Function<T,R> | Represents the function that accepts one argument and produces a result. This is a functional interface whose functional method is apply(Object). The arguments of this function (T,R) will be the datatype of column on which it is intended to use. |
Serializable | Is the interface present in the java.io package. It is a marker interface. A Marker Interface does not have any methods and fields. Thus classes implementing it do not have to implement any methods. Classes implement it if they want their instances to be Serialized or Deserialized. |
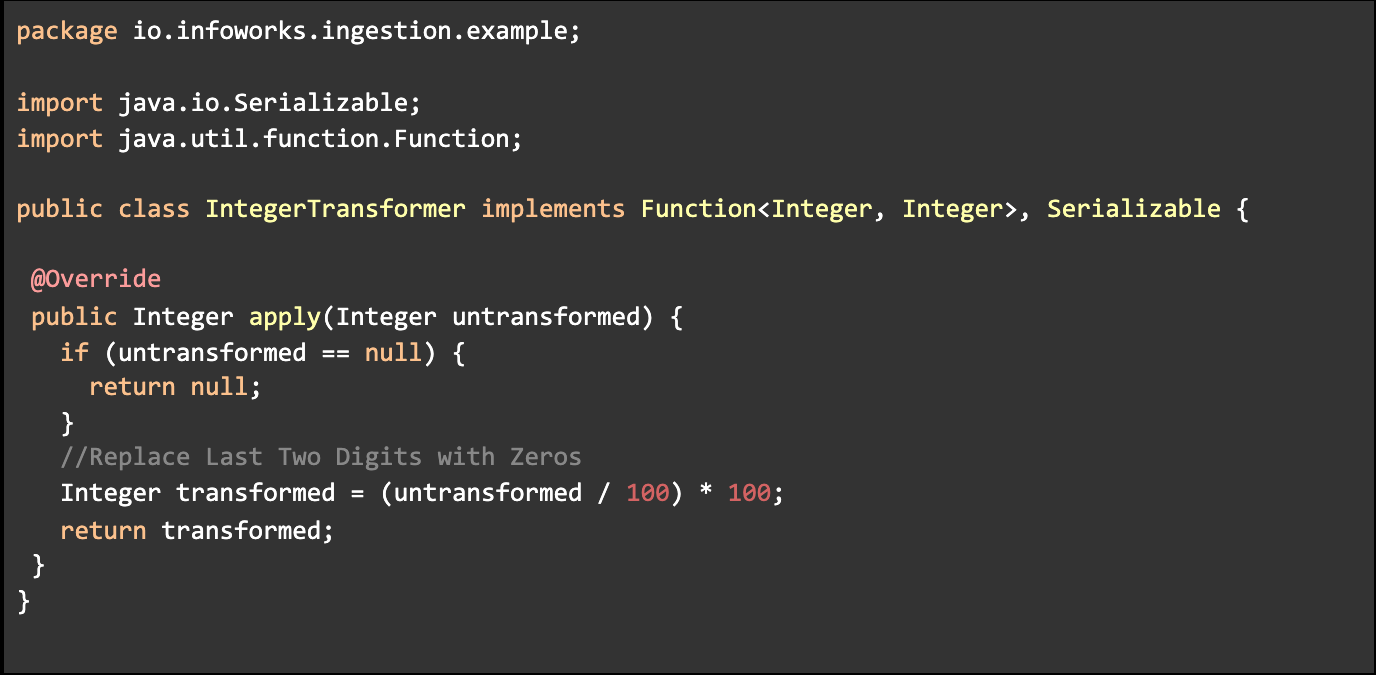
Implement the apply function as per your requirements.
Build the Jar file for classes.
Upload Jar file In UI or upload file on control plane and provide path for that in UI.
Provide any Alias name and fully qualified Class Name. In above example,
Alias: replace_last_two_digits_with_zeros
ClassName: io.infoworks.ingestion.example.IntegerTransformer
Using Transform Functions
To view the Transform Function that is set, perform the following steps:
Click Data Sources -> View Source -> Source Setup.
Navigate to the Source Extensions section and select the source extension which is required for this source.
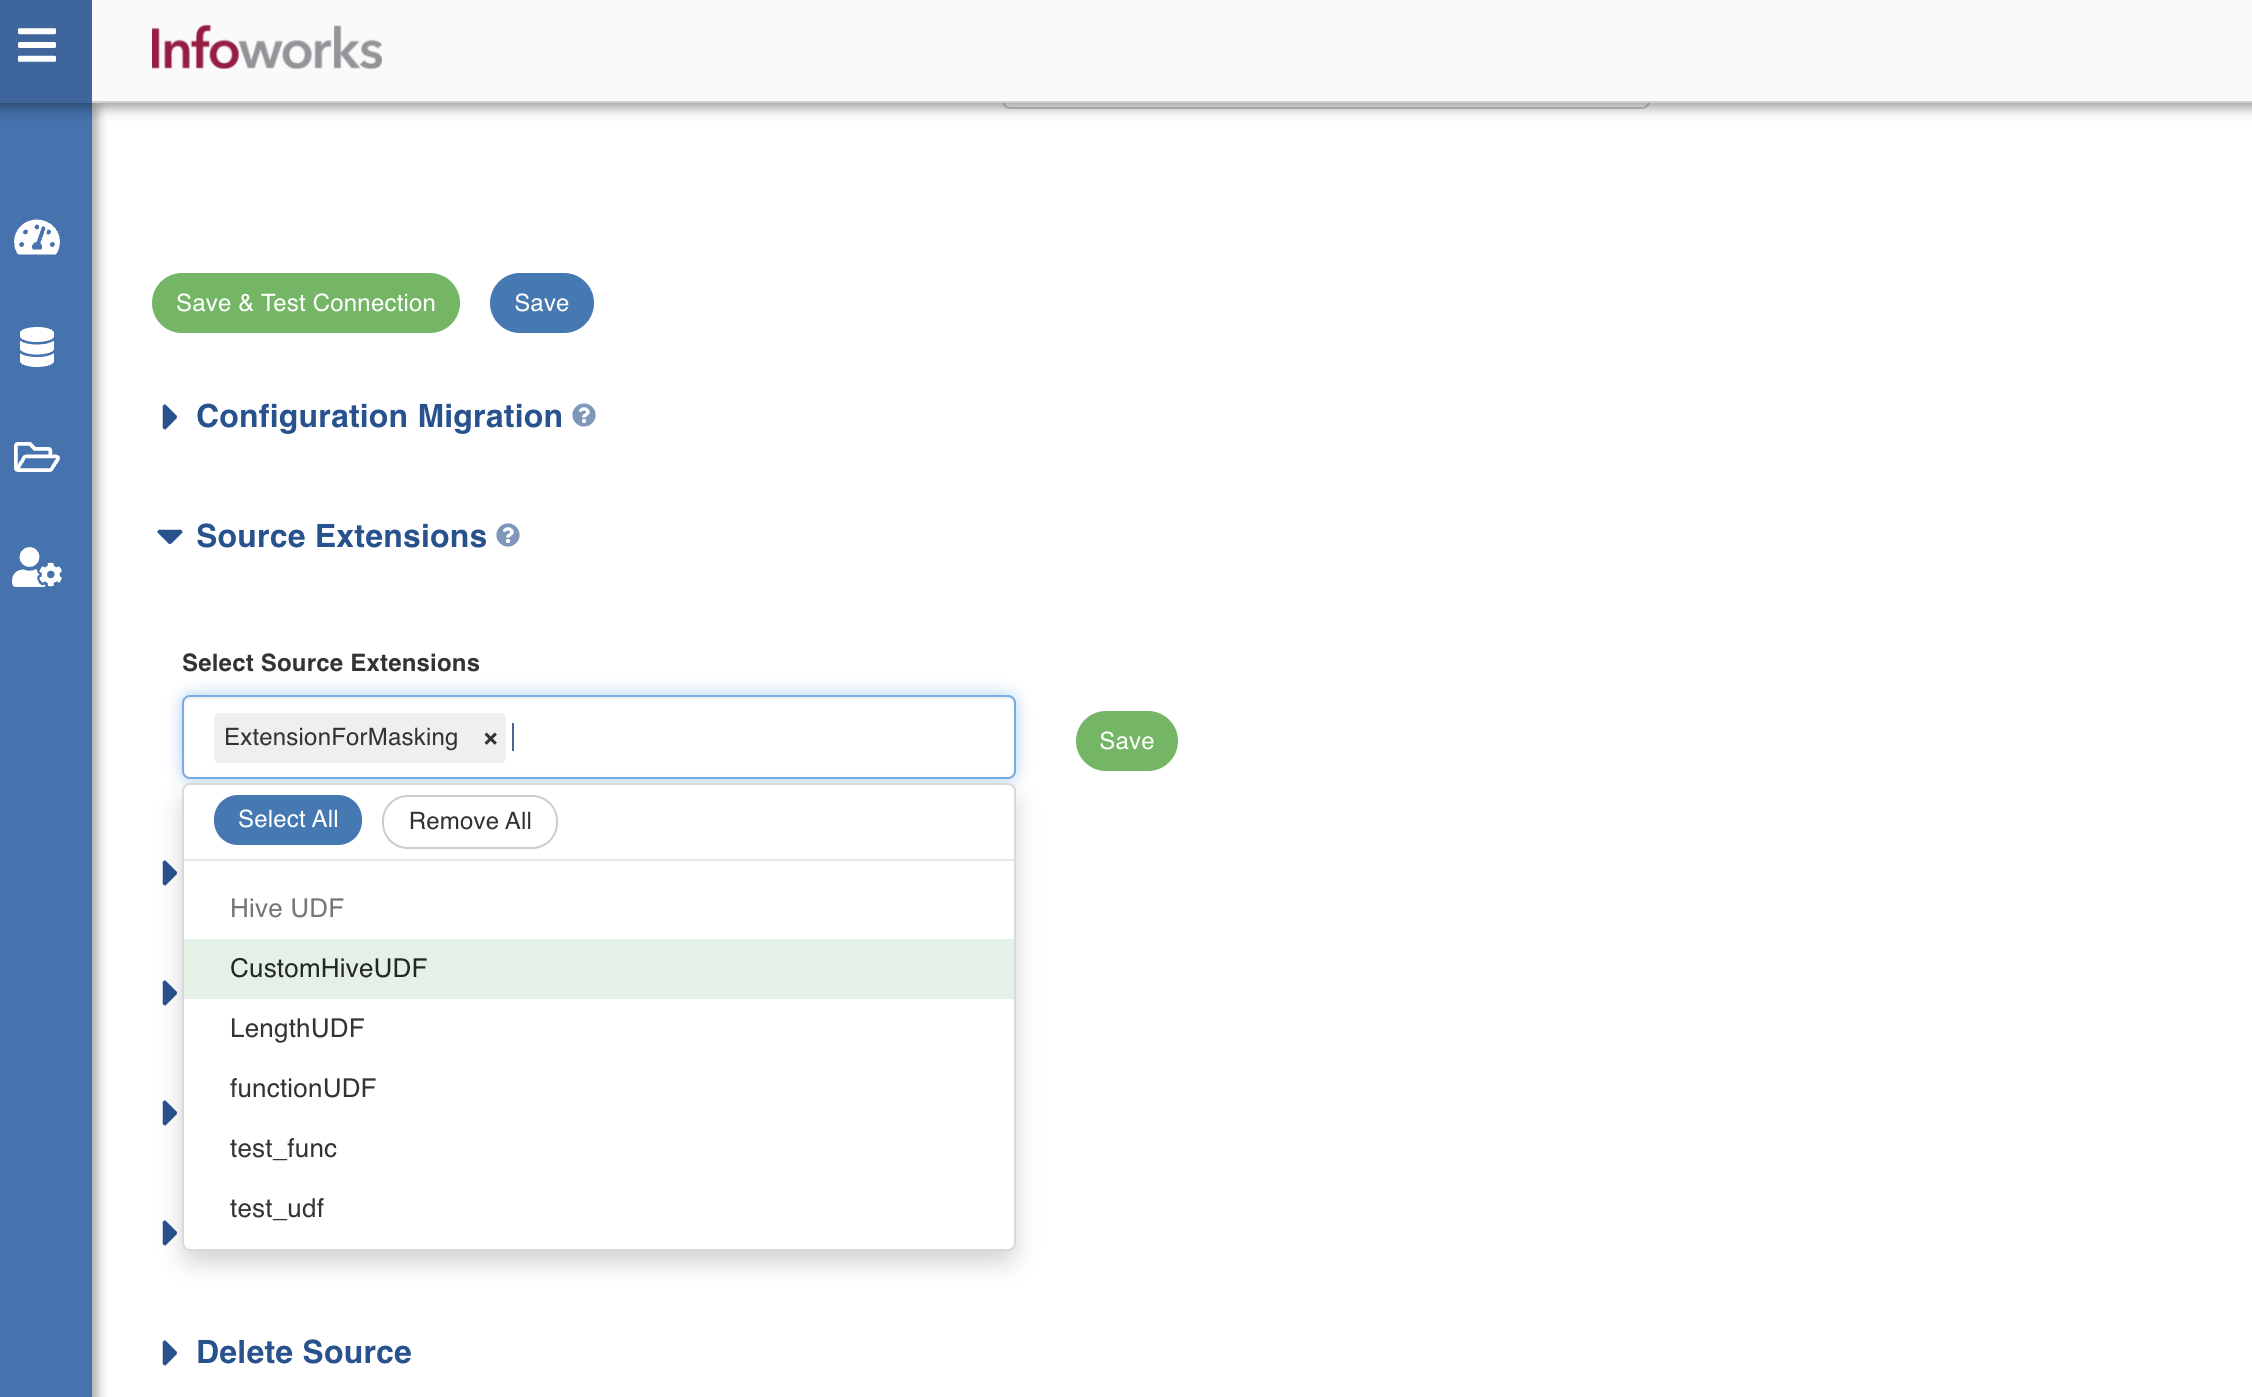
Click Save to save the source extension.
Navigate to the Tables tab and click Configuration for any of the tables.
Under Table & Source Schema, click Details.
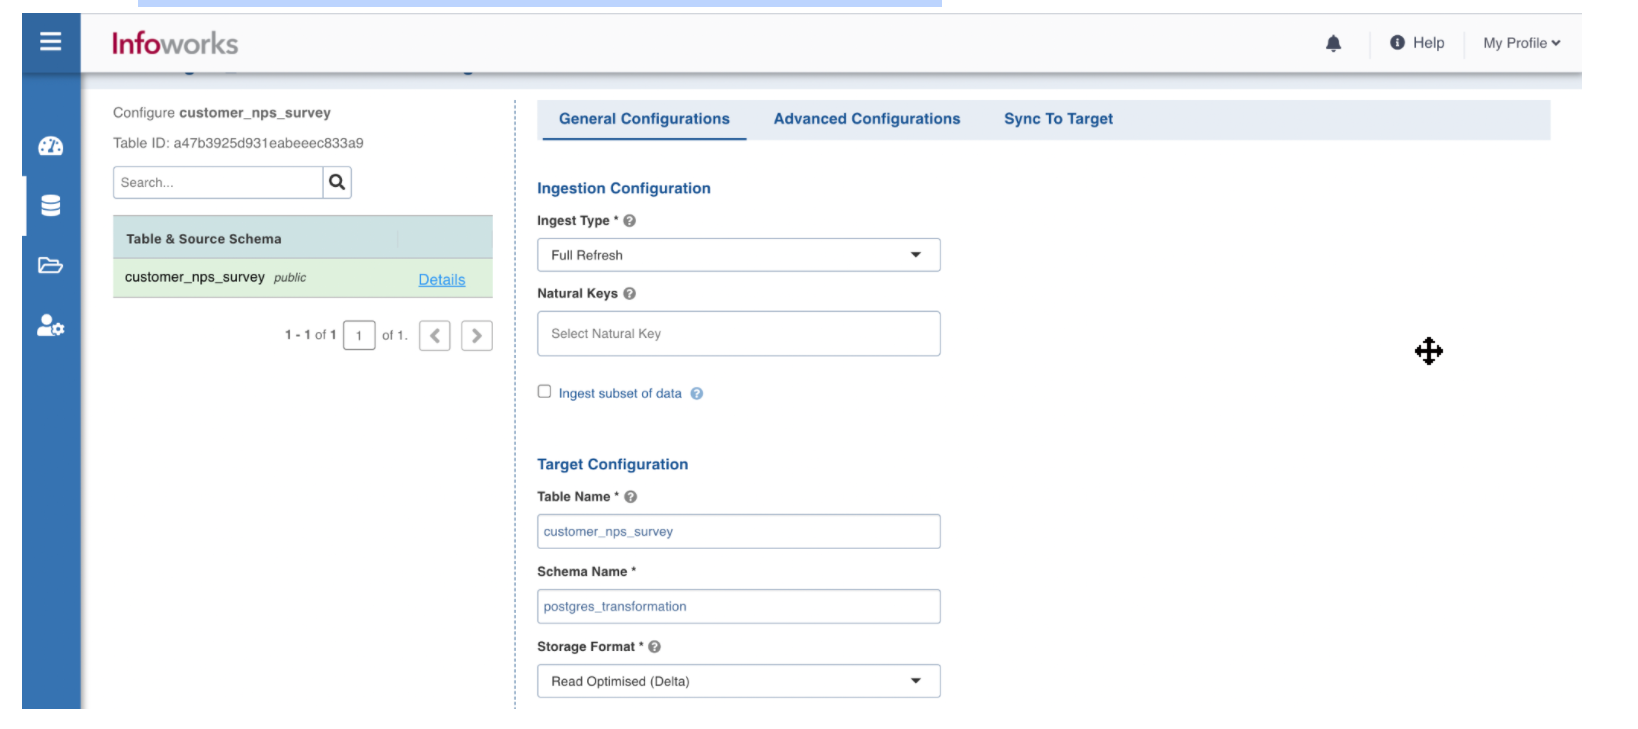
Click Add a transform function for the columns for which transformation is required. The Add Transform Function window appears.
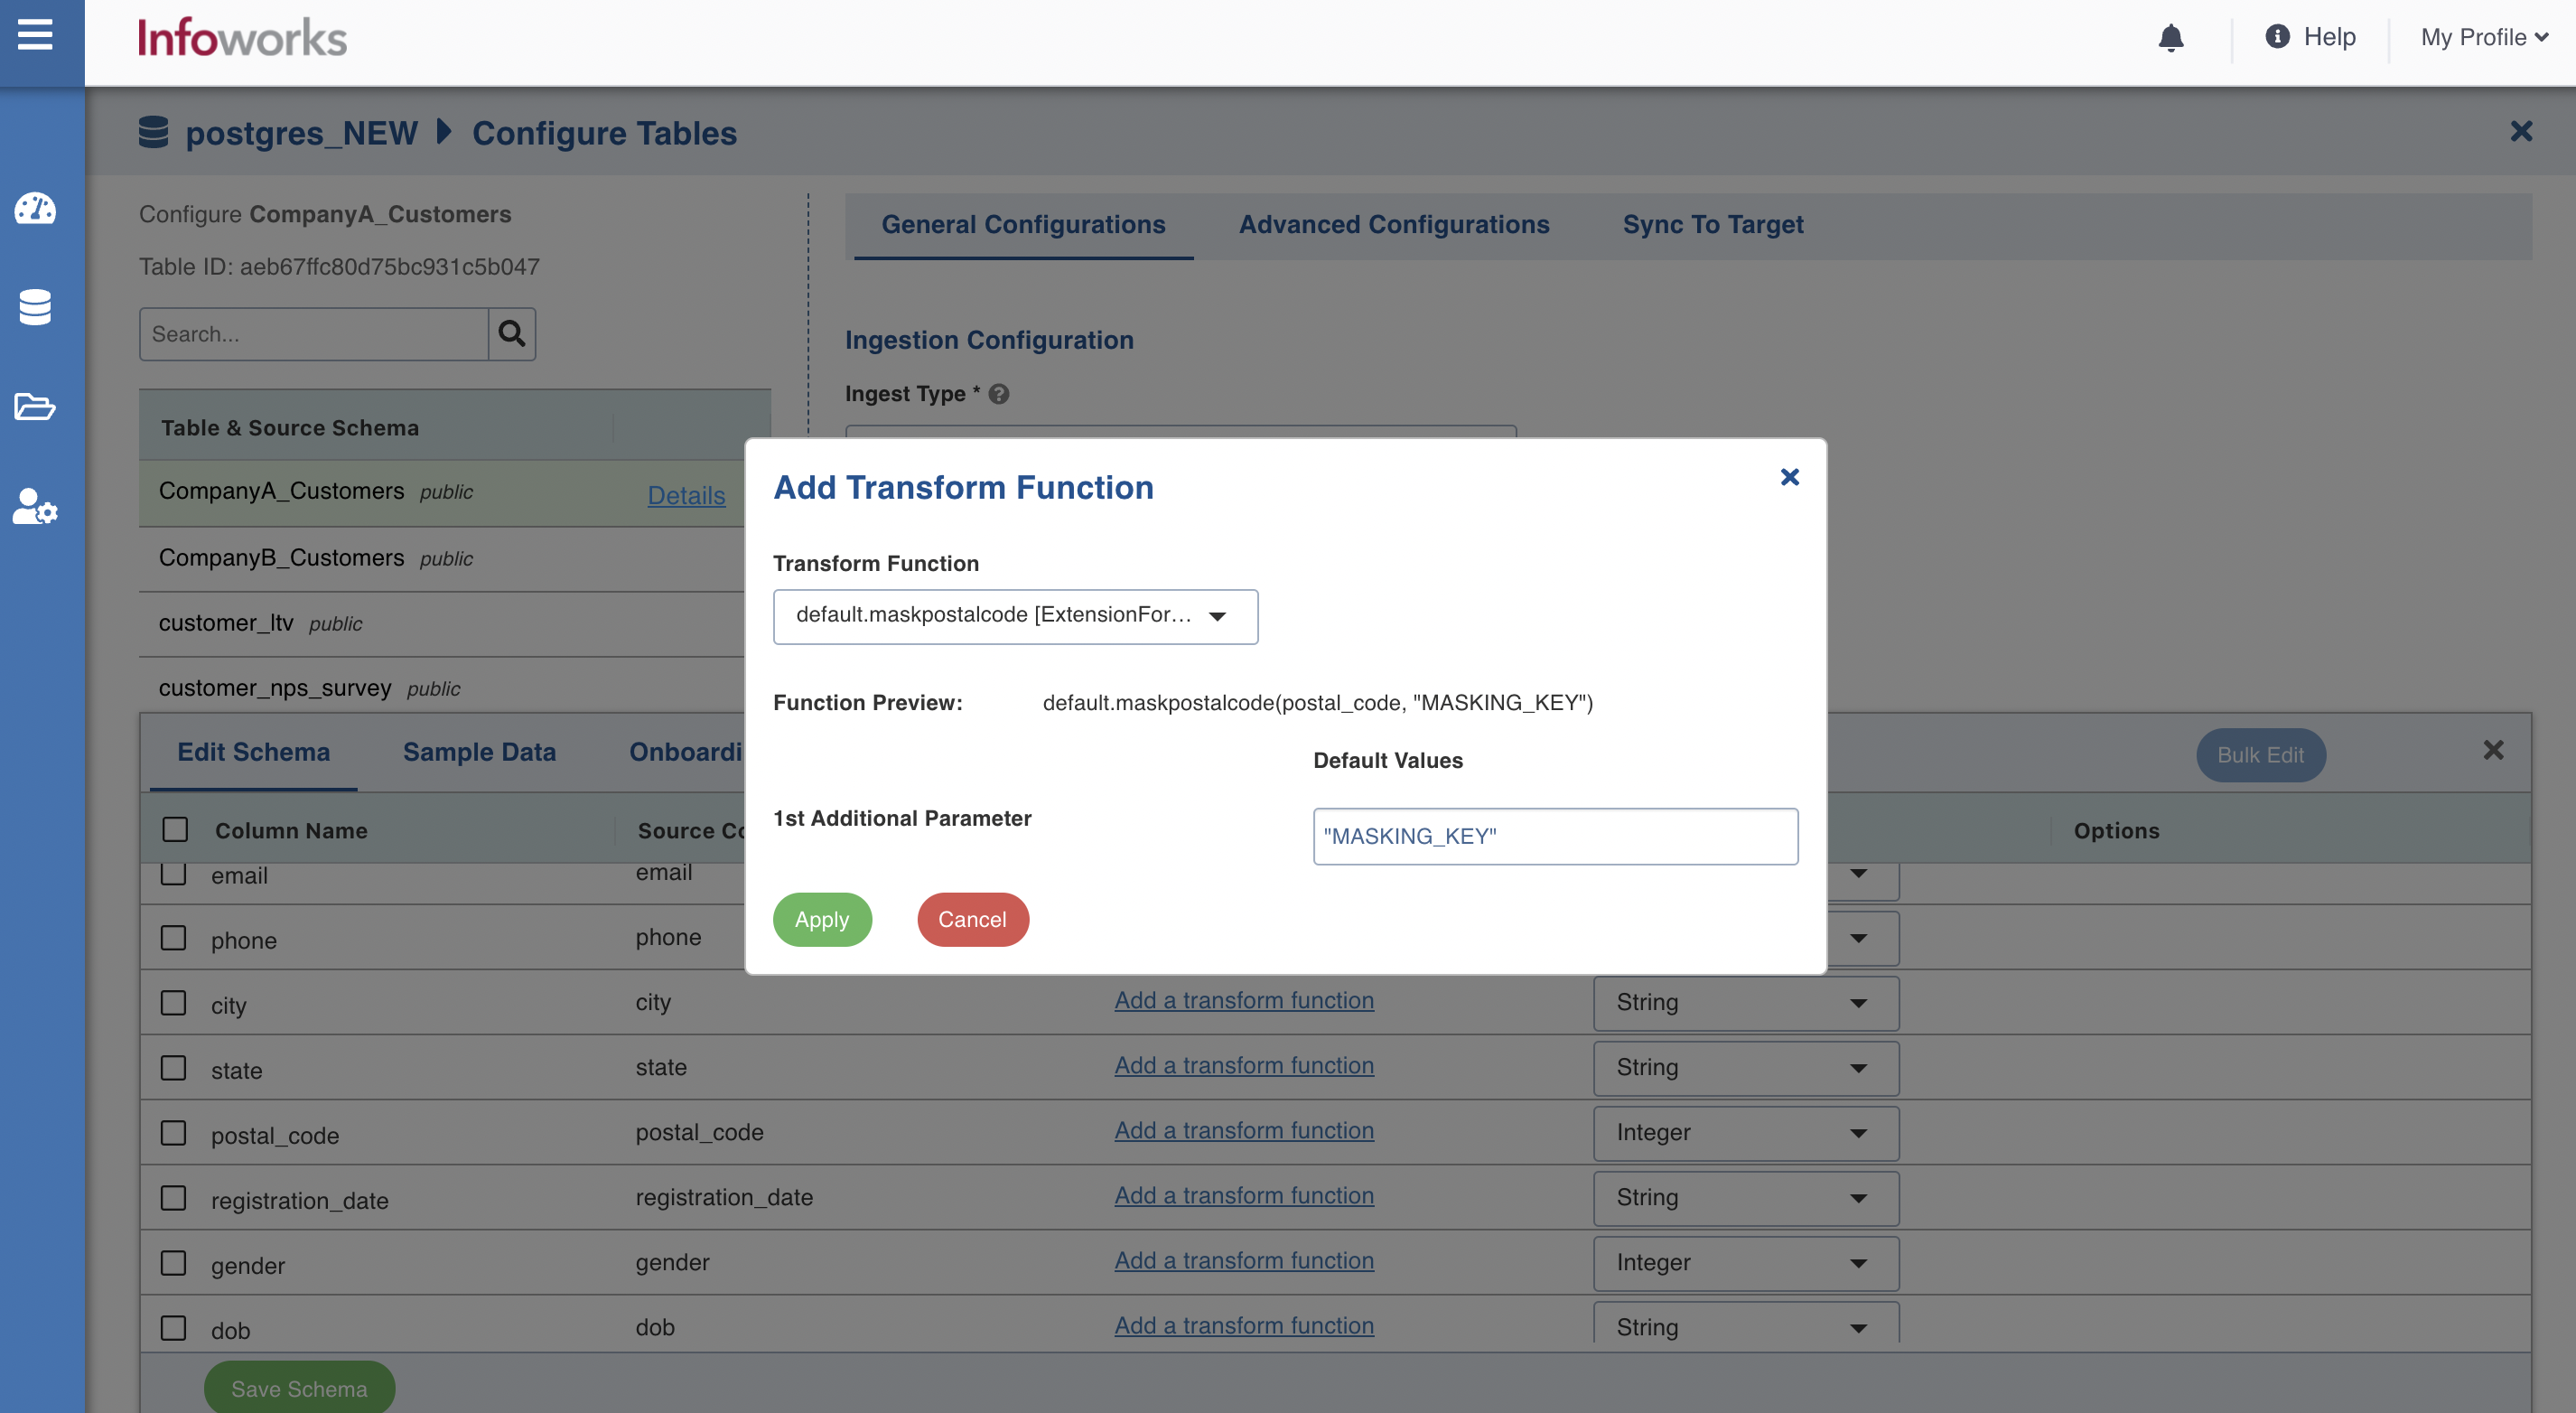
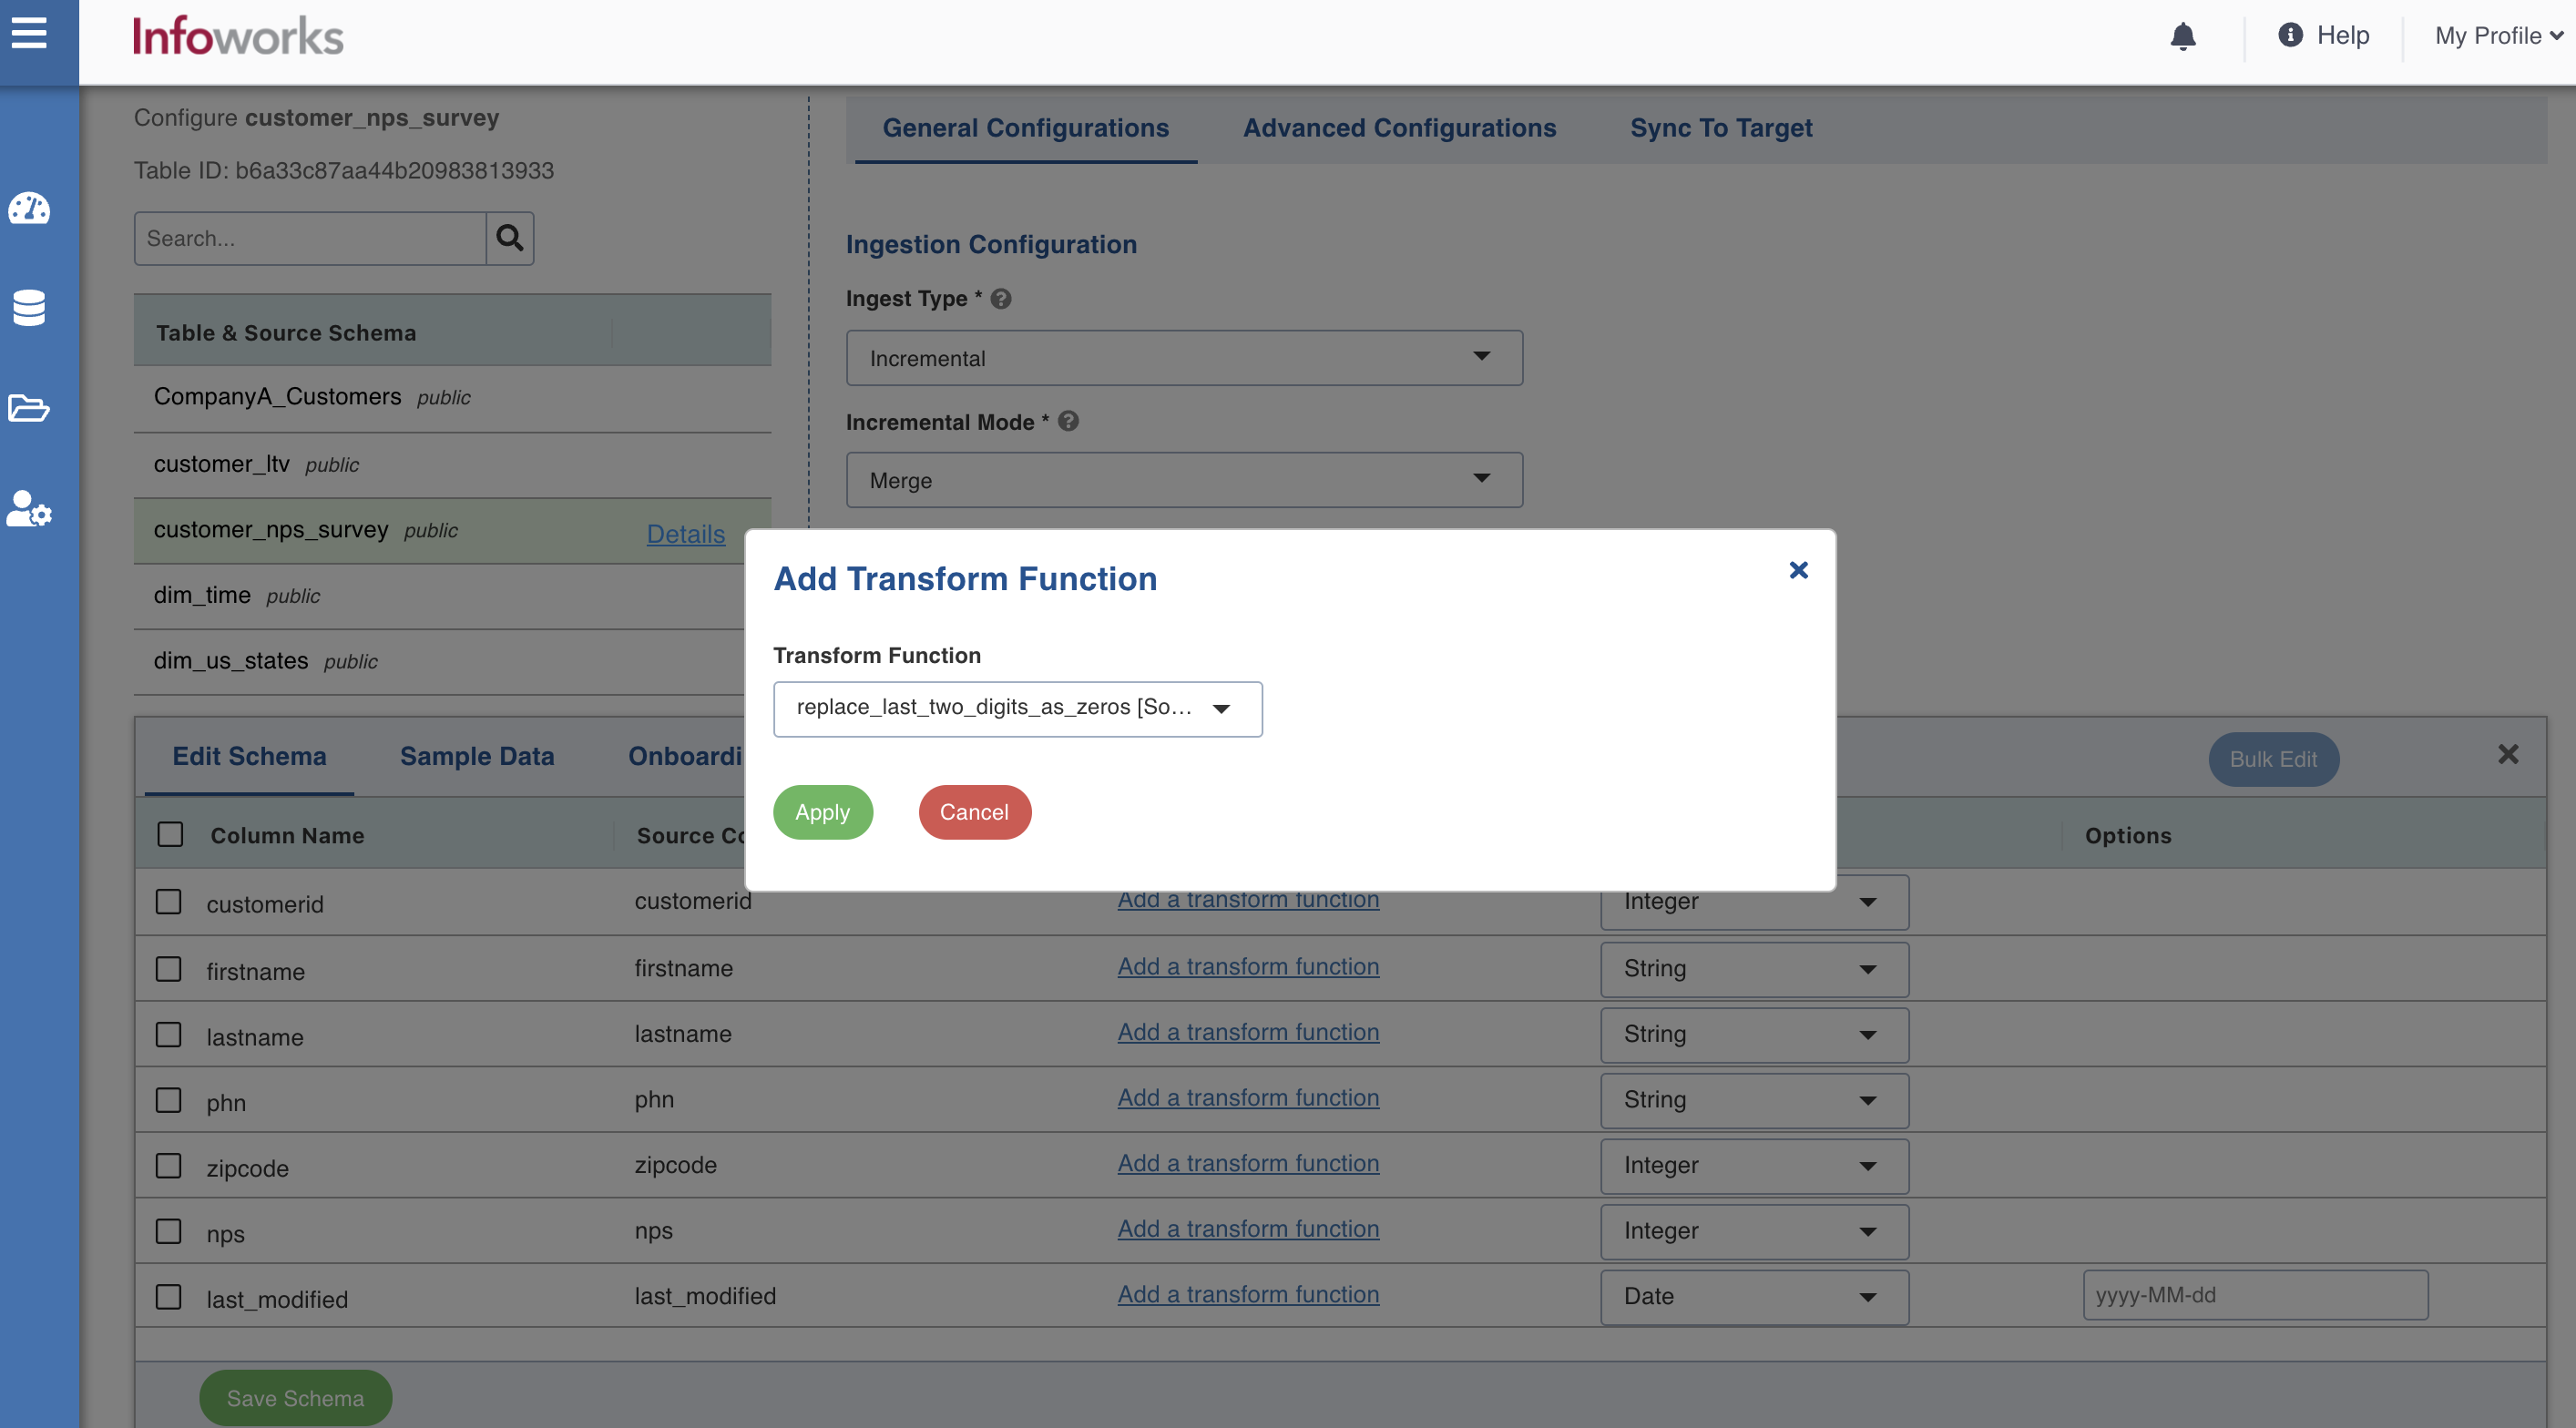
In the Add Transform Function window, perform the following:
In case of Hive UDF, select the transform function and enter the value for 1st Additional Parameter field. Click Apply.
In case of Custom Extension, select the transform function and click Apply.
Click Save Schema. The schema is updated successfully for the columns.
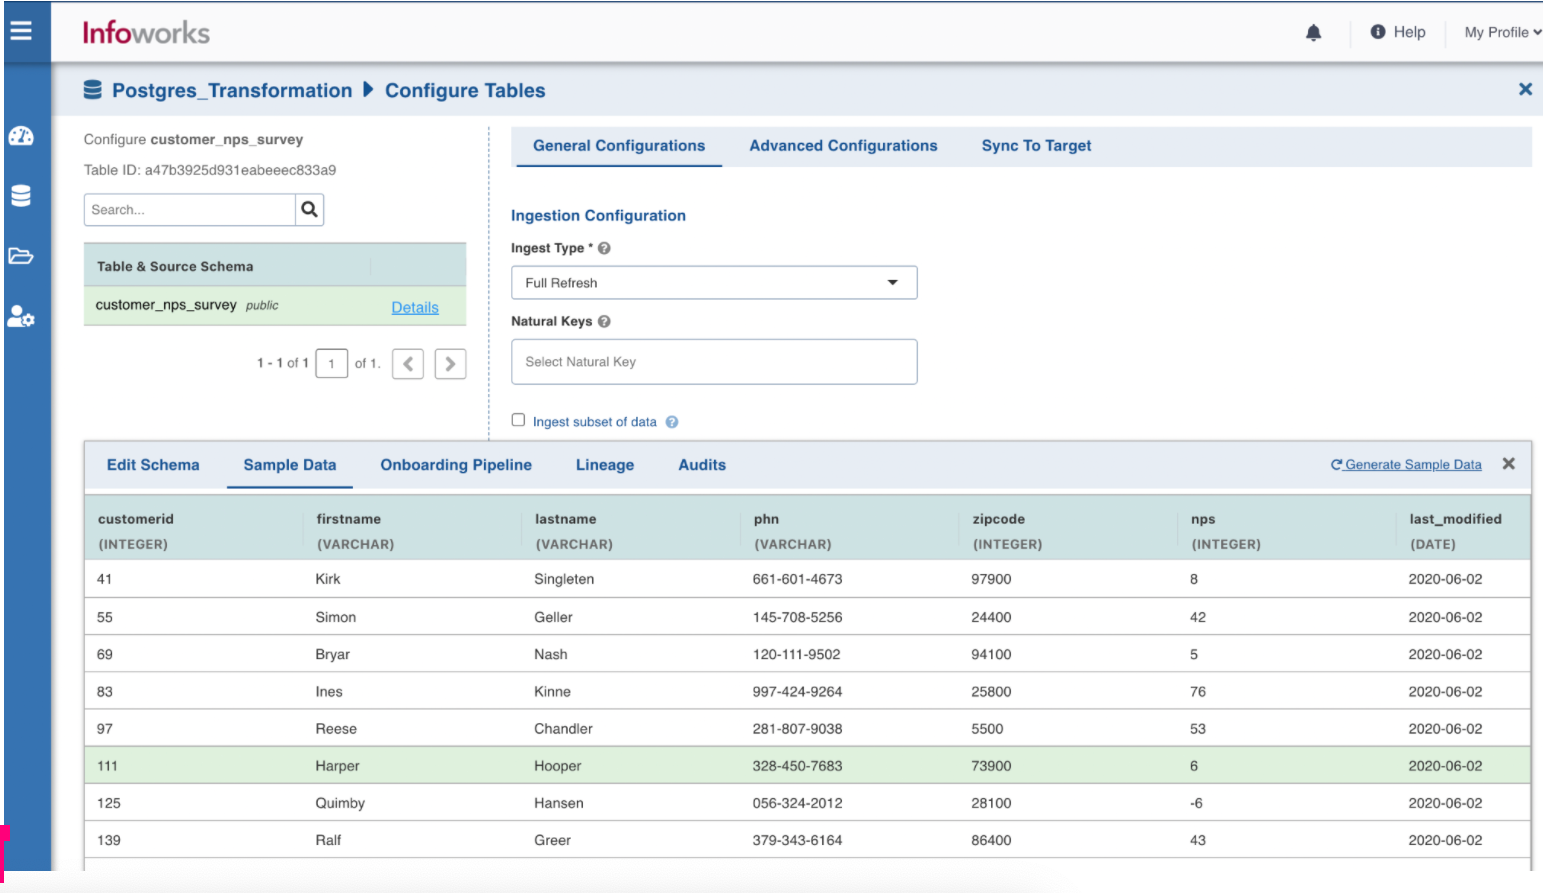
To view the updated sample data, click the Sample Data tab.
NOTE The Sample Data is updated only for Custom Extension. Any updates made for Hive UDF are not reflected.
In this example, after transformation the zip code includes the last two digits as zeros.
Managing Job Hooks
Job hooks may be used to execute predefined scripts before or after data is ingested. They can be used to perform additional steps such as encrypting or decrypting source files, moving or deleting files, integrating with third party tools, and so on. Scripts may be written in bash or python 3.x. The scripts are executed on the data plane (compute cluster) where the job runs.
To manage the job hooks, perform the following steps:
In Infoworks, navigate to Admin > Extensions > Job Hooks.
Click Create Job Hook.
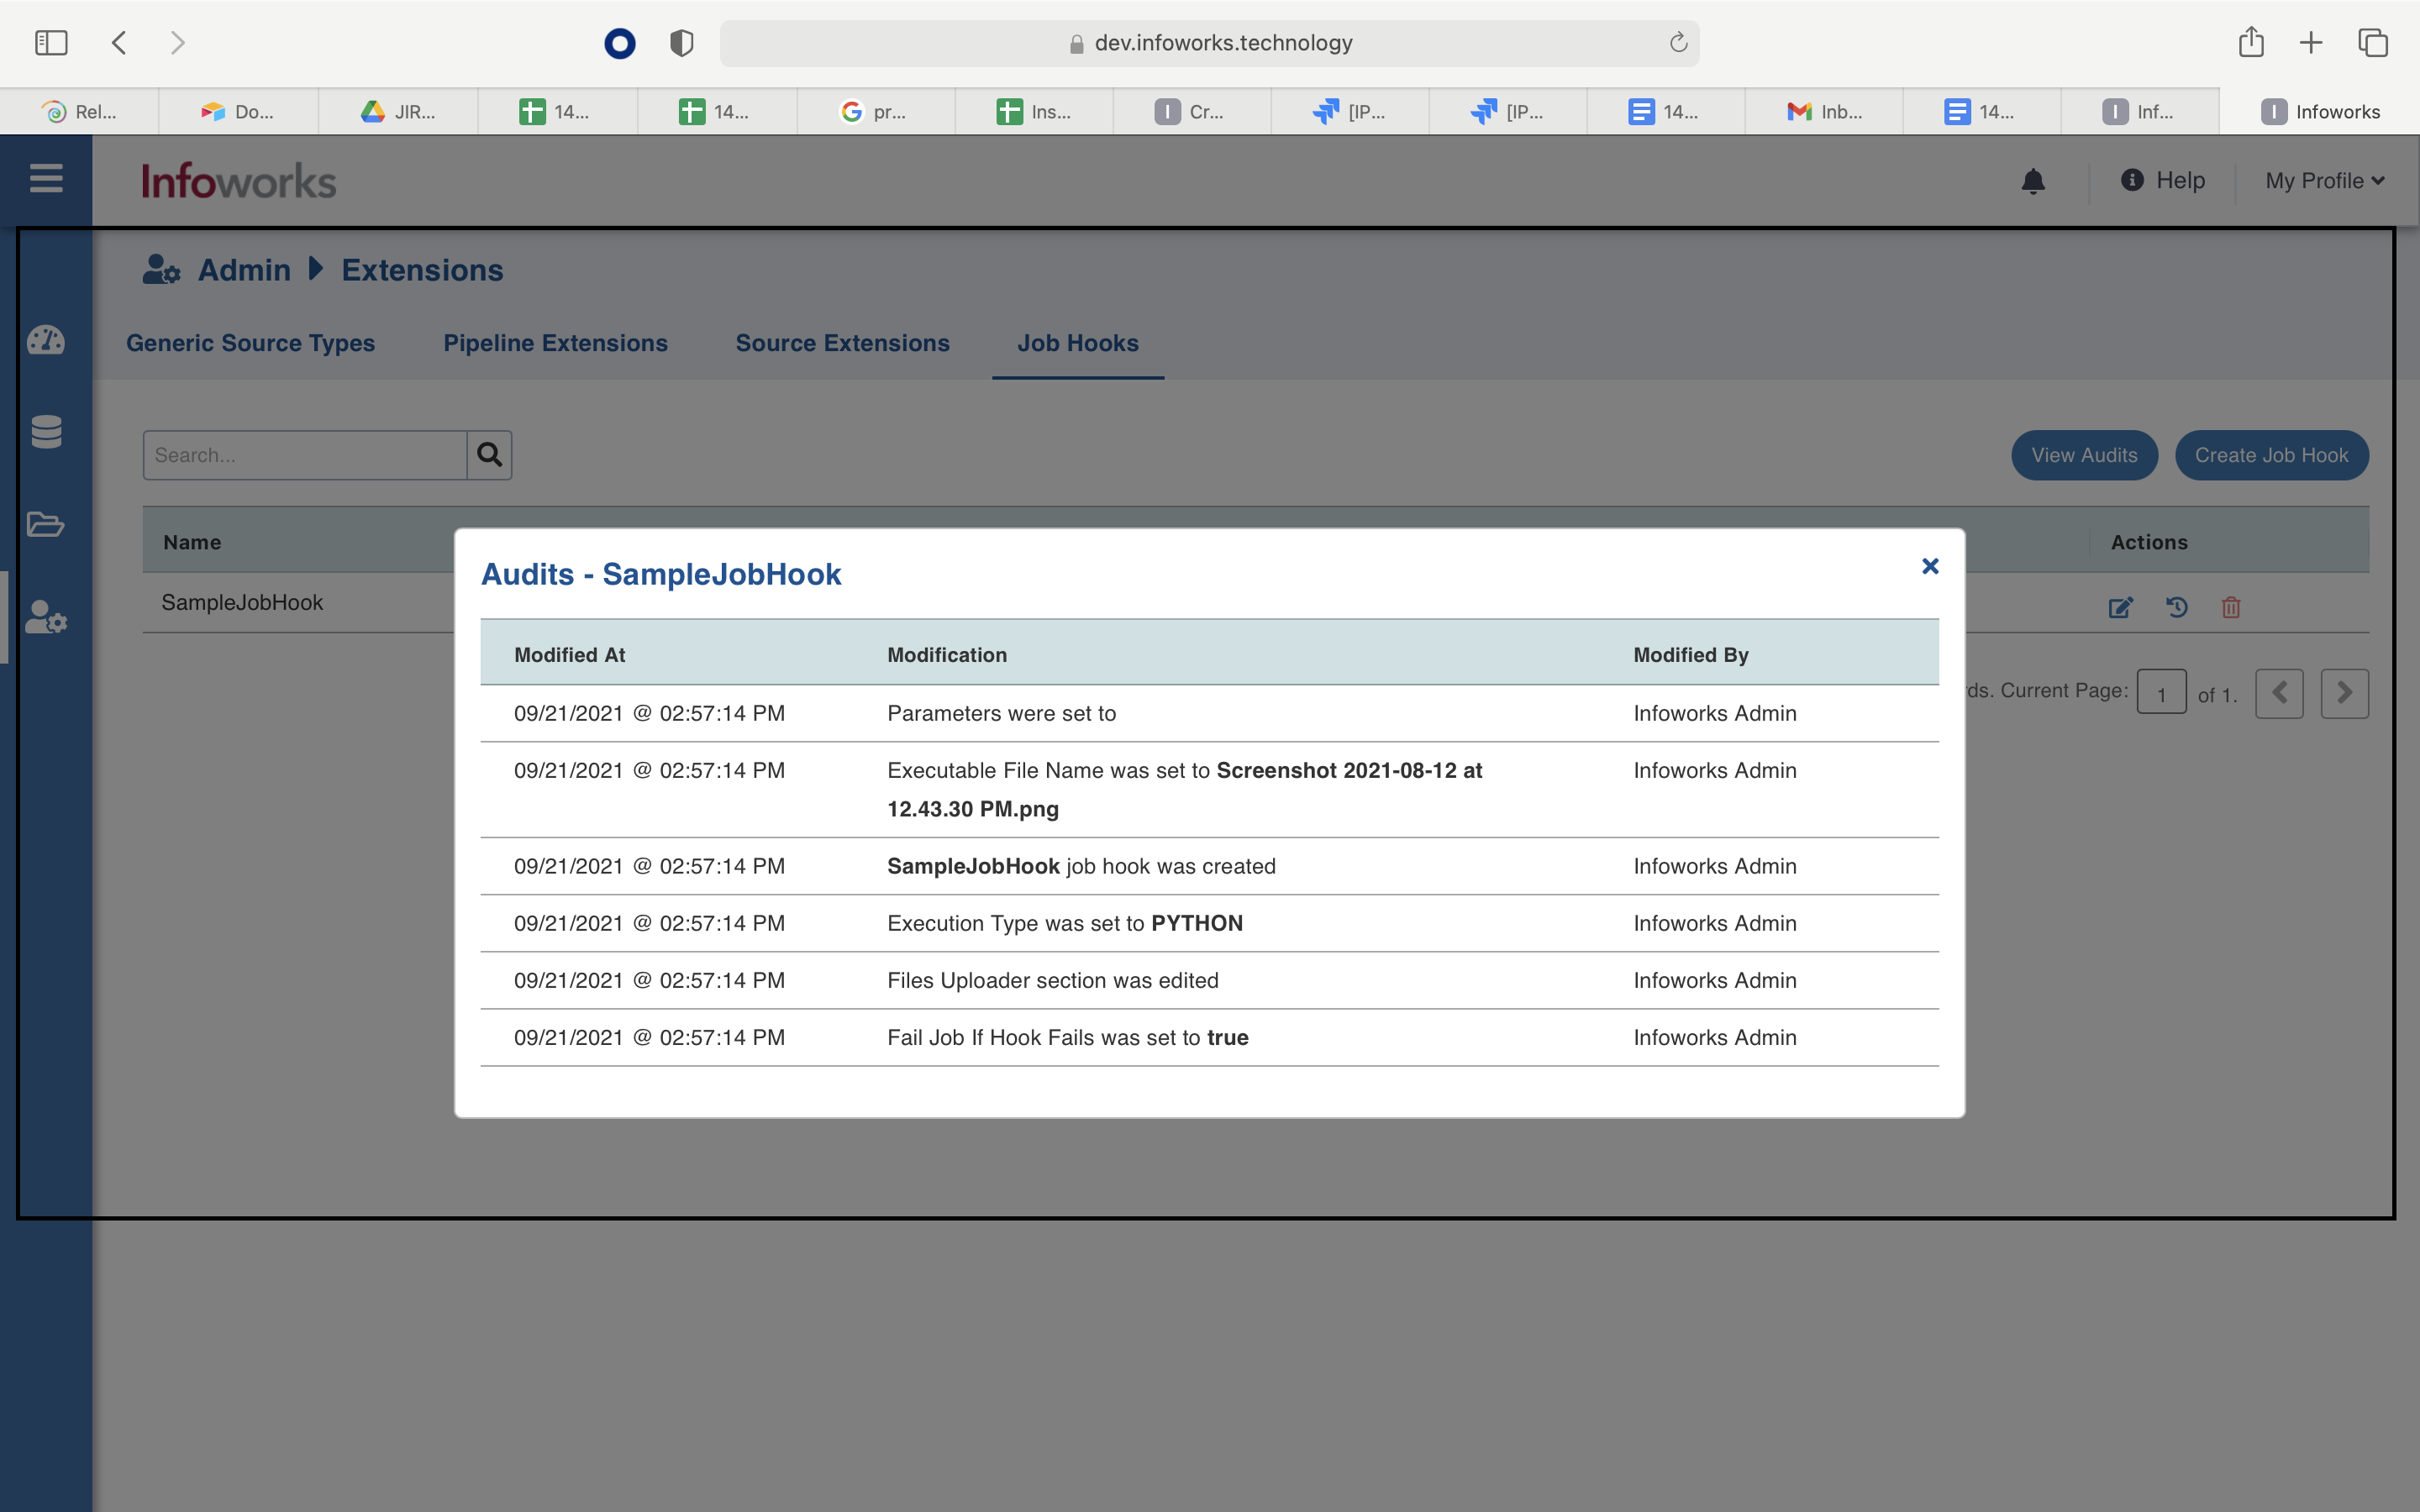
In the Add Job Hook page, enter the following details:
Name: A user-friendly name for the job hook. For example, SampleJobHook.
Execution Type: Choose Python or Bash.
Upload the external scripts. Multiple files can be uploaded.
Executable File Name: Select one of the uploaded external scripts.
Parameters: Any external parameters that should be passed to the executable script.
Fail Job if hook fails: If the check box is selected, job status fails if the hook fails.
Click Save.
NOTE If you select the Fail Job if hook fails check box, IWX will not roll back the ingested data or metadata updated by the underlying Spark job that IWX executes.
You can view the details of the created job hook by clicking the Audits icon in the Actions column.
Using a Job Hook
You can associate job hooks to an existing data source or while onboarding new data.
To set up a job hook, perform the following steps:
In Infoworks, navigate to Data Sources > View Source > Source Setup. Alternatively, you can also navigate to Data Sources > Onboard New Data, and click a source connector.
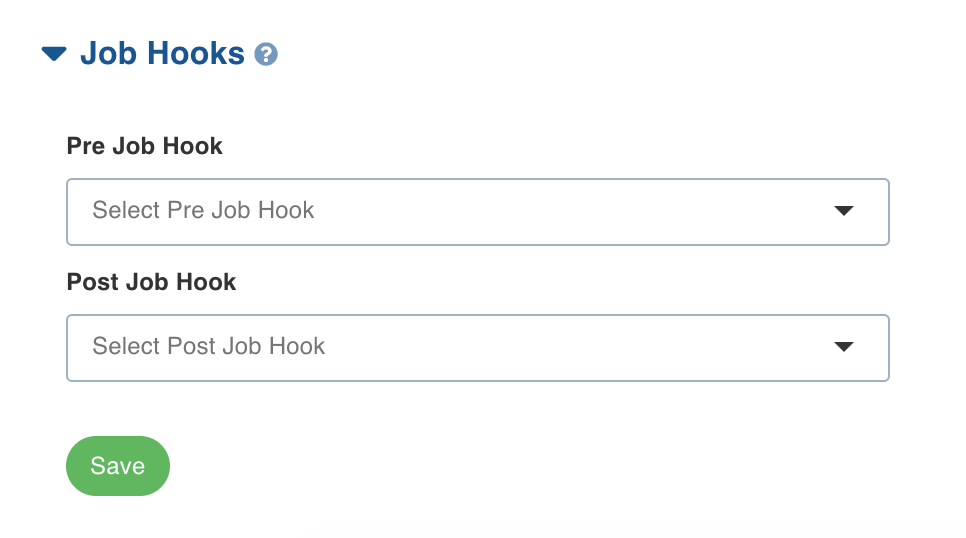
Scroll down to the bottom, and expand the Job Hooks section.
If you need to run a hook before ingesting a data source, select it in the Pre Job Hook drop-down.
If you need to run a hook after ingesting a data source, select it in the Post Job Hook drop-down.
NOTE Same job hook may be selected in the Pre Job Hook and Post Job Hook drop-downs, if required.
Click Save. The job hooks are saved successfully.
NOTE A job hook cannot be deleted if it is in use.
Supported Dynamic Environment Variables
User can use the following variables in the pre-post job hook scripts assuming they will be available as environment variables.
jobId
tableNameAtSource
schemaNameAtSource
catalogNameAtSource
targetTableName
targetSchemaName
sourceId
sourceName
tableId
workflowId
workflowRunId
sourceBasePath (for file sources)
targetTablePath
jobType
jobStatus (only accessible from post hook)
NOTE If any of the above parameters are null or not relevant to a particular job, they will not be available as environment variables.